
To set up a Minecraft server on a VPS, choose a Linux VPS with enough RAM and CPU, install Java, download Minecraft server software such as PaperMC or Vanilla, accept the EULA, open port 25565 in the firewall, and run the server with screen or systemd so it stays online after you disconnect.
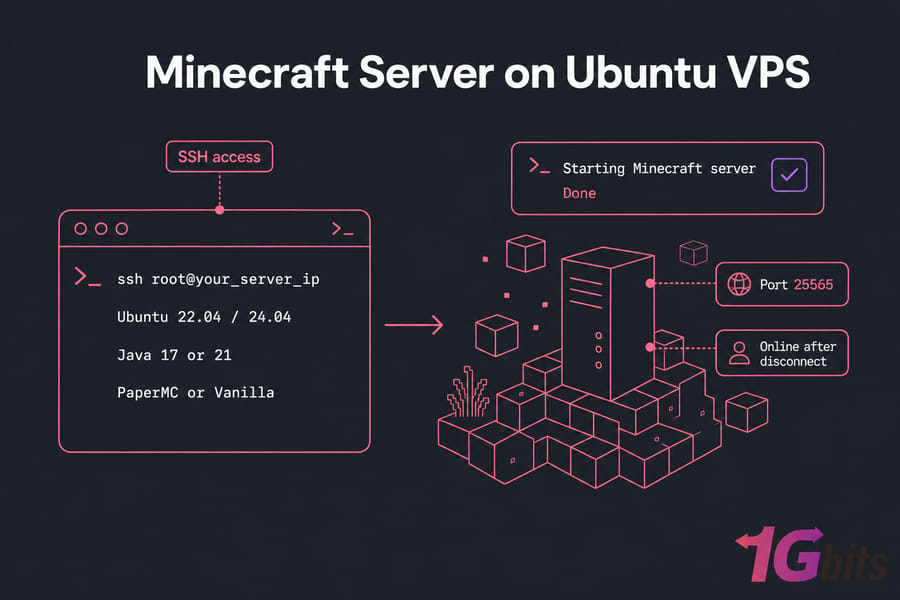
You’ll need:
- A VPS with Ubuntu 22.04 or 24.04
- SSH access
- A public IPv4 address
- At least 2–4 GB RAM for small servers
- Java 17 or 21 depending on version
- Basic terminal access
- Minecraft Java Edition if joining from PC
Why host a Minecraft server on a VPS?
A VPS hits a sweet spot for a lot of Minecraft setups. You get root access, dedicated resource allocation, and the freedom to run Paper, Forge, Fabric, or plain Vanilla without the limits you often hit on entry-level game hosting.
| Option | Cost | Control | Performance | Best For |
| Shared Minecraft hosting | Low | Limited | Varies by provider | Quick setup, less customization |
| VPS | Moderate | High | Good resource isolation | Small to mid-size private servers |
| Dedicated server | High | Full | Highest | Large communities, heavy modpacks |
If you want plugins, custom configs, scheduled backups, and better latency control, a Minecraft VPS hosting plan usually makes more sense than a locked-down shared plan. It’s also cheaper than jumping straight to a dedicated server.
But there is a catch. You’re the admin now. That means updates, firewall rules, Java compatibility, and startup automation are your job. I’ve seen plenty of people buy a cheap VPS, skip the basics, and then wonder why nobody can connect.
If you’re still comparing options, this roundup of the best Minecraft server hosting providers can help. And if you want a broader gaming setup, game VPS hosting is worth a look too.
Before you deploy, size the VPS correctly.
Minecraft VPS requirements: how much RAM, CPU, and storage do you need?
Minecraft server requirements depend on more than RAM. CPU speed matters a lot — often more than beginners expect — because world generation, mob activity, and plugins can hammer a single core pretty hard.
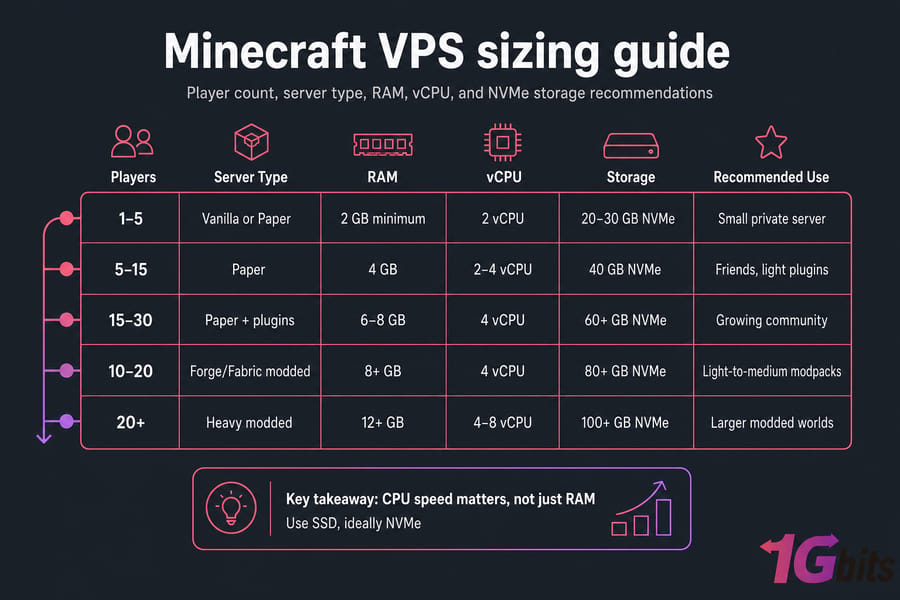
| Players | Server Type | RAM | vCPU | Storage | Recommended Use |
| 1–5 | Vanilla or Paper | 2 GB minimum | 2 vCPU | 20–30 GB NVMe | Small private server |
| 5–15 | Paper | 4 GB | 2–4 vCPU | 40 GB NVMe | Friends, light plugins |
| 15–30 | Paper + plugins | 6–8 GB | 4 vCPU | 60+ GB NVMe | Growing community |
| 10–20 | Forge/Fabric modded | 8+ GB | 4 vCPU | 80+ GB NVMe | Light-to-medium modpacks |
| 20+ | Heavy modded | 12+ GB | 4–8 vCPU | 100+ GB NVMe | Larger modded worlds |
Key takeaway: Minecraft performance depends heavily on CPU speed, not just RAM.
For Vanilla, you can get away with less. For PaperMC, you often get better performance at the same size because it’s more efficient. Forge usually needs the most headroom, while Fabric sits somewhere in between depending on the mods.
Storage matters too. Use SSD, ideally NVMe VPS storage, because chunk loads and world saves feel noticeably better on faster disks. It won’t magically fix a weak CPU, but it helps with responsiveness and backups.
And location? Don’t ignore it. A VPS in the same region as most of your players will usually beat a “bigger” server that’s halfway across the world. Lower latency means fewer complaints.
If you need help choosing a size, start with a VPS for Minecraft that gives you room to grow, and read this guide on how much RAM you need for gaming, design, and hosting. Once you know your target specs, choose the server software.
Minecraft server software options: Vanilla, Paper, Forge, or Fabric?
Most readers should use Paper on Ubuntu. That’s my default recommendation unless you specifically need official Vanilla behavior or a mod loader.
| Option | Best For | Mods/Plugins | Performance | Difficulty |
| Vanilla | Official Mojang experience | No plugins, no mod loader | Basic | Low |
| Paper | Private servers, plugins | Plugins | Best overall | Low |
| Forge | Heavier modded servers | Mods | Lower than Paper | Medium |
| Fabric | Lighter modded setups | Mods | Usually lighter than Forge | Medium |
Vanilla comes from Mojang and keeps things simple. PaperMC builds on the Bukkit/Spigot ecosystem and gives you better performance plus plugin support. Forge is the usual choice for modpacks. Fabric is leaner and often easier on resources, though mod compatibility depends on what you want to run.
Pro tip: For most users, Paper gives the best balance of performance and simplicity.
If you’d rather skip the manual route later, 1Gbits also has Minecraft hosting plans. For this guide, though, we’re doing it the hands-on way.
Connect to your Linux VPS and prepare Ubuntu
Use Ubuntu 22.04 or 24.04. It’s familiar, stable, and easy to work with on a Linux VPS or Ubuntu VPS.
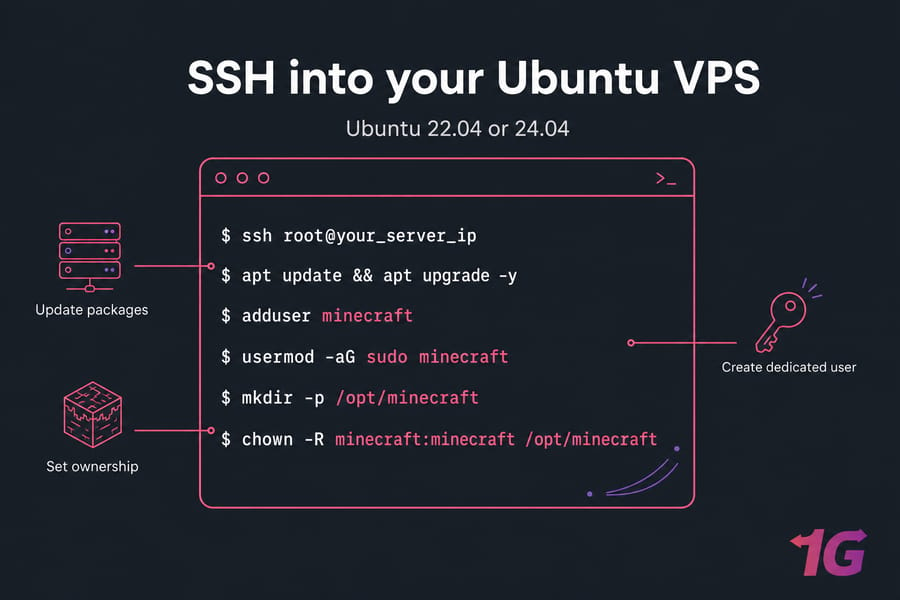
- SSH into the server.
ssh root@your_server_ip
apt update && apt upgrade -y
adduser minecraft
usermod -aG sudo minecraft
mkdir -p /opt/minecraft
chown -R minecraft:minecraft /opt/minecraft
This updates the box, creates a dedicated minecraft user, and gives that user ownership of /opt/minecraft. Don’t keep running everything as root forever unless you enjoy avoidable mistakes.
If SSH is new territory, here’s how to SSH into your server. Now here’s the thing: permissions problems are one of the most common setup annoyances, so creating the user properly at the start saves time later.
Next, install the correct Java version.
Install Java on Ubuntu for a Minecraft server
Minecraft version compatibility matters here. Newer releases commonly need Java 21, while many servers still use Java 17. Check the official PaperMC or server software docs if you’re deploying a specific release.
apt install openjdk-21-jre-headless -y
java -version
If your target server version needs Java 17 instead, use:
apt install openjdk-17-jre-headless -yWhen you run java -version, you should see the installed OpenJDK release in the output.
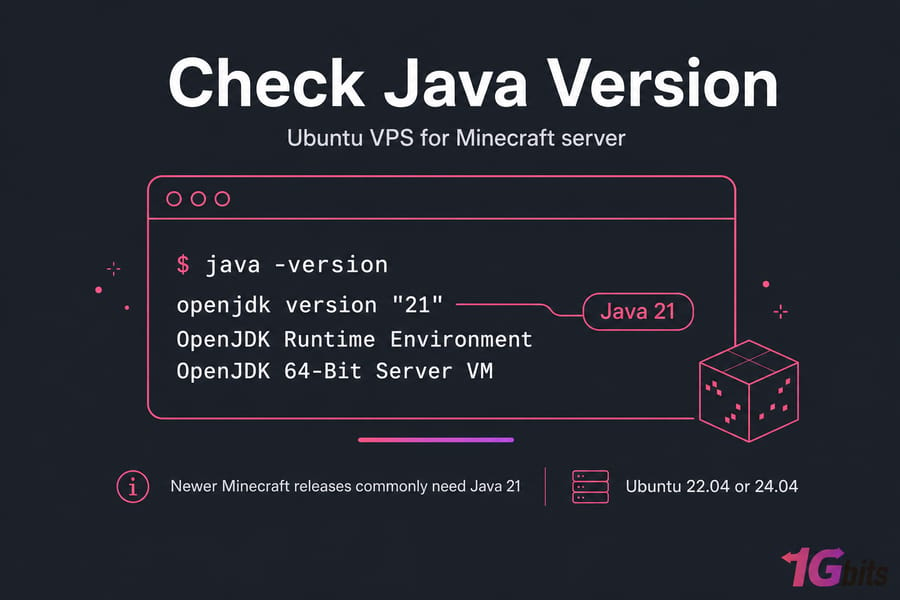
If you want a more detailed walkthrough, 1Gbits has a full guide to install Java on Ubuntu. With Java installed, download the server software.
Download and configure your Minecraft server on VPS
We’ll use PaperMC as the example because it’s the best default for most people. Just make sure you replace the version and build in the URL with the current one from Paper’s downloads page.
- Switch to the Minecraft user and move into the server directory.
su - minecraft
cd /opt/minecraft
wget https://api.papermc.io/v2/projects/paper/versions/<version>/builds/<build>/downloads/paper-<version>-<build>.jar -O server.jar
java -Xms2G -Xmx2G -jar server.jar nogui
nano eula.txt
After the first run, Paper creates files like eula.txt and server.properties. Open eula.txt and set eula=true. That’s required before the server will start.
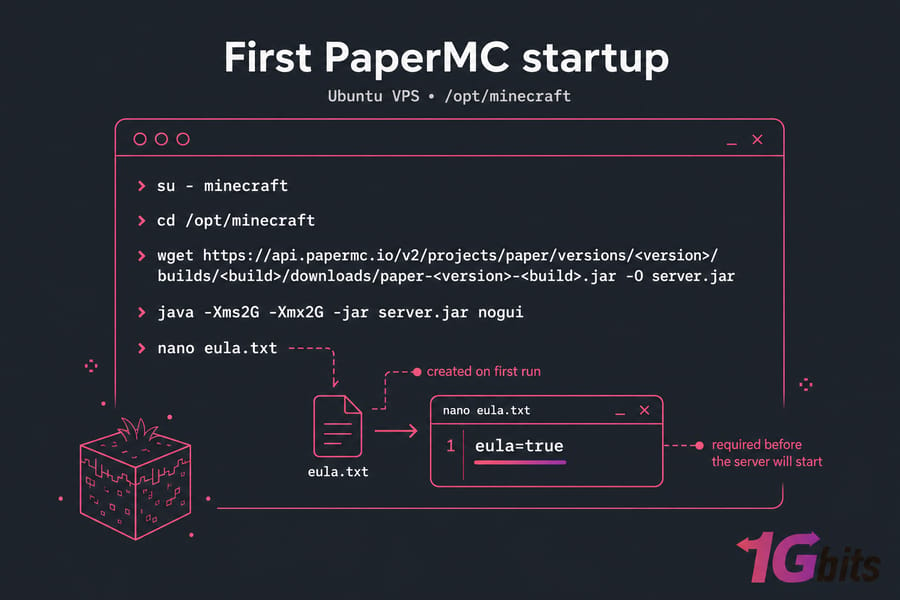
Then edit server.properties. At a minimum, review these settings:
motd— server name shown in the clientdifficulty— easy, normal, hardonline-mode— keep this true unless you have a very specific edge casepvp— enable or disable player combatmax-players— your player slots limitview-distance— reduce this if the server lagssimulation-distance— another big performance lever
Warning: Don’t casually set online-mode=false. That changes authentication behavior and can create security and account issues.
If you’re editing config files in the terminal for the first time, this guide on the nano Linux command-line text editor helps. And yes, you can inspect files with cat too — here’s a refresher on how to use the cat command in Linux.
Now make the server reachable by opening the Minecraft port.
Open port 25565 and configure the Minecraft server firewall
Minecraft Java servers use TCP 25565 by default. If UFW is active — and it should be — allow Minecraft traffic and make sure SSH stays open.
ufw allow OpenSSH
ufw allow 25565/tcp
ufw enable
ufw status
ss -tulpn | grep 25565
Warning: Allow SSH before enabling UFW, or you may lock yourself out.
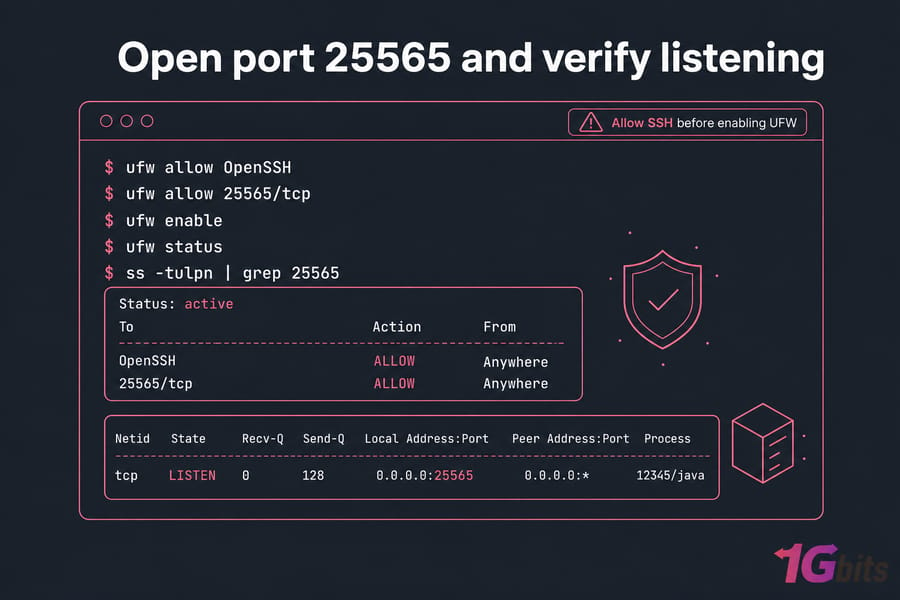
If your provider has a cloud firewall or security group, open TCP 25565 there too. I’ve seen people spend an hour checking Linux rules when the real problem was an upstream block.
You can read more about how to configure a firewall on your VPS. If you’re hosting for the public, a DDoS-protected VPS is a smart move.
The server can now accept traffic, but it should also stay online after logout.
Keep your Minecraft VPS server running with screen or systemd
You’ve got two practical options. screen is quick. systemd is better for long-term uptime because it auto-starts on boot and restarts on failure.
For a temporary session with screen:
apt install screen -y
screen -S minecraft
java -Xms2G -Xmx2G -jar /opt/minecraft/server.jar nogui
Detach with your usual screen key sequence, then reattach later. If you need help, here’s how to use the Linux screen command.
For the recommended systemd setup, create /etc/systemd/system/minecraft.service with this content:
[Unit]
Description=Minecraft Server
After=network.target

[Service]
User=minecraft
WorkingDirectory=/opt/minecraft
ExecStart=/usr/bin/java -Xms2G -Xmx2G -jar server.jar nogui
Restart=always

[Install]
WantedBy=multi-user.target
Then load and start it:
systemctl daemon-reload
systemctl enable minecraft
systemctl start minecraft
systemctl status minecraft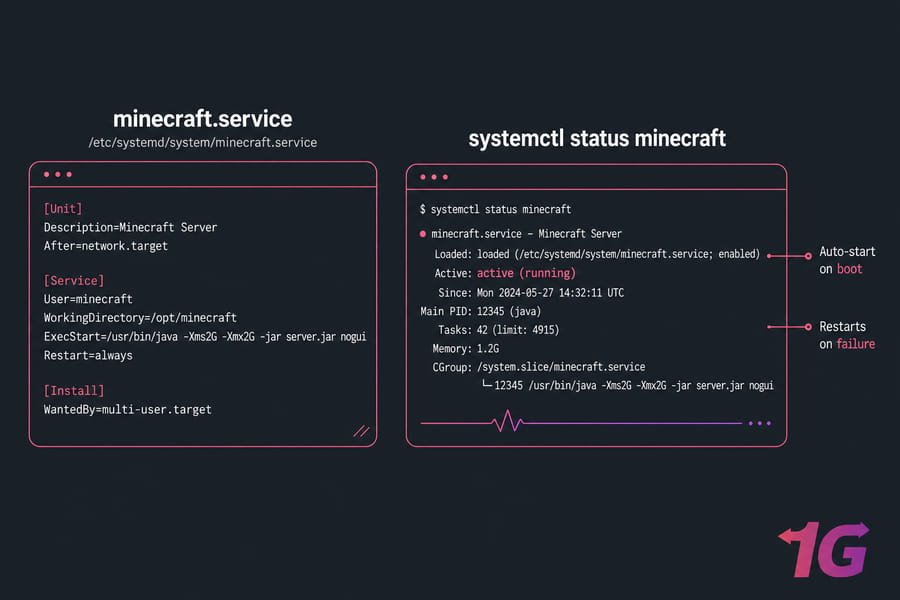
This is the part a lot of tutorials skip, and honestly, it’s the part that makes the setup feel “real.” Without it, your Minecraft server goes down the moment your SSH session ends or the VPS reboots.
Once uptime is handled, optimize the server for smoother gameplay.
Minecraft server optimization on VPS: reduce lag and improve stability
Start simple. Don’t throw every JVM flag you find on Reddit at the server.
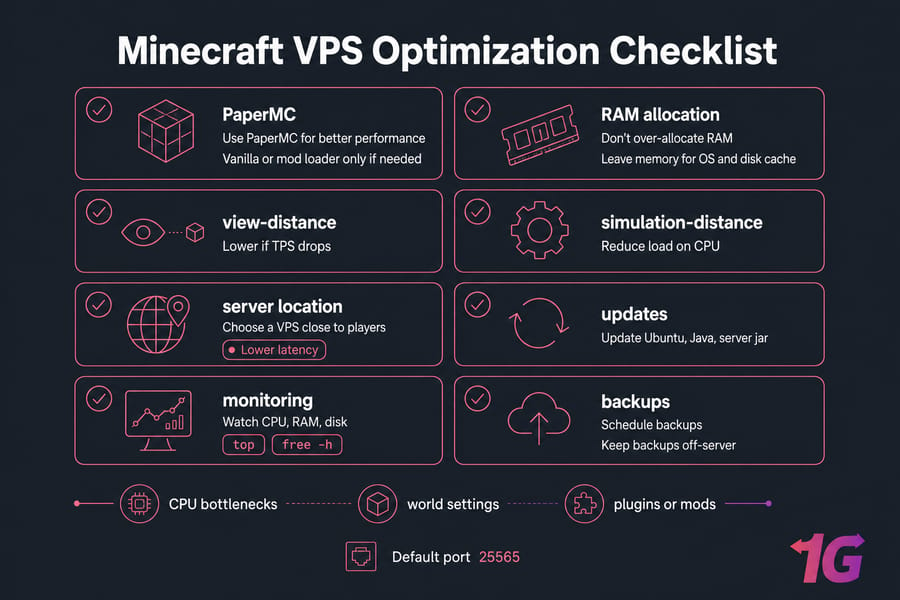
- Don’t over-allocate RAM. Leave some memory for the OS and disk cache.
- Use PaperMC unless you specifically need Vanilla or a mod loader.
- Lower
view-distanceandsimulation-distanceif TPS drops. - Pick a VPS location close to your players to reduce latency.
- Watch CPU, RAM, and disk usage regularly.
- Back up the world on a schedule.
- Keep Ubuntu, Java, and the server jar updated.
Minecraft server lag fix work usually comes down to three things: CPU bottlenecks, world settings, and too many plugins or mods. More RAM helps only when RAM is actually the problem.
For monitoring, basic tools like top and free -h are often enough at the start. And please keep backups off the server when possible. If the VPS dies, an on-box backup dies with it.
Related reading: how to back up a Minecraft server.
Share your Minecraft server IP and test player connections
Your players will connect to the public IP of the VPS. If you’re using the default port, many clients can join with just the IP. Otherwise, use IP:25565.
- Start the server and confirm it’s listening.
- Join from your own Minecraft client first.
- Ask a friend to test externally.
- If you want a cleaner address, point a domain or subdomain to the server IP.
- Enable a whitelist if you want tighter access control.
If you need help with the address itself, here’s how to find your Minecraft server IP. And if you want something nicer than a raw IPv4, set up a subdomain with this guide to create a subdomain for my domain.
If players still can’t connect, check these common issues.
Minecraft server troubleshooting on a VPS
When a Minecraft server on VPS won’t behave, don’t guess. Check the obvious stuff first.
java -version
systemctl status minecraft
journalctl -u minecraft -n 50 --no-pager
ufw status
ss -tulpn | grep 25565
free -h
top| Problem | Likely Cause | Fix |
| Server won't start | Wrong Java version | Match Java 17 or 21 to the server release |
| Service failed | Bad jar path or broken service file | Check systemd unit and WorkingDirectory |
| Players time out | Port closed or provider firewall block | Check UFW and upstream firewall rules |
| Connection refused | Server not running or not listening | Review systemctl status and ss output |
| Crashes during startup | Corrupted jar or incompatible mods/plugins | Re-download the jar and inspect logs |
| Lag and stutter | Not enough CPU/RAM or aggressive settings | Reduce distances, remove heavy plugins, upgrade VPS |
| Out of memory | Too little RAM or too many mods | Increase VPS RAM or lower server load |
If journalctl shows Java errors, fix that first. If ss shows nothing on 25565, the process isn’t listening. If the server runs locally but friends still can’t connect, it’s probably a firewall or wrong IP issue — not a home router problem, since this is a VPS with its own public IPv4.
For deeper help, see how to fix Minecraft server connection issues.
Best VPS for Minecraft hosting: when to scale up or switch plans
A VPS is enough for a lot of servers. But not all of them.
Upgrade when you notice high CPU usage, memory pressure, longer save times, more players than expected, or backups taking forever. Heavy plugins and modpacks will force this sooner than a basic Paper setup.
If you’re still in the small-to-mid range, a scalable Linux VPS with fast storage is usually the right call. If your community keeps growing, moving to a larger NVMe VPS or even dedicated infrastructure starts making sense.
1Gbits is a practical fit here because you can start small, keep full control, and scale when the player count grows. Between Minecraft VPS, broader game VPS hosting, and Minecraft hosting , you’ve got a few clean upgrade paths instead of rebuilding everything later.
Quick summary: pick the right VPS size, use Ubuntu, install the right Java version, deploy Paper, open port 25565, and run the server with systemd.
Launch your Minecraft VPS server with 1Gbits. If you want better performance, more control, and an easier upgrade path for plugins, mods, and growing player counts, start with a Linux VPS built for gaming workloads.
Trust signals: Linux VPS, NVMe storage, scalable upgrades, global locations, and 24/7 support.

Leave A Comment