
There are certain incidents where the entire work gets lost due to connection failure. Seems familiar? Well, it is a common thing, and you must have encountered this situation too! To provide you with some relief, we are here to deliver a solution to this issue. The utility is known as the Linux screen command which helps you to restore your work.
A screen? Well, yes,! Let us analyze the concept in detail. A Screen or more commonly known as a GNU screen is a terminal multiplexer. It assists you to resume any session as well as multiple virtual terminals inside that particular session.
When we talk about the Linux screen command, you can easily push the running applications in the background. Afterwards, according to your wish, pull them forward as and when required. This terminal multiplexor is packed with immense options for you. Want to know more?
When exploring advanced Linux tools like the screen command, it's essential to pair them with the right server environment. If you're looking for high performance and flexibility, consider a Linux Dedicated Server to fully leverage your Linux expertise.
Advantages of Linux screens
- If you are running the screen session, you can easily create new windows and carry out other tasks inside them. It is effortless to switch between tabs to keep in line with the work. You have the option to split the terminal window into either horizontal or vertical regions. Furthermore, you can easily look at several screen windows in one window.
- It is straightforward to detach and reattach. Detach is the process when you push the window to the background. Whereas reattach is the process when you pull the window to the front.
- You have the liberty to share a screen session. Two people are able to look at the same screen at the same time with different SSH connections. If you're interested in understanding how SSH plays a crucial role in managing and securing such remote connections, check out our guide on what SSH is used for.
- It becomes feasible to use multiple cell windows within the same SSH session. The Linux screen helps you to keep the shell active amidst any network failure.
- Even from multiple locations, you can easily disconnect and reconnect to various shell sessions.
- It is possible to hold a long-running process without the need to maintain an active shell session.
Now let us initiate the process to learn how to install the Linux GNU screen!
How to install the Linux GNU screen?
Almost all the Linux distros nowadays are pre-installed with the screen package. To check if your system has the installed version, type the following command:
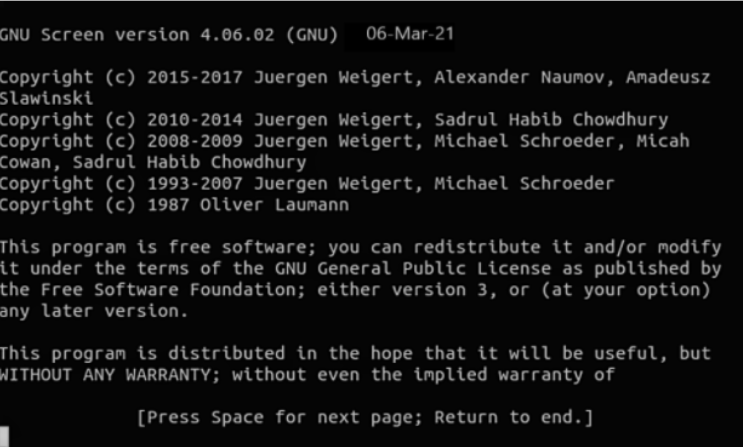
screen - - version
Output
Screen version 4.06.02 (GNU) 06-Mar-21
If you do not see any installed package, don’t worry! You can do that in seconds with the help of your package manager.
How to install the Linux screen on Ubuntu [Ubuntu screen]?
sudo apt update
sudo apt-get install screen

To install on Fedora:
sudo dnf install screen
Moving on,
How to start a Linux screen?
Just type:
screen

You will witness this page.
This command helps in creating a window and starting a shell. Now, a screen session is in front of you. Here is a list of some control commands in front of you.
- Ctrl+a “
It lists all the windows for you
- Ctrl+a c
A new window is created
- Ctrl+a 0
This helps to switch to window 0
- Ctrl+a S
It splits your current region horizontally
- Ctrl+a A
You can rename your current window
- Ctrl+a d
It detaches you from the ongoing screen session
- Ctrl+a tab
It helps to switch the input to the next region
- Ctrl+a I
The current region is split vertically into two regions
- Ctrl+a X
The current region can be closed
- Ctrl+a Q
All the other regions except your current region are closed
- Ctrl+a Ctrl+a
You can easily toggle between the previous and the current regions.
Now that you have got the hang of the basic Linux screen commands, let us learn some more concepts:
How do you name Linux screen sessions?
It’s always easy to remember a familiar word as a filename rather than numerics. Here is an example:
screen -S newfile

When the Linux screen launches the session, a blank window is visible. Now what? Just download the file ‘newfile’ using this:
curl http://ipv4.download.thinkbroadband.com/1GB.zip >newfile.zip

After the download begins, use Ctrl+A and press D. Your session will be detached. Use the -ls command to notice the details of your session.
If you see the name of your file, reattach it using the following command:
screen -r newfile

Now, you can see the progress of your download.

Type exit and close the session window.
Now, if you want to customize your Linux screen, read on!
Whenever you start your screen, the configuration parameters are read from /etc/screenrc and ~/.screenrc. Use ~/.screenrc in order to modify the default screen settings as per your needs.
Sample:
# Turn off the welcome message
startup_message off
# Disable visual bell
vbell off
# Set scrollback buffer to 10000
defscrollback 10000
# Customize the status line
hardstatus alwayslastline
hardstatus string '%{= kG}[ %{G}%H %{g}][%= %{= kw}%?%-Lw%?%{r}(%{W}%n*%f%t%?(%u)%?%{r})%{w}%?%+Lw%?%?%= %{g}][%{B} %m-%d %{W}%c %{g}]'
How to use the screen with multiple windows?
Here are a few processes for you to showcase examples where you can use the screen with multiple windows.
Here are a few processes for you to showcase examples where you can use the screen with multiple windows. For more advanced tips on keeping your Linux server safe and secure, check out our comprehensive guide on Linux Server Security.
To start a screen session, called monitor, type the following:
screen -S monitor

Now, in the command prompt, type the following to display the kernel buffer messages.
dmesg -H -w

Below given is the output screen:

Now, to showcase another application, we need a new screen window. As on this window, dmesg is looking for new messages.
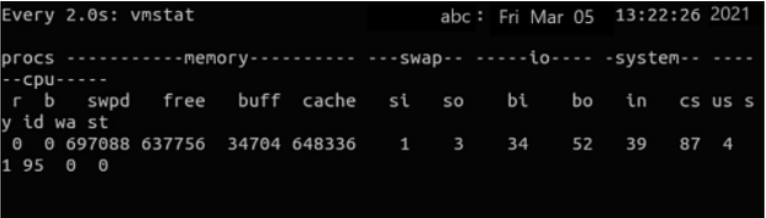
In order to create a new window, press Ctrl+A then C. We are going to display the virtual memory usage of the computer here.
To do that, use the following command:
watch vmstat

This is the output:

Now, you have successfully run two processes at the same time. Congratulations!
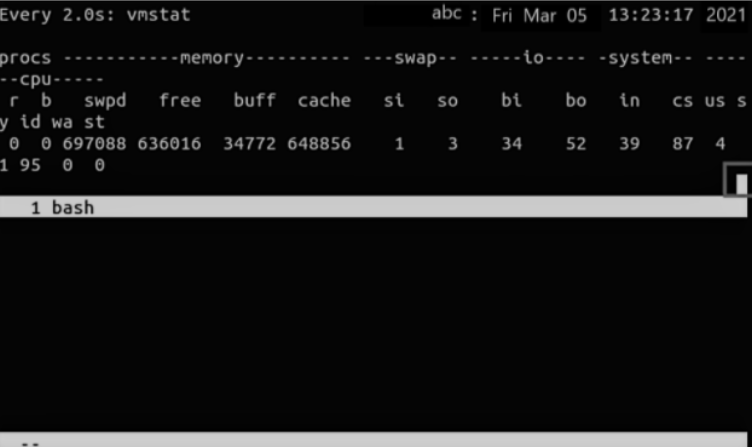
If you want to switch between the two, use Ctrl+A and the window’s number! In our case, the number assigned to the first window is 0, and the second is 1.
Hence, we type, Ctrl+A 0

Now, type Ctrl+A 1 to go to the vmstat window.
Moving further, press Ctrl+A, and Shift+S to split the current window into two regions.
How to use the screen over SSH?
The following process is recommended if you want to initiate a process on a machine and continue it on another.
As you have seen that you can start the window, detach it and reattach it whenever you want. Let us now make an SSH connection to the computer.
For instance,
ssh abc@192.168.4.30

Now, after initializing, start a screen session.
screen -S ssh - abc

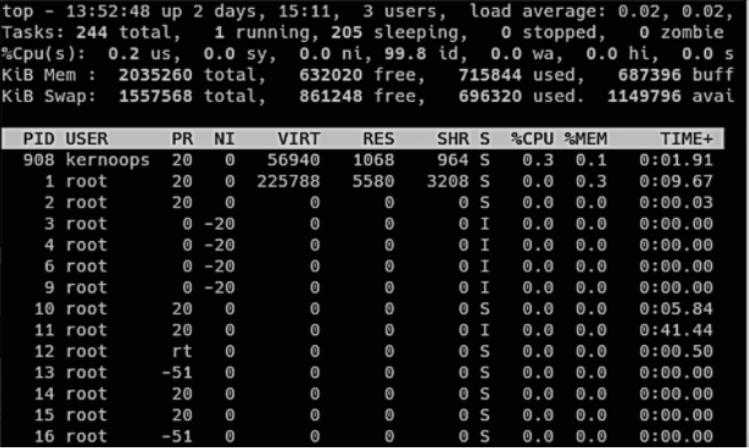
Just for a sample, we will initiate the network monitoring command: top.
top

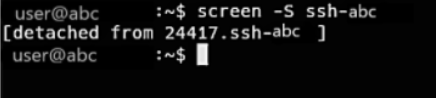
In order to detach the window, press Ctrl+A D.
Now, this is the original terminal window.
If you want to exit the session, type exit.
exit
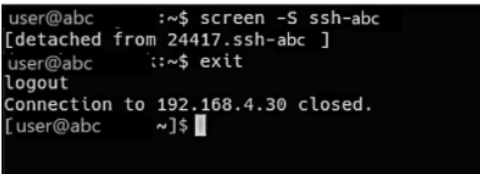
Again, reconnect and reattach the screen session to witness the still-running instance of the top command.
How to share a screen session?
If someone wants to connect to the Ubuntu server from Fedora, follow this command:
ssh user@192.168.4.30

After this, your connection is established. Start a screen session using -S. Use -d and -m to create a detached screen session.
screen -d -m -s ssh-abc

For multi-screen mode, use -X to attach the session.
screen -X ssh-abc

This way, when either of the people types something, it will be visible to both.
Conclusion
The above-stated data is all about profoundly making you understand the most important commands to use on the Linux screen. We hope that the information presented in the article guided you to solve your queries and widened your horizons. You can also buy linux vps to practice it on a routine basis.
People also read:

Leave A Comment