
BlueStacks not working is almost always one of five things: virtualization is off, Hyper-V is fighting the emulator, your graphics driver is stale, the machine is short on RAM or CPU, or the install got corrupted. Restart the PC, confirm VT-x/AMD-V is enabled in BIOS, check Windows virtualization features, update your GPU driver, then repair or reinstall. That order fixes most cases.
I've troubleshot this on dozens of machines office laptops, gaming rigs, and hosted Windows boxes. The pattern repeats. People reinstall four times before checking a BIOS toggle that takes 90 seconds. Let's not do that.
Why Is BlueStacks Not Working on Windows 10 or 11?
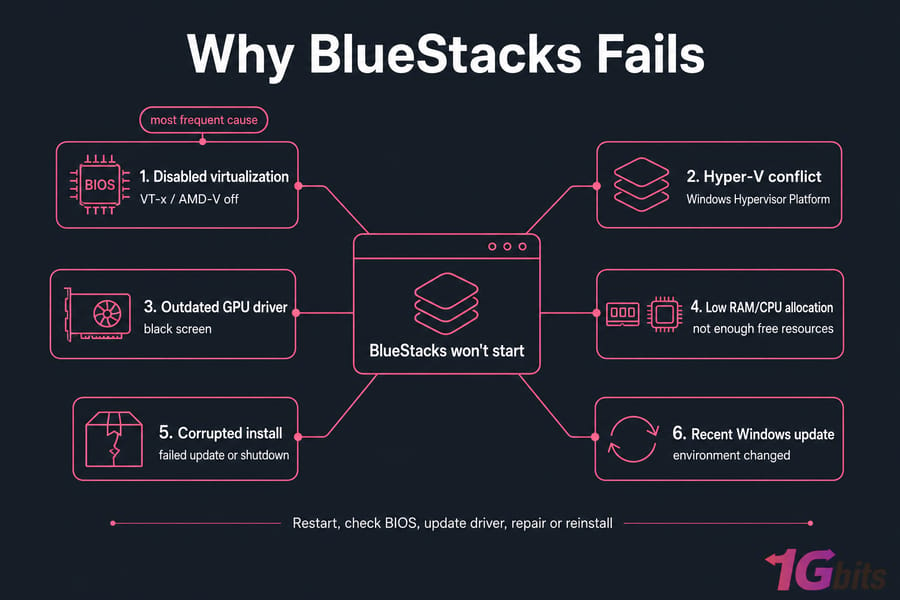
BlueStacks 5 isn't a normal app. It runs a full Android system inside a lightweight virtual machine on your PC, which means it leans on hardware virtualization (Intel VT-x or AMD-V), your GPU driver, free RAM, and a handful of Windows features that most people never look at.
Break any one of those and the emulator fails in a different way. That's why the fix depends entirely on the symptom.
The most common causes behind startup failures
- Virtualization disabled in BIOS/UEFI — the single most frequent cause of "engine won't start"
- Hyper-V or Windows Hypervisor Platform claiming the CPU's virtualization layer
- Outdated or broken graphics drivers — usually shows up as a black screen
- Not enough free RAM because Chrome, Discord, and an antivirus scan are already eating it
- Corrupted installation after a failed update or an abrupt shutdown
- Antivirus or firewall blocking the BlueStacks service
How Windows updates change things
Here's a scenario I see constantly: BlueStacks worked fine last month, then a feature update landed and now it won't launch. Windows updates can re-enable virtualization-based security, reset GPU drivers, or turn Virtual Machine Platform back on for WSL2. Nothing you did — the environment shifted underneath the emulator. If you're new to emulators generally, our roundup of the best Android emulators gives useful context on how these platforms differ.
First, figure out exactly which failure you're looking at.
BlueStacks Not Opening, Crashing, or Freezing: Identify the Exact Symptom
The exact symptom tells you the root cause faster than any random fix list. Find your row.
| Symptom | Likely Cause | First Fix | Next Step |
| BlueStacks won't open at all | Leftover processes, virtualization off, broken install | Kill all BlueStacks tasks in Task Manager, relaunch as administrator | Check VT-x/AMD-V, then repair the install |
| Crashes seconds after launch | GPU driver conflict or too little free RAM | Update graphics driver, close background apps | Lower RAM allocation, switch renderer |
| Stuck on loading screen | Engine or Windows service failure | Restart the BlueStacks service and reboot | Check Hyper-V feature conflicts |
| Black screen with audio | Rendering mode or wrong GPU selected | Switch DirectX ↔ OpenGL in Settings | Force the dedicated GPU in the vendor panel |
| Runs but extremely laggy | Under-allocated or over-allocated resources | Set CPU cores/RAM to sane values, close overlays | Move to SSD or better hardware |
| Engine won't start error | Virtualization or permission problem | Enable VT-x/AMD-V in BIOS | Disable conflicting Windows features |
This is the same structured approach we use for other system-level faults — see our RDP troubleshooting workflow if you want a second example of symptom-first diagnosis.
BlueStacks System Requirements and Compatibility Checks
Before you spend an hour on fixes, confirm the machine can actually run the thing. Plenty of PCs meet "minimum" specs and still deliver a miserable experience.
| Component | Minimum | Recommended | Why It Matters |
| RAM | 4 GB | 8–16 GB | Android VM plus Windows plus your browser — 4 GB gets tight fast |
| CPU | Dual-core with VT-x/AMD-V | Quad-core or better | Virtualization support is mandatory, not optional |
| Storage | 5 GB free | 10+ GB free on SSD | HDD installs cause long loads and freezes |
| Graphics | Integrated GPU, updated driver | Dedicated GPU, current driver | Driver age matters more than raw GPU power |
| OS | Windows 10 | Windows 10/11, fully patched | Admin rights required for the engine service |
To check yours: press Ctrl+Shift+Esc for Task Manager, open the Performance tab, and read off cores, memory, and disk type. Windows version lives under Settings > System > About.
Conflicts with VirtualBox, Hyper-V, and WSL2
If you already run VirtualBox, Docker Desktop, WSL2, or any Hyper-V virtual machine, you've got two hypervisors competing for the same CPU extensions. That's the classic "worked yesterday, broken today" trigger. Not sure what any of that means? Our explainer on what virtualization is covers the basics in plain terms.
How to Enable Virtualization for BlueStacks
VT-x (Intel) and AMD-V (AMD) let your CPU run a guest operating system efficiently. Without them, BlueStacks either refuses to start or crawls.
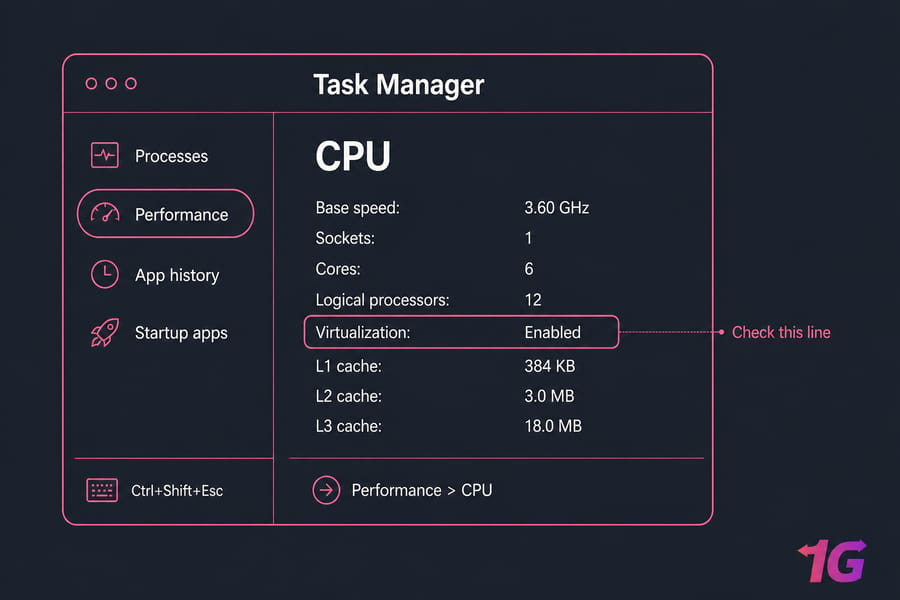
Check whether it's already on
- Open Task Manager (Ctrl+Shift+Esc)
- Go to Performance > CPU
- Look for the "Virtualization" line — it says Enabled or Disabled
Turn it on in BIOS or UEFI
- Restart the PC and press the setup key during boot — usually Del, F2, F10, or Esc depending on the brand
- Find Advanced, CPU Configuration, or Security
- Enable Intel Virtualization Technology, Intel VT-x, SVM Mode, or AMD-V
- Save and exit (usually F10)
- Boot into Windows and re-check Task Manager
Menu names differ wildly between motherboard vendors and laptop OEMs, so don't panic if yours doesn't match word for word. Some locked-down corporate laptops hide the setting entirely — in that case you'd need IT to unlock it, or you'll need a different machine. Our breakdown of virtualization types explains why some setups simply can't nest another hypervisor.
BlueStacks Hyper-V Error and Windows Feature Conflicts
Virtualization enabled but still failing? Now look at Windows features. When Hyper-V is active, it takes exclusive ownership of the hypervisor layer, and older or misconfigured BlueStacks installs can't get in.
| Windows Feature | Can Affect BlueStacks? | Disable It? | Notes |
| Hyper-V | Yes, frequently | Only if you don't need VMs | BlueStacks 5 offers a Hyper-V-compatible build — install that instead |
| Windows Hypervisor Platform | Sometimes | Try toggling | Some setups need it ON for the Hyper-V build |
| Virtual Machine Platform | Yes, via WSL2 | Only if WSL2 is unused | Enabled automatically when you install WSL2 |
| Memory Integrity (Core Isolation) | Yes | Test with it off | Lives in Windows Security, not Windows Features |
| Windows Sandbox | Occasionally | Safe to disable | Depends on Hyper-V under the hood |
To change these: search "Turn Windows features on or off," tick or untick, then reboot. The reboot isn't optional — feature changes don't apply until restart.
And please don't blanket-disable Hyper-V if you use it for work VMs. Download the Hyper-V-compatible BlueStacks installer from the official site instead. That's the whole reason it exists. If you're weighing hypervisors more broadly, we compared KVM vs Hyper-V elsewhere on the blog.
BlueStacks Black Screen and Graphics Driver Fixes
Emulator opens, you hear the startup sound, screen stays black. Classic rendering problem.
- Update the GPU driver straight from Intel, AMD, or NVIDIA — not from a random driver updater tool. Device Manager works too, but vendor downloads are usually fresher.
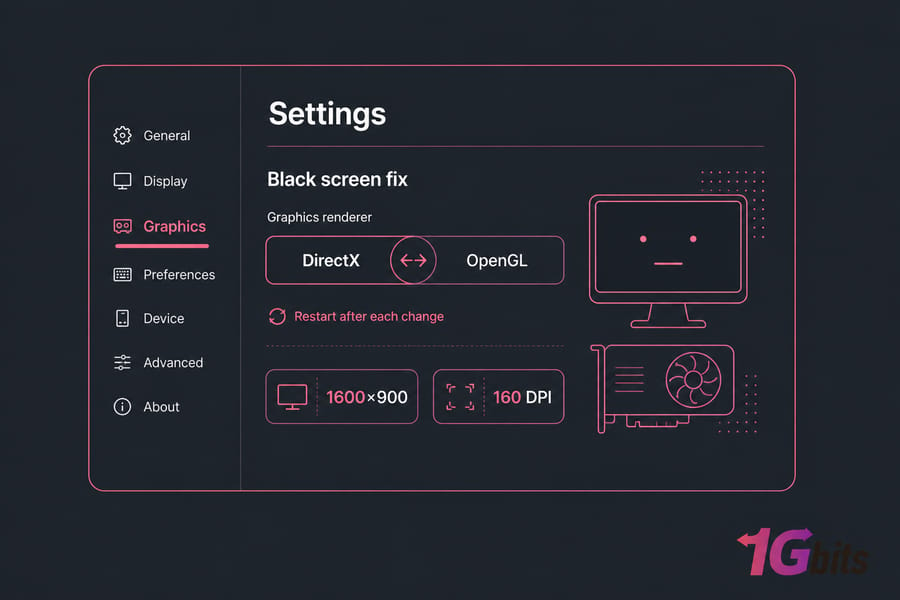
- Switch the renderer. Open BlueStacks Settings > Graphics and flip between DirectX and OpenGL. Restart the emulator after each change. One of the two almost always works.
- Force the right GPU. On dual-graphics laptops, Windows sometimes hands BlueStacks the integrated chip when it should use the discrete one. Set it explicitly in the NVIDIA Control Panel, AMD Software, or Windows Settings > Display > Graphics.
- Drop the resolution and DPI. 1600×900 at 160 DPI is a safe fallback if 1080p misbehaves.
- Disable "Prefer performance over compatibility" if you enabled it experimentally.
Fix BlueStacks Stuck on Loading Screen or Engine Won't Start
When the loading bar freezes, something in the engine layer failed to initialise. Work through this in order:
- Kill every BlueStacks process. Task Manager > Details tab > end anything starting with "HD-" or "BlueStacks." Ghost processes block clean restarts constantly.
- Run as administrator. Right-click the shortcut > Run as administrator. Permission issues alone explain a surprising number of engine failures.
- Restart the service. Open services.msc, find BlueStacks-related services, restart them.
- Clear Windows temp files. Win+R, type %temp%, delete what deletes. Skip anything locked.
- Whitelist BlueStacks in your antivirus and firewall, then reboot.
- Reboot and relaunch. Don't skip this — half of these changes need a restart.
If Windows keeps logging the same error, the Event Viewer entries are worth reading; our guide to Windows logs shows where to look.
BlueStacks Keeps Crashing? Repair or Reinstall It Correctly
Try repair first. If BlueStacks launches but crashes on specific apps, or an update failed mid-way, the built-in repair option (or reinstalling over the top with the same version) usually restores missing files without touching your instances.
Go for a full reinstall when crashes are constant, the engine never starts, or you've already tried repair. Steps:
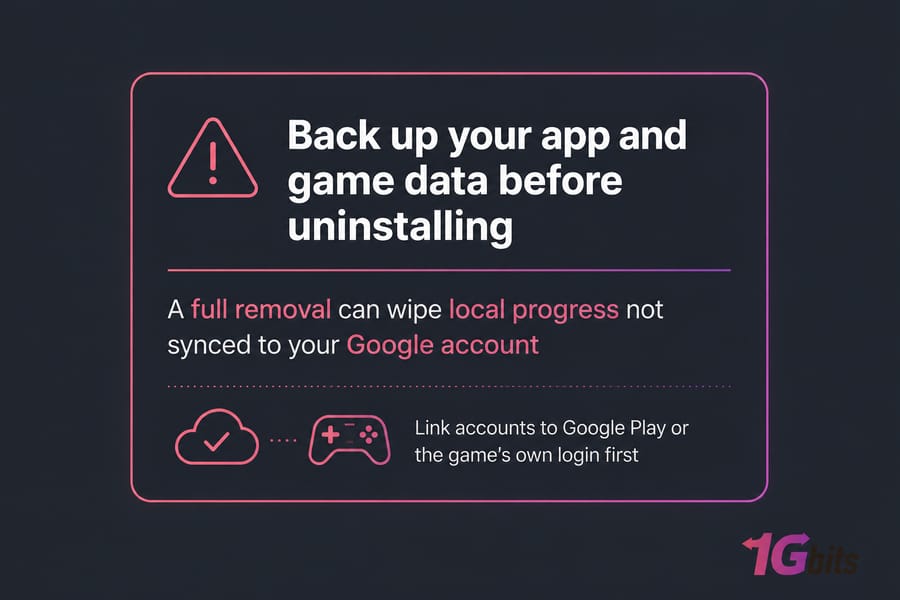
- Back up game data — link accounts to Google Play or the game's own login where possible
- Uninstall via Settings > Apps, then run the official BlueStacks cleanup utility to strip leftover services and registry entries
- Reboot
- Download the current stable installer from the official BlueStacks site — pick the Hyper-V build if Hyper-V stays enabled
- Install to an SSD path with plenty of free space
Reinstalling without the cleanup step is why people end up in reinstall loops. The old junk comes right back.
BlueStacks Lag Fix: Improve Performance and Stability
Running but unplayable? Allocation is usually wrong in one direction or the other. And yes — over-allocating hurts. Give BlueStacks every core and 12 GB of your 16 GB and Windows starts swapping. Everything gets worse.
| Use Case | CPU Cores | RAM | Renderer / FPS |
| Casual apps, messaging | 2 | 2 GB | OpenGL, 30 FPS |
| Mid-tier gaming | 4 | 4 GB | DirectX, 60 FPS |
| Heavy 3D gaming | 4–6 | 6–8 GB | DirectX, 60+ FPS, ASTC on |
| App testing / automation | 2–4 | 4 GB | OpenGL, 30 FPS, multi-instance |
Beyond allocation: close Chrome tabs, disable Discord and GeForce overlays, switch the Windows power plan to High performance, and keep BlueStacks on an SSD. That last one is the biggest single upgrade for anyone still on a mechanical drive. The same resource logic applies to servers — we covered it in common performance bottlenecks.
Local PC vs BlueStacks VPS: When Hardware Is the Real Problem
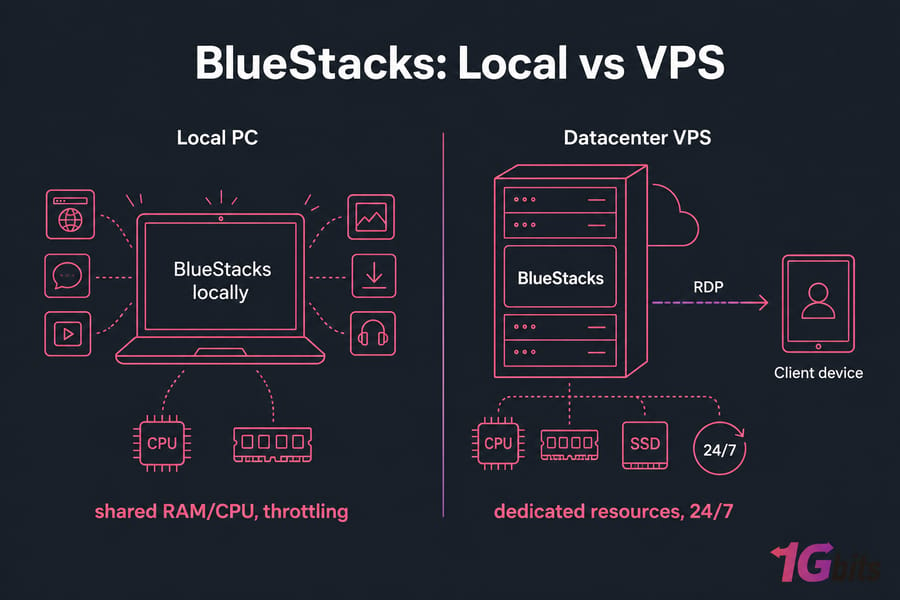
Sometimes there's nothing left to fix. An 8 GB laptop with a thermal-throttling CPU and integrated graphics will never run a demanding Android game smoothly, no matter how many settings you tweak.
Signs you've hit the ceiling: constant swapping, fans at full tilt within minutes, crashes only during long sessions, or a need to keep instances running 24/7 while your PC is off.
| Factor | Local PC | BlueStacks VPS |
| Resources | Shared with everything else you run | Dedicated allocation, predictable |
| Uptime | Off when your machine is off | 24/7, survives reboots at home |
| Access | One physical machine | RDP from any device, anywhere |
| Multi-instance | Limited by local RAM | Scale the plan up as needed |
| Thermals | Throttles under sustained load | Datacenter cooling, no throttling |
| Upgrades | Buy new hardware | Change plan in minutes |
To be clear: a VPS doesn't fix a corrupted install or a bad graphics setting. It fixes resource problems. If your local box is the bottleneck, a hosted BlueStacks VPS or Android VPS hosting plan gives you consistent CPU, RAM, and uptime without buying a new machine. A general-purpose Windows VPS works too, as long as it supports nested virtualization. Our walkthrough on how to run an Android emulator on a VPS covers the setup end to end.
Final Checklist to Get BlueStacks Working Again
Five minutes, in this order:
- Restart the PC and kill leftover BlueStacks processes
- Confirm you meet the RAM, CPU, and free-storage requirements
- Check virtualization in Task Manager; enable VT-x/AMD-V in BIOS if off
- Review Hyper-V, Virtual Machine Platform, and Memory Integrity — reboot after changes
- Update the GPU driver from Intel, AMD, or NVIDIA directly
- Switch between DirectX and OpenGL rendering
- Set sane CPU/RAM allocation and close background apps
- Repair the install; if that fails, clean uninstall and reinstall the current stable build
- Still failing on old hardware? Move the workload to a hosted environment
Stuck at step nine and unsure which plan fits? The 1Gbits support team can size a spec for your workload, or you can contact us with your use case.
Still having trouble with BlueStacks? If you've worked through every fix above and the emulator still won't behave, the hardware is likely the limit. Explore BlueStacks VPS plans built for emulator workloads — dedicated resources, remote access, and no more fighting your laptop.

Leave A Comment