

Windows Server Migration Tools is a toolset provided by Microsoft that helps in the process of moving all server roles, features, configurations, and data from older Windows Server versions to newer ones. In 2026, efficient migration has become increasingly important, as companies are not only replacing their old servers with new ones but also adopting secure and cloud-ready infrastructures. Consequently, they are transitioning from Windows Server 2012 R2 to 2019, 2022, and even 2026.
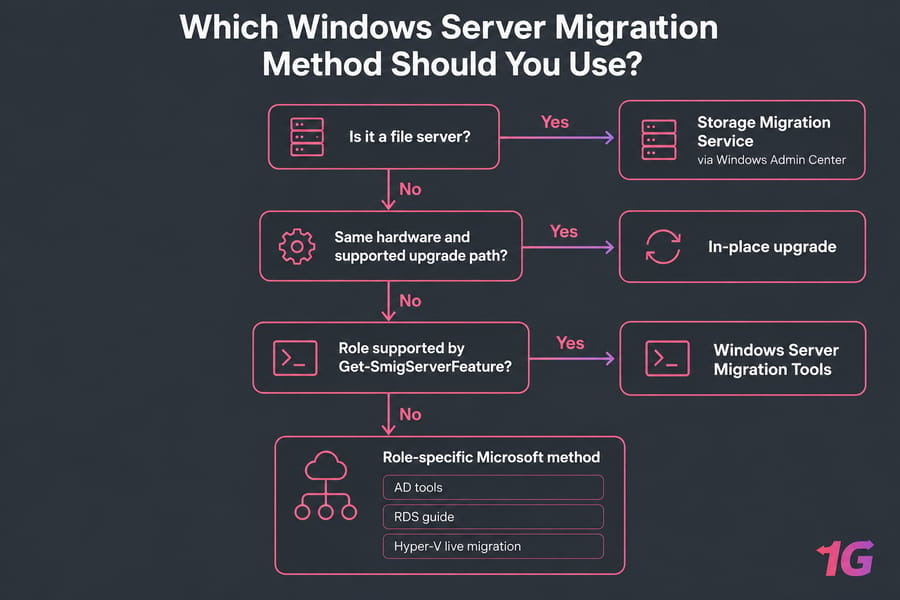
Windows Server Migration Tools (WSMT) is a built-in Windows Server feature. It's a set of PowerShell cmdlets that move server roles, features, OS settings, local users and groups, and IP configuration from an old server to a new one. It works best for specific roles like DHCP. For file servers, Microsoft now recommends Storage Migration Service. If you want to keep the same hardware, an in-place upgrade may be simpler.
The guide is a complete, step-by-step outline of the process to install, use, and troubleshoot the Windows Server Migration Tools, assisting the IT administrators to ensure a smooth upgrade with the least downtime and full compatibility among the different versions. I've watched admins lose whole weekends because they picked the wrong tool on day one. So before you touch a cmdlet, check that WSMT is the right tool for your job.
| Method | Best for | Interface | Built-in cutover |
| Windows Server Migration Tools | Individual roles (DHCP, local users/groups, IP config) | PowerShell | No, you do it by hand |
| Storage Migration Service | File servers, shares, NTFS permissions | Windows Admin Center | Yes (identity and IP takeover) |
| In-place upgrade | Same hardware, supported version jump | Setup wizard | Not needed |
⚙️ What Are Windows Server Migration Tools?
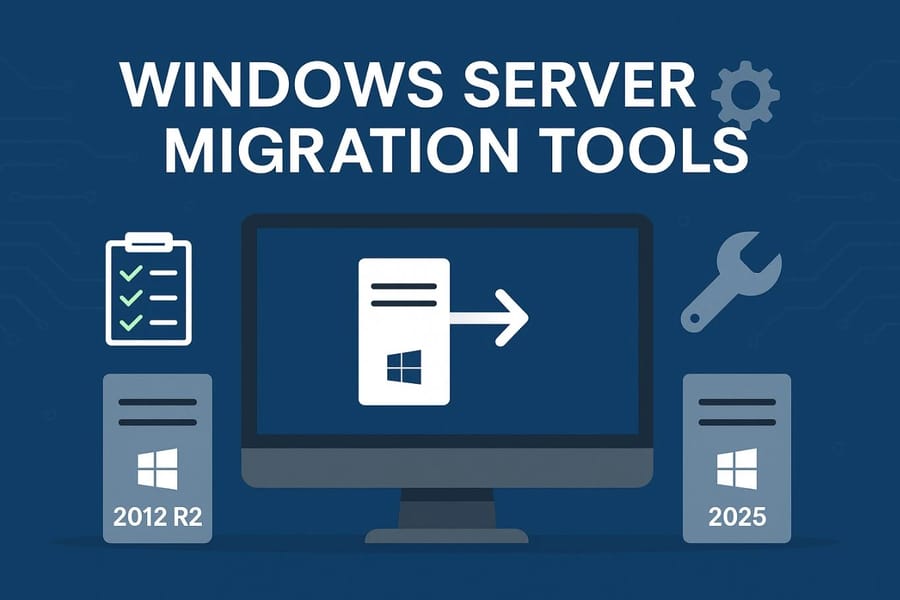
Microsoft Windows Server Migration Tools are a set of command-line utilities that are built in, intended for the transfer of server roles, data, and configuration between two Windows Server installations in a short time span. They differ from the conventional manual migrations in that they automate the whole procedure and, at the same time, standardize it, thus minimizing the chances of data loss or configuration errors.
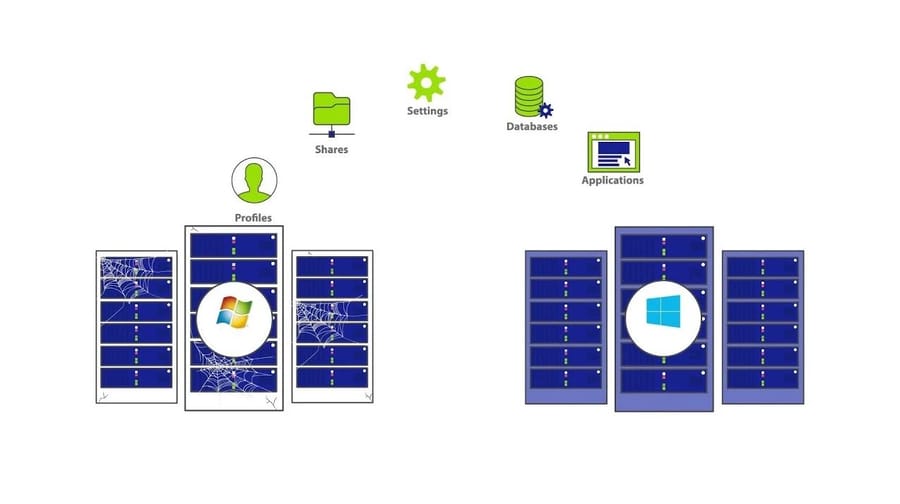
They can move DHCP, File, and Hyper-V settings as the core components that make them an enterprise-level infrastructure transition choice. Thus, Windows Server Data Migration Tools are a way for organizations to upgrade their hardware or operating systems without the need to rebuild their entire environment from scratch.
The major distinction between utilizing Windows Server Migration Tools and carrying out an in-place upgrade is the flexibility and control. Migration tools take along only the roles and data that are selected, which results in a cleaner setup and one that is compatible with the new architectures, while in-place upgrades mostly take along the legacy issues that were from the preceding installations.
According to Microsoft Learn's upgrade and migration overview, WSMT migrates server roles, features, operating system settings, data and shares to newer Windows Server versions. You install it through Add Roles and Features or with PowerShell.
Migration and in-place upgrade are different things. A migration builds a clean destination server and copies the configuration over. An upgrade replaces the OS on the existing box. Migration takes more work, but you get a clean OS and a real rollback path, because the old server is still there.
WSMT doesn't handle everything. It won't move Active Directory Domain Services, it doesn't give you orchestrated file server cutover, and Microsoft hasn't updated it much in years. In a 4sysops test on Server 2022, the tools showed bugs, including false .NET errors during deployment. Test in a lab before production.
The migration paths that are supported are Windows Server 2012 R2 → 2016, 2012 R2 → 2019, 2016 → 2022, and 2019 → 2025; the IT teams are allowed to traverse through the generations of Windows Server. Nonetheless, these tools demand identical system architectures (x64 to x64), correct administrative privileges, and feature versions that are compatible with each other in order to function properly.
🆚 Windows Server Migration Tools vs Storage Migration Service
When to use Windows Server Migration Tools
Use WSMT for DHCP Server, local users and groups, and IP configuration, especially when you're doing one role at a time and you're comfortable with PowerShell.
When to use Storage Migration Service for file servers
For file servers, use Storage Migration Service. You run it from Windows Admin Center, and it works in three phases: inventory, transfer and cutover. During cutover, the destination takes over the source server's name and IP address, so users don't need to remap drives. If your destination is Azure, look at Azure File Sync or Azure Storage Mover instead.
When an in-place upgrade is the better option
An upgrade makes sense for a single-purpose server on healthy hardware when there's a supported upgrade path. Domain controllers are the exception. Microsoft doesn't recommend upgrading them in place and prefers a clean install with a new DC.
🎯 Supported Roles, Features, and Migration Paths
Don't assume every role can be migrated. After you install the tools, check what's actually available:
Add-PSSnapin Microsoft.Windows.ServerManager.Migration
Get-SmigServerFeature
If a role doesn't appear in that list, WSMT can't move it. That's the end of it.
Common paths include 2012 R2 → 2022 or 2025, 2016 → 2022 or 2025, and 2019 → 2025. Treat these as examples and confirm each role against Microsoft's official role matrix. Also keep in mind:
- Cross-subnet: supported from Windows Server 2012 onward. Older versions only worked within the same subnet.
- Physical and virtual: physical-to-virtual and virtual-to-virtual migrations are both supported.
- Server Core and Desktop Experience: migrating between the two installation types is supported, but the PowerShell steps on Server Core are different. If you're moving to or from a headless install, our Windows Server Core guide covers the command-line management model, licensing, and what carries over.
- Domain vs workgroup: both servers must be able to reach the domain controller for any domain users or groups being migrated.
🛠️ How to Install Windows Server Migration Tools
Installing Windows Server Migration Tools is the first step toward performing a smooth and controlled migration between servers. This feature isn't installed by default, so administrators need to add it manually using either Server Manager or PowerShell.
Check Prerequisites
Before you install or use Microsoft Windows Server Migration Tools, it's essential to verify that both the source and destination servers meet the compatibility and permission requirements. Skipping this step can lead to version mismatch errors or failed deployments.
- Both servers must run supported versions (e.g., Windows Server 2012 R2, 2016, 2019, 2022, or 2025).
- The same CPU architecture (x64-to-x64) must be used on both machines.
- You must have local administrator rights on each server.
- Ensure the latest Windows updates are installed to avoid feature conflicts.
- Disable third-party antivirus temporarily if it blocks PowerShell scripts.
Verifying these prerequisites ensures that the Windows Server Migration Tools feature installs successfully and functions correctly across both systems.
Pre-Migration Checklist
- Backup: take a system state backup and a full image of the source. Write down your rollback trigger before you begin.
- Inventory: list hostnames, static IPs, shares, scheduled tasks, service accounts and app dependencies.
- Pilot: do a practice run in a lab or on a staging VM.
- Permissions and patching: use Administrator rights on both servers, patch both fully, check firewall rules, and confirm DC connectivity. If either server needs a fresh OS first, our Windows Server installation guide walks through media creation and post-install configuration.
- Maintenance window: schedule it and tell users. Role migrations cause short outages.
Installation Methods
There are two primary ways to install Windows Server Migration Tools: through Server Manager or PowerShell. Both methods install the same components but cater to different administrative preferences.
Using Server Manager:
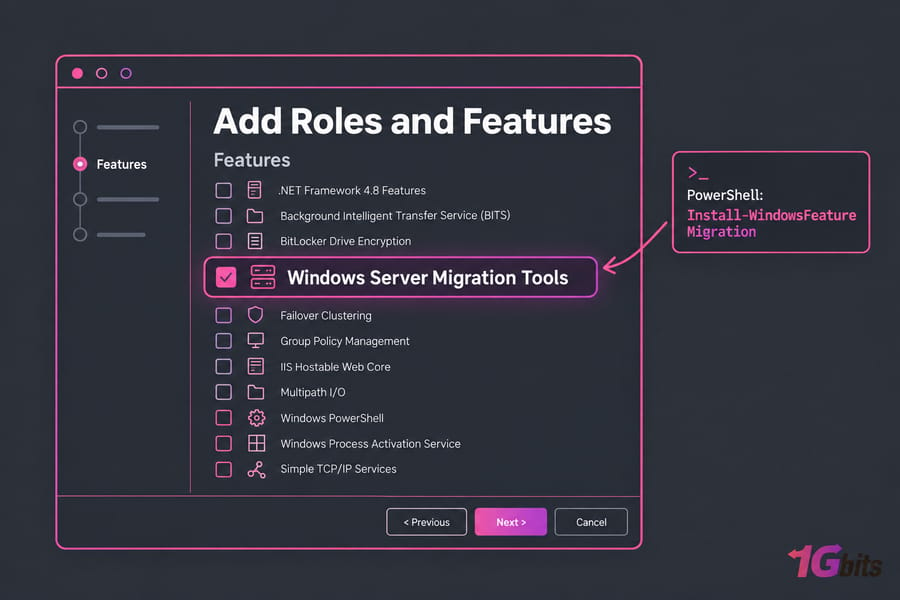
- Open Server Manager → click Manage → choose Add Roles and Features.
- Proceed through the wizard until you reach Features, then select Windows Server Migration Tools.
- Complete the wizard and restart if prompted.
Using PowerShell:
- Open PowerShell as Administrator.
- Run the following command:
Install-WindowsFeature Migration -IncludeManagementTools- Wait for the installation to complete, and verify there are no error messages.
Once installation is done, Windows Server Migration Tools are added under the system tools directory.
Deploying to Source Server Using SmigDeploy.exe
After installation on the destination server, you must deploy the migration tools to the source server using the SmigDeploy.exe utility. If your source runs Windows Server 2012 R2 or older, you'll need a deployment package. Build it on the destination:
cd %Windir%\System32\ServerMigrationTools
SmigDeploy.exe /package /architecture amd64 /os WS12R2 /path C:\SmigPackage- Copy the generated folder to the source server's local drive.
- On the source server, open the folder and run SmigDeploy.exe again as Administrator to register the cmdlets.
Sources running 2016 or later can install the feature directly with Install-WindowsFeature. This process prepares the Windows Server Migration Tool download package for use on older versions, enabling data and role exports.
Verification
After installing and deploying, it's important to verify that the tools are functioning correctly before beginning the actual migration process.
- Check for the folder:
C:\Windows\System32\ServerMigrationTools - Launch PowerShell and run
Get-WindowsFeature Migration*to confirm installation. - Ensure all required migration roles are listed and no dependencies are missing.
- Run
Get-SmigServerFeatureto see which roles can be migrated. - Run a test export/import to confirm connectivity between servers.
Successful verification confirms that Windows Server Migration Tools are correctly installed and ready for use.
🧭 How to Use Windows Server Migration Tools
Once installation is complete, learning how to use Windows Server Migration Tools is the next critical step to ensure a successful transition between environments. This process involves preparing both the source and destination servers, exporting necessary roles and data, importing configurations, and verifying that everything works as intended.
Prepare the Source and Destination Servers
Before migration begins, both the source (old) and destination (new) servers must be configured properly.
- Confirm both servers are on the same network and can communicate.
- Verify that Windows Server Migration Tools are installed on both systems.
- Disable firewalls or antivirus temporarily if they block PowerShell or file transfers.
- Update both servers to the latest Windows patches.
- Back up important data and the system state.
Proper preparation is crucial when using Microsoft Windows Server Migration Tools because it prevents network conflicts and data loss during the migration process.
Export Roles, Features, and Data with PowerShell Commands
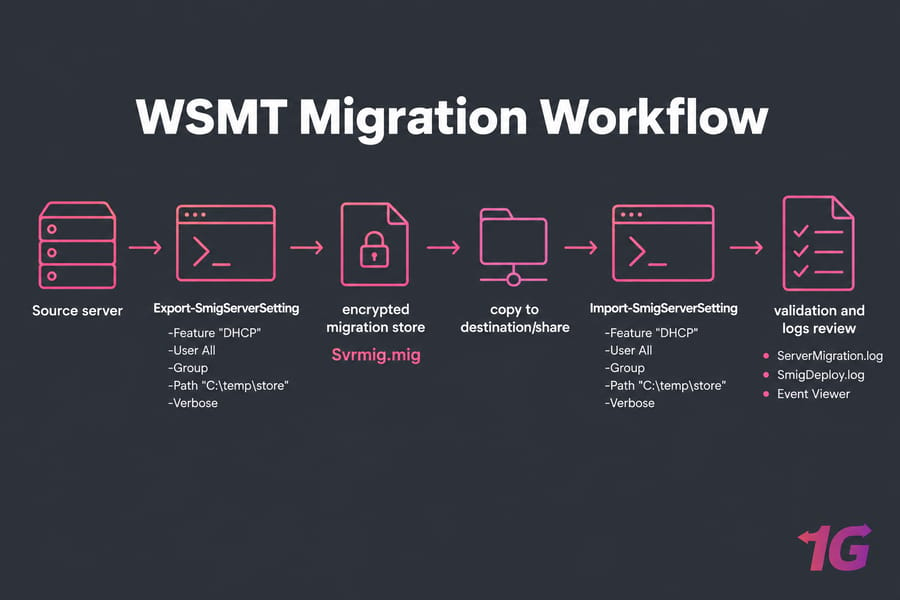
The next step is to export roles, features, and data from the source server using PowerShell. This example comes from Microsoft's Export-SmigServerSetting reference:
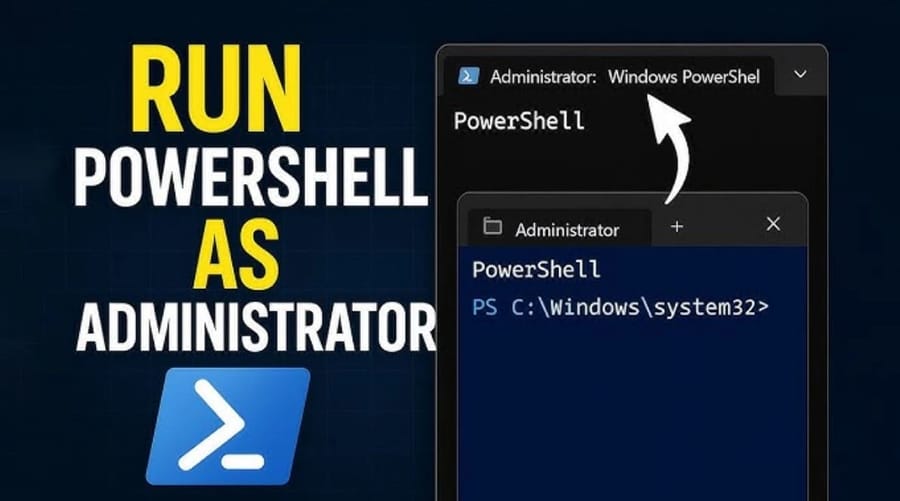
- Open PowerShell as Administrator on the source server.
- Navigate to the Server Migration Tools folder:
cd "C:\Windows\System32\ServerMigrationTools"- Run the export command:
Export-SmigServerSetting -Feature "DHCP" -User All -Group -Path "C:\temp\store" -Verbose- You'll be asked for a password that encrypts the migration store. Keep it somewhere safe, because the import won't work without it.
- Wait until the export completes and verify the log for success.
- If the store isn't on a share the destination can read, copy
Svrmig.migover by hand.
This export process ensures that all selected configurations and server settings are securely packaged.
Transfer and Import Configurations on the Destination Server
Once the export is finished, the migration package must be transferred to the destination server and imported. This step re-creates the exported roles, users, and network configurations.
- Copy the exported data folder (or
Svrmig.mig) to the destination server. - Open PowerShell as Administrator and navigate to:
C:\Windows\System32\ServerMigrationTools- Run the import command:
Import-SmigServerSetting -Feature "DHCP" -User All -Group -Path "C:\temp\store" -Verbose- Review logs for confirmation of successful import.
- Reboot the destination server if prompted.
Results depend on the role. The import rarely gives you an exact copy of the source, so check everything afterward. After completing these steps, the destination system should mirror the roles and settings of the old server.
Logs: Look forServerMigration.logandSmigDeploy.login%windir%\Logs. If they can't be written there, Windows puts them in%temp%instead. Also check Event Viewer on both servers.
Verify and Test the Migrated Roles
Verification ensures the migration was successful and that all server functionalities are running as expected.
- Test key services such as DNS, DHCP, or Active Directory.
- Confirm all user accounts and groups appear correctly.
- Use
Get-WindowsFeatureto ensure all roles are installed. - Check event logs for migration errors or warnings.
- Validate application functionality and network accessibility.
Completing this verification is an opportunity to fix any issues before putting the server into production.
Clean Up Temporary Files and Disable Old Roles
After confirming that the new server works properly, you can proceed with cleanup tasks to finalize the migration.
- Delete temporary migration folders from both servers.
- Disable or uninstall legacy roles from the old server.
- Remove the Server Migration Tools folder if no longer needed.
- Update DNS records and point clients to the new server.
- Run a final system reboot on both machines.
Cleaning up ensures a stable, optimized environment after migration. At this point, you've fully learned how to use Windows Server Migration Tools to migrate roles, data, and configurations safely between versions.
🔧 Role-Specific Considerations
DHCP
The DHCP migration guide requires both servers to reach the domain controller while the cmdlets run. After the import, authorize the new server in AD, deauthorize the old one, and check that scopes and leases came across.
File shares and NTFS permissions
Use Storage Migration Service. Afterward, compare ACLs with Get-Acl, test SMB access from a client machine, and check that share-level permissions match.
Active Directory and FSMO roles
WSMT doesn't do this. Promote a new DC, let replication finish, and then transfer FSMO roles with Move-ADDirectoryServerOperationMasterRole. Check DNS zones and run dcdiag before you demote the old DC. For a deeper foundation on AD DS, forests, and replication, our Windows Server Active Directory guide covers setup, security, and hybrid cloud considerations.
Remote Desktop Services and Hyper-V
RDS migration has its own process, and only some components can be migrated directly. Move Hyper-V VMs with live migration or export/import, not WSMT. For a full walkthrough on virtualization concepts, best practices, and VM migration within Hyper-V itself, see our Windows Server with Hyper-V guide.
Network Policy Server (RADIUS)
If your source server runs the NPS role for 802.1X Wi-Fi or VPN authentication, plan for a manual rebuild rather than a WSMT export — RADIUS configuration, shared secrets, and certificate bindings don't migrate cleanly with this toolset. Our Windows Server RADIUS setup guide walks through the full NPS rebuild, including certificates and logging.
🔄 Common Migration Scenarios
When planning a migration, it's essential to understand the version-to-version compatibility between different editions of Windows Server. Each upgrade path comes with its own technical considerations, feature changes, and security updates.
Windows Server 2012 R2 → 2019 / 2022
Migrating from Windows Server 2012 R2 to 2019 or 2022 is one of the most common transitions for organizations modernizing their infrastructure. This path allows you to benefit from improved performance, enhanced security features, and better virtualization capabilities.
- Use Windows Server Migration Tools 2012 R2 to 2019 or 2022 for roles like AD DS, DHCP, and File Services.
- SMB 3.1.1 support in newer versions may require updating legacy clients.
- Hyper-V configuration changes require the re-creation of virtual switches.
- Verify DNS and DHCP settings post-migration.
- Ensure .NET Framework 4.8 or later is installed for compatibility.
By following these steps, you can upgrade safely from 2012 R2 while avoiding data loss.
Windows Server 2016 → 2022 / 2025
Transitioning from Windows Server 2016 to 2022 or 2025 is smoother because both share similar architectures and updated feature sets. Still, it's important to revalidate each role and service for version-specific dependencies.
- Use Windows Server Migration Tools 2016 to 2022 or 2016 to 2025 to move DHCP, IIS, and file shares.
- Update your PowerShell scripts, as older cmdlets may be deprecated.
- SMB compression and QUIC in 2022+ may require reconfiguration.
- Verify container or Docker dependencies if used.
- Re-authorize DHCP scopes on the new server.
This upgrade is an ideal choice for organizations seeking long-term stability beyond 2025.
Windows Server 2019 → 2025
Migrating from Windows Server 2019 to 2025 offers the smallest learning curve but introduces new tools, optimizations, and hybrid-cloud integration features.
- Use the Windows Server Migration Tools 2019 to 2025 package for exporting roles.
- Check Active Directory replication compatibility.
- Update any Group Policy templates (ADMX) for new schema versions.
- Confirm Hyper-V VM configuration version compatibility.
- Enable new security features like Secured-core Server after migration.
This migration path ensures your infrastructure remains secure, efficient, and ready for future workloads.
💡 Key Features and Benefits
The Windows Server Migration Tools feature provides a fast, reliable, and automated way to transfer server roles, system data, and configurations between different Windows Server versions. These tools are specifically designed to simplify data migration, reduce manual tasks, and eliminate human error during complex server upgrades.
| Feature | Description | Benefit |
| Automated Role Transfer | Migrates Active Directory, DHCP, DNS, File Services, and more automatically. | Reduces manual reconfiguration and human error. |
| Data Migration Support | Transfers files, permissions, and system settings securely. | Ensures data integrity and consistent permissions. |
| Cross-Version Compatibility | Supports migrations from 2012 R2 → 2016/2019/2022/2025. | Allows seamless upgrades without intermediate versions. |
| PowerShell Integration | Uses scripts and commands for export/import automation. | Enables repeatable and scalable migration processes. |
| Rollback Options | Keeps backups of original server configurations. | Provides easy recovery if migration fails. |
| Low Downtime Operation | Transfers most roles and data while services remain active. | Minimizes business interruption during migration. |
By leveraging these features, organizations can modernize their infrastructure efficiently and confidently.
🧰 Troubleshooting and Limitations
Even though Windows Server Migration Tools are highly efficient, administrators may occasionally encounter issues such as deployment errors, version mismatches, or import failures.
| Issue | Cause | Solution |
| Missing SmigDeploy.exe | The deployment folder was not created or copied correctly. | Re-run SmigDeploy.exe from the correct path on the destination server. |
| Version Mismatch Error | Source and destination servers run unsupported combinations (e.g., 2008 → 2022). | Use the proper Windows Server Migration Tools download package for each version. |
| Path Access Denied | Insufficient admin permissions or incorrect file paths. | Run PowerShell as Administrator and verify folder permissions. |
| Cross-Architecture Error | Attempting migration between x86 and x64 servers. | Ensure both servers share the same architecture before export. |
| Domain or Trust Issues | Servers belong to different domains or have broken trust relationships. | Rejoin domains or establish trust before running migration commands. |
| Import Failure Logs | Corrupted export data or incompatible role versions. | Check logs in %windir%\Logs\ServerMigration and re-export the data. |
| Unsupported Role Migration | Some roles are not included in the Windows Server Migration Tools list (e.g., WSUS). | Use third-party tools such as Zinstall or Wondershare RecoverIt for unsupported scenarios. |
Additional symptoms and their likely causes:
| Symptom | Likely cause / fix |
| Role missing from Get-SmigServerFeature | WSMT doesn't support it. Use a role-specific method. |
| Domain users fail to import | A server can't reach the DC. Check DNS and trust relationships. |
| SmigDeploy registration errors | Wrong /os or architecture flag, or you didn't use an elevated prompt. |
| Import rejects store | Wrong password, or a Svrmig.mig left over from an earlier run. |
By reviewing logs, verifying configurations, and ensuring version compatibility, most migration problems can be resolved quickly. When limitations prevent successful migration, using reputable third-party utilities provides a safe alternative to complete the process without risking data integrity.
✅ Best Practices for Smooth Migration
Following best practices ensures a safe and efficient Windows Server migration experience with minimal downtime and no data loss. Proper preparation, testing, and post-migration validation can prevent the most common errors and compatibility issues.
✅ Do:
- Always back up the full system state before starting the migration process.
- Test the migration in a lab or virtual environment before running it in production.
- Ensure time synchronization between source and destination servers.
- Keep both servers fully updated with the latest Windows patches.
- Document each step to maintain traceability and simplify troubleshooting.
- Brush up on the fundamentals if this is your first migration — our Windows Server Administration guide covers the core tools, roles, and troubleshooting patterns you'll rely on.
🚫 Don't:
- Skip verification steps after the import process.
- Mix domain and workgroup environments during migration.
- Forget to re-authorize DHCP and DNS roles on the new server.
- Migrate across unsupported versions or architectures (x86 ↔ x64).
- Ignore post-migration log checks or event viewer warnings.
Applying these methods ensures that Windows Server Migration Tools perform at their best, resulting in a stable and secure upgraded environment.
🧪 Post-Migration Validation and Decommissioning
- Test DHCP leases, DNS resolution and AD authentication from real clients.
- Check file shares, NTFS permissions and SMB access.
- Look through the event logs and migration logs for warnings.
- Take the source offline instead of deleting it. Keep it for one to two weeks as your rollback option before you wipe it.
Don't decommission the old server the same day. I've seen a forgotten scheduled task show up on day six.
🎯 Conclusion
If an administrator knows how to use Windows Server Migration Tools properly, it will be possible to upgrade the entire infrastructure and not only that, but also to do so with a migration of roles, data, and configurations between 2012 R2, 2016, 2019, 2022, and 2025 with little or no downtime. All it takes is for the admin to follow the step-by-step instructions and guidelines, and then he will have modernized his servers with security and performance still there.
To sum up: use WSMT for individual roles, Storage Migration Service for file servers, and an in-place upgrade only when the upgrade path and hardware support it. Always do a practice run on a staging server before production.
For businesses that prefer a smoother transition or want to offload server management, consider moving to a high-performance VPS with Windows VPS hosting from 1Gbits, offering instant setup, global data centers, and 24/7 expert support. If you're outgrowing shared or virtualized environments entirely, a Windows Dedicated Server gives you full hardware control — and if you're currently using shared hosting, you can also explore the guide on Migrating from Shared Hosting to VPS to take your infrastructure to the next level with professional reliability and scalability.

Leave A Comment