

Installing Windows Server is an important initial step in developing an IT infrastructure that is reliable, secure, and scalable. The new Microsoft release in 2025 comes with better performance, virtualization support, and high-security integrations that cater to the modern enterprise. Still, many system administrators run into issues like "Windows Server installation failed" or not having the proper installation media.
Installing Windows Server 2025 takes about 20–40 minutes of hands-on time. Most failed installs I've been called in to fix went wrong before setup even started: someone picked the wrong edition, used a Legacy BIOS boot on a GPT disk, or was missing a RAID driver. This guide covers the decisions to make first, then the install itself, then what to set up in the first hour after it finishes.
This step-by-step guide will teach you how to conduct a full Windows Server installation from scratch - making bootable media, changing system settings, solving frequent malfunctions, and establishing Active Directory.
Quick checklist before you start:
- Hardware that meets the minimums (or a VM with enough resources)
- An ISO from the Microsoft Evaluation Center or your licensing portal (VLSC or the Microsoft 365 admin center)
- An 8 GB+ USB drive, or an ISO you can mount in your hypervisor
- A product key, or an Azure subscription if you'll use pay-as-you-go
- Your choice of edition and installation option (Server Core or Desktop Experience)
- Storage or RAID controller drivers, if your server uses them
🖥️ What Is Windows Server Installation?
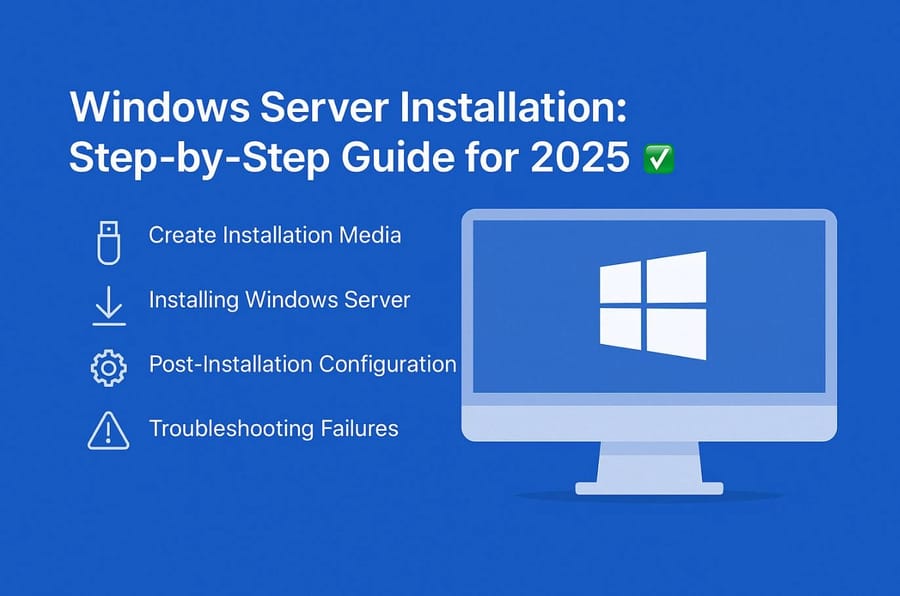
The installation of the Windows Server operating system generally means putting Microsoft's server OS on either physical or virtual machines so that the devices can be used to control and distribute network resources, run applications, and offer services that are on an enterprise level.
On the contrary, the server versions, for example, Windows 11, are all designed to support various management, user access, virtualization, and advanced security techniques. In 2025, Microsoft not only streamlined the installation process through better automation but also integrated hybrid cloud and extended lifecycle support. As a result, the process became more productive for both IT staff and enterprise administrators.
- Windows Server Standard: Ideal for small to medium businesses needing essential server functionality and limited virtualization.
- Windows Server Datacenter: Designed for large enterprises with unlimited virtualization rights and advanced data center features.
- Windows Server Essentials: Simplified version tailored for small businesses with up to 25 users and 50 devices.
- Windows Server 2025: Latest release featuring enhanced security (Secure Boot, TPM 2.0), improved container performance, and integration with Azure Arc for hybrid management.
With proper setup, administrators can ensure optimal performance, scalability, and long-term system reliability.
🎯 Clean Install vs Upgrade vs VM Install
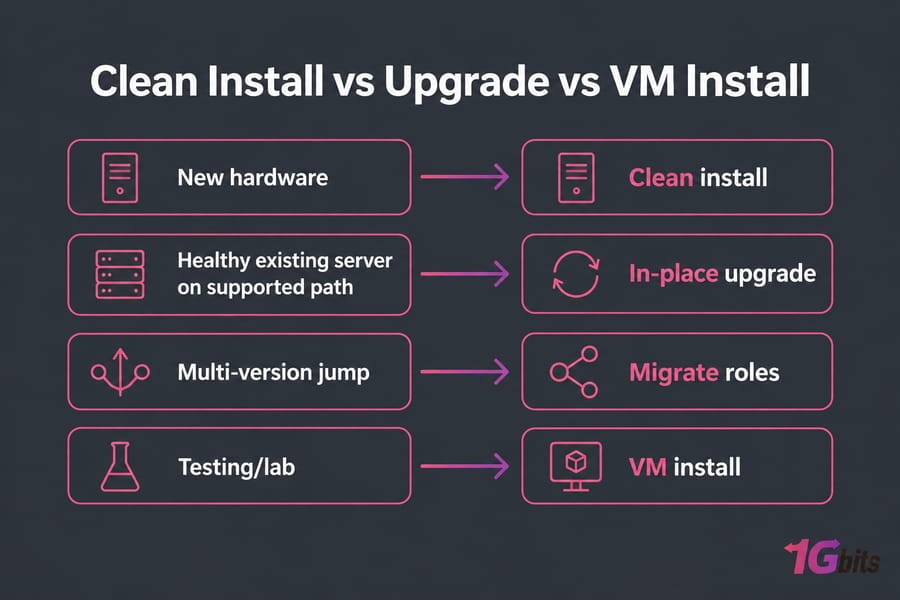
Do a clean install on new hardware, or when the old server has built up years of leftover junk. An in-place upgrade only makes sense on a healthy box where the upgrade path is supported. If you're jumping several versions, migrating the roles and workloads to a new server is usually safer — our in-place upgrade vs clean install guide goes through the supported paths, and when you do go the migration route, Windows Server Migration Tools covers the role-by-role export/import workflow. If you're just testing, a VM install costs nothing and you can throw it away afterward.
🎛️ Choose the Right Edition and Installation Option
Standard vs Datacenter
Standard covers most small and medium deployments and includes rights for two virtual machines per fully licensed host. Datacenter allows unlimited VMs and adds features like Storage Spaces Direct and software-defined networking. If you'll run more than a handful of VMs on one host, Datacenter usually works out cheaper. To see how 2025 compares with older releases, see compare Windows Server 2019, 2022, and 2025.
Server Core vs Desktop Experience
Setup asks you to pick one of these, and it's the most consequential choice you'll make during the install.
| Factor | Server Core | Desktop Experience |
| Interface | Command line, SConfig, PowerShell | Full GUI with Server Manager |
| Disk and RAM footprint | Smaller | Larger |
| Attack surface and patch count | Lower | Higher |
| Best for | AD DS, DNS, Hyper-V hosts, file servers | Beginners, GUI-dependent apps, RDS |
My take: go with Core unless an application needs the GUI. You can't switch between the two after installation, so decide now. The Windows Server Core guide covers managing it in depth.
Evaluation, Product Key, or Pay-as-you-go
The Microsoft Evaluation Center offers a free evaluation that expires after 180 days, and it has to be activated online within 10 days of installation. For production, you'll use an OEM, retail, or volume license key. New in 2025, pay-as-you-go licensing connects the server to your Azure subscription through Azure Arc and bills you for usage instead of an up-front license.
⚙️ Requirements & Prerequisites
Before starting your Windows Server installation, it's essential to ensure your system meets the minimum hardware and software requirements. Having the right setup, licensing, and tools prepared in advance helps avoid installation errors and ensures a smooth, stable deployment process.
💾 Hardware / System Requirements
Windows Server 2025 demands modern hardware components that meet Microsoft's updated standards for performance and security. Many guides get this part wrong. According to Microsoft's official hardware requirements, you need:
| Component | Minimum Requirement | Recommended for Best Performance |
| CPU | 1.4 GHz 64-bit with SSE4.2 and POPCNT support | 2.0 GHz or higher, multi-core |
| RAM | 512 MB (Server Core) / 2 GB (Desktop Experience) | 8 GB or more |
| Disk Space | 32 GB minimum | 64 GB+ (for updates & roles) |
| Firmware | UEFI 2.3.1 with Secure Boot | Required for TPM-based security |
| TPM | Version 2.0 | Required for Secure Boot & BitLocker |
| Network Adapter | 1 Gbps Ethernet | Multiple NICs for redundancy |
| Display | 1024×768 or higher | HD resolution recommended |
TPM 2.0 and Secure Boot are only needed for specific features such as BitLocker and secured-core server. You can install without them, though I'd still turn them on where the hardware supports them. For per-workload sizing, see our Windows Server 2025 hardware requirements and sizing guide.
🔑 Licensing / Product Key / Activation
Windows Server installation requires a valid product key or digital license for activation. You can use an evaluation version for testing or upgrading from older versions, like Windows Server 2019 or 2022, with valid licensing.
| License Type | Description | Usage |
| Evaluation Version | Free 180-day trial from Microsoft | Testing & learning environments |
| Retail License | Purchased via authorized resellers | Small to medium businesses |
| Volume Licensing | For large organizations | Centralized management of multiple servers |
| OEM License | Preinstalled by hardware vendors | Limited transfer rights |
| Upgrade License | From the previous Windows Server version | Requires an eligible base OS |
Always confirm your license type before installation to avoid activation issues. Microsoft's Volume Activation Management Tool (VAMT) can simplify license tracking in enterprise environments.
🧰 OS Media & Tools Needed
To create a successful installation environment, you'll need proper installation media, such as an ISO file, and tools to make it bootable. Microsoft recommends using Rufus, Diskpart, or PowerShell to prepare a USB flash drive (8 GB or larger).
| Tool / Resource | Purpose | Download / Command |
| Windows Server ISO | Official installation image | Microsoft Download Center |
| Rufus | Create a bootable USB easily | https://rufus.ie/ |
| Diskpart (CMD) | Manual USB formatting & partitioning | diskpart → list disk → clean → create partition primary |
| PowerShell | Automated script-based media creation | New-Partition / Format-Volume cmdlets |
| USB Drive (≥8 GB) | Installation media storage | Use high-speed USB 3.0 preferred |
Ensure your ISO file matches your Windows Server edition (Standard, Datacenter, or Essentials). Always verify checksums to confirm your download's integrity before creating bootable media.
💿 Create the Installation Media
Creating a reliable Windows Server installation media is the first practical step toward setting up your server environment. You can use a USB drive, ISO file, or DVD, depending on your hardware configuration and preference. The most common and efficient method in 2025 is creating a bootable USB drive using tools like Rufus, Diskpart, or PowerShell.
Download the ISO only from Microsoft. Before you use it, compare its hash against the value your download portal lists:
Get-FileHash .\WindowsServer2025.iso -Algorithm SHA256- Download the Windows Server ISO from Microsoft's official site or Volume Licensing Service Center.
- Insert your USB drive (at least 8 GB, preferably USB 3.0).
- Use Diskpart or PowerShell to clean, partition, and format the drive to FAT32 or NTFS.
- Mount the ISO file and copy all contents to your USB drive.
- Verify bootability by checking the USB for the "boot" folder and bootmgr file.
- Test your bootable media by restarting your PC and booting from USB.
For a bootable USB drive, Rufus is the quickest option. Choose GPT with a UEFI target for modern hardware. The ISO's install.wim is larger than 4 GB, so a FAT32 drive made by hand will need that file split first. DVD installs still work if a machine can't boot from USB.
🧩 Installing Windows Server (Step-by-Step Process)
Once your bootable media is ready, the next stage is to install Windows Server on your target machine or virtual environment. Follow each step carefully to ensure the installation completes successfully and the system is properly configured for post-setup tasks.
💻 Boot from USB / DVD & BIOS / UEFI Configuration
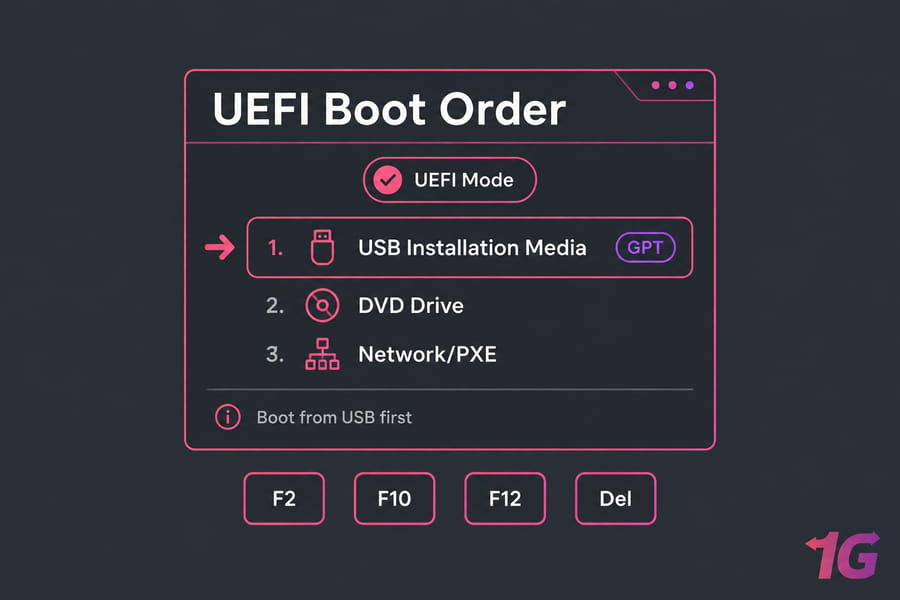
Insert your prepared USB or DVD, then restart the system and enter the BIOS/UEFI setup by pressing keys like F2, Del, or F12 during startup. Set the boot priority so that your USB or DVD drive is listed first, then save and exit the BIOS. The system will automatically detect your installation media and begin the Windows Server installation wizard.

🌍 Language, Keyboard & Region Settings
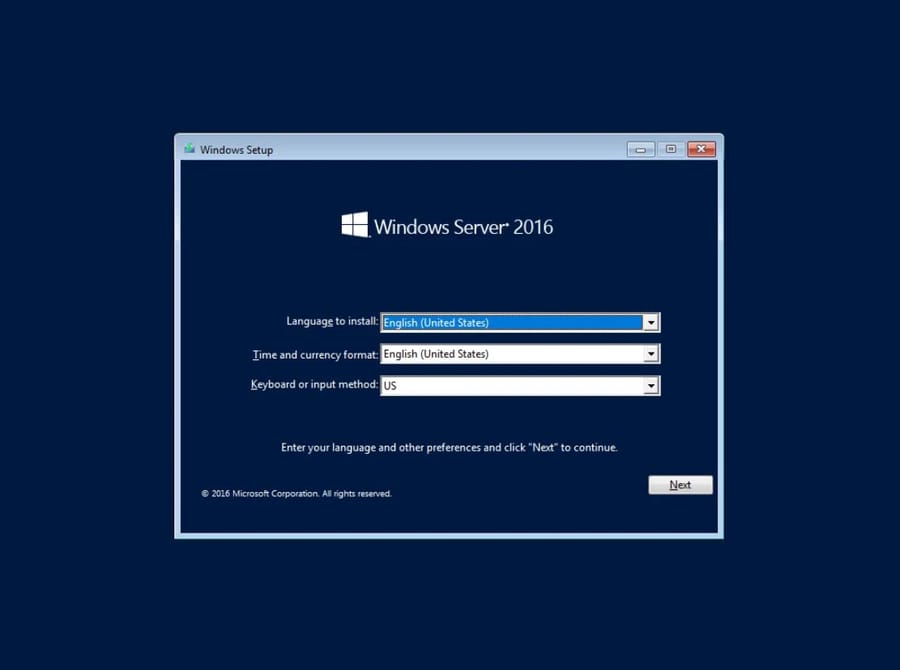
When the setup screen appears, you'll be prompted to select your language, time and currency format, and keyboard input method. Choose settings appropriate for your organization or region to avoid compatibility issues later. Once selected, click Next and then Install Now to begin the setup process.
🧱 Select "Install Windows Server" → Edition → Partitioning / Disk Setup
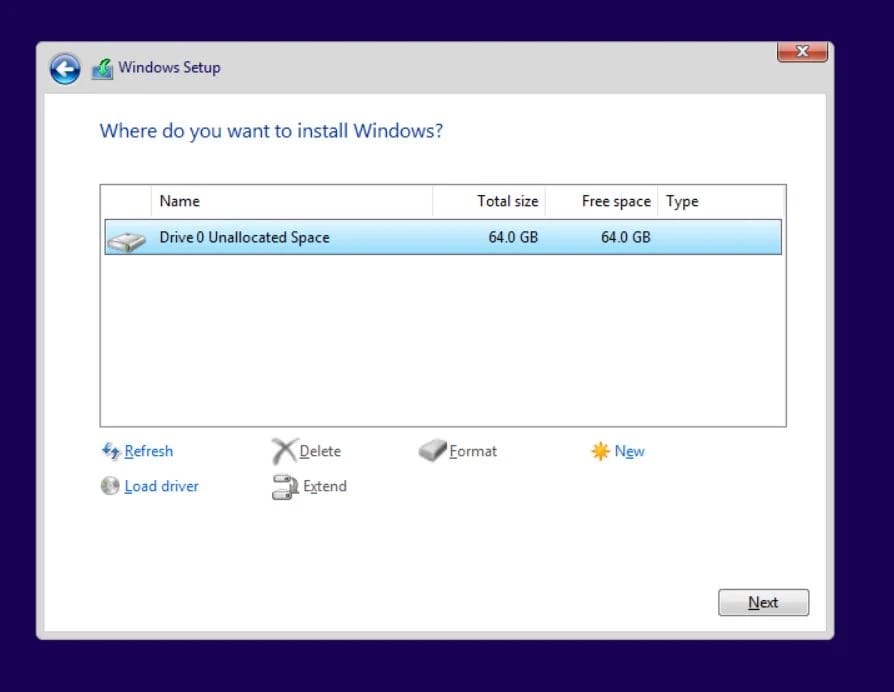
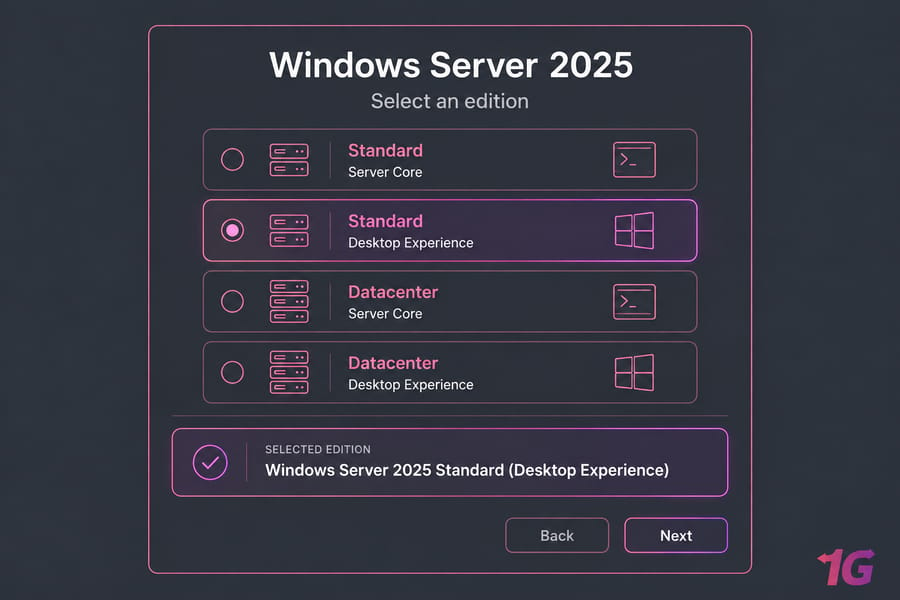
Choose the Windows Server edition you want to install: Standard, Datacenter, or Essentials, based on your licensing and project needs. Accept the license terms, then select Custom: Install Windows only for a clean setup. Next, create or delete partitions, select your desired disk, and let Windows prepare the storage for installation.
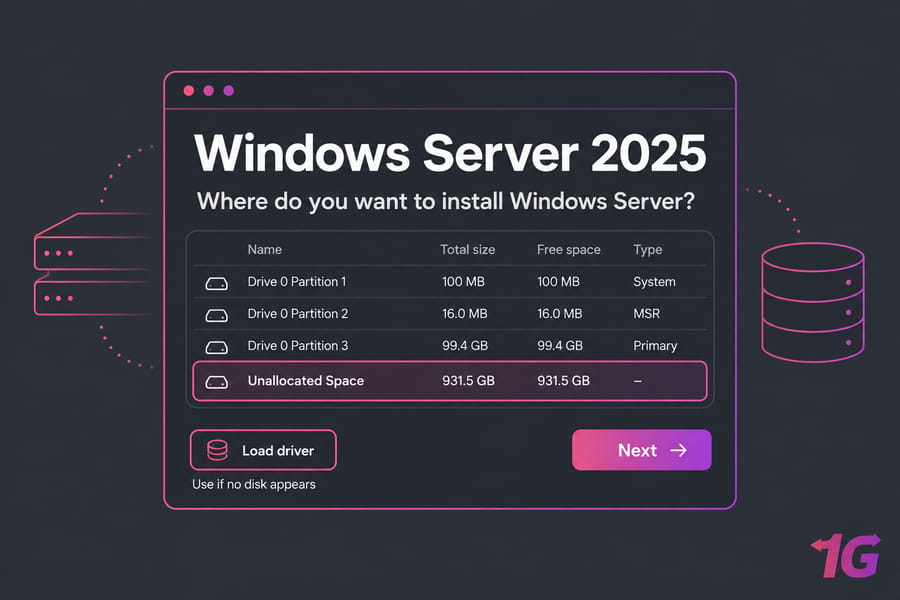
On a clean install, delete the old partitions, select the unallocated space, and click Next. If no disk shows up, click "Load driver" and point it to your storage controller driver.
⚙️ Copying & Installing Files; Automatic Reboots
The installation wizard will copy and expand Windows files to your chosen partition, a process that may take several minutes depending on hardware speed. During this phase, the system will automatically restart multiple times; this is completely normal. Avoid interrupting the process to prevent corruption or a "Windows Server installation has failed" error. Don't press any keys when it asks to boot from media again.
🔐 Final Setup (Administrator Password & First Login)
After installation, you'll be prompted to set a strong Administrator password. Make sure it includes a mix of uppercase letters, numbers, and symbols for maximum security. Store it in a password vault right away. Once the password is created, log in for the first time to access the Server Manager dashboard. From here, you can begin configuring roles, features, and network settings to fully deploy your Windows Server environment.
🖥️ Installing in Hyper-V, VMware, or VirtualBox
Create a new VM, attach the ISO as a virtual DVD, and boot it. In Hyper-V, use a Generation 2 VM so you get UEFI, Secure Boot, and a virtual TPM. For a lab I'd assign 2 vCPUs, 4 GB RAM, and a 64 GB dynamic disk. For the full picture on virtualization concepts, licensing, and VM management, see our Windows Server with Hyper-V guide. Three problems come up a lot:
- A Gen 2 VM that never catches the "press any key" prompt and falls through to PXE. Just restart it and press a key faster.
- VMware VMs that can't see the disk with a PVSCSI controller until you load the VMware Tools driver.
- Guest additions or integration tools that were never installed after setup.
🛠️ Post-Installation Configuration & Common Setup Tasks
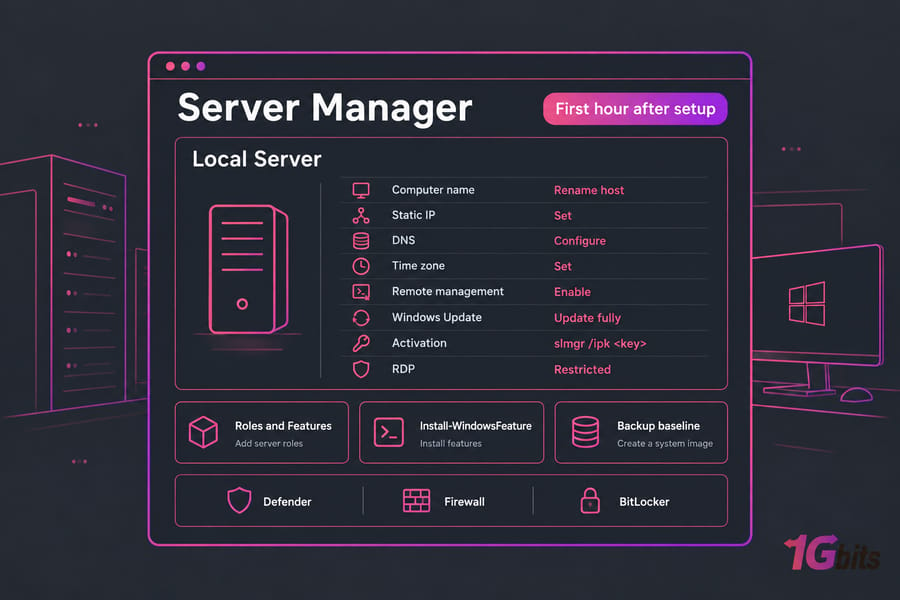
After completing the Windows Server installation, several essential configurations are required to optimize performance and ensure stability. Do these in this order:
- Update fully. Install the latest security patches, drivers, and cumulative updates to protect your server from vulnerabilities. Microsoft specifically says to install the latest servicing package right after setup.
- Activate:
slmgr /ipk <key>thenslmgr /ato. - Rename the host. Replace the default WIN-XXXX name before joining a domain (e.g., DC01, FileServer01).
- Set a static IP, DNS, and time zone using SConfig (on Core) or Network Settings. Ensure correct regional settings to avoid synchronization or authentication issues.
- Enable remote management. Use Windows Admin Center, Server Manager, or remote PowerShell. Keep RDP limited to a VPN or restricted IPs.
- Install roles and features with
Install-WindowsFeature. If you need a web server, follow the IIS installation guide for Windows Server. - Create a backup baseline and check the Defender, firewall, and BitLocker settings.
For day-2 tasks, our guide to managing Windows Server after setup picks up from here, and for the backup step above, the Windows Server Backup guide walks through system-state and full-volume strategies.
🧱 Installing Active Directory / Using ADUC
Once Windows Server is successfully installed and configured, the next major step is to set up Active Directory Domain Services (AD DS), the backbone of centralized authentication and resource management in any enterprise environment.
Once the server has a static IP, run Install-WindowsFeature AD-Domain-Services -IncludeManagementTools. Then promote it with Install-ADDSForest -DomainName corp.example.com, or use the Server Manager flag notification if you prefer the GUI.
- Add Active Directory Domain Services Role: Open Server Manager → Add Roles and Features, select Active Directory Domain Services (AD DS), and proceed through the wizard.
- Promote Server to Domain Controller: Click the notification flag → choose Promote this server to a domain controller → create a new forest or join an existing one → define your domain name.
- Configure Domain Settings: Set the Directory Services Restore Mode (DSRM) password and confirm the database, log, and SYSVOL paths.
- Restart Server: Once the configuration completes, the server will reboot and start functioning as a Domain Controller (DC).
- Access "Active Directory Users and Computers" (ADUC): Open the ADUC console from Administrative Tools to create users, groups, and organizational units (OUs).
Proper Active Directory configuration enables seamless user authentication, centralized policy enforcement, and network resource management. The guide to setting up Active Directory after installation covers OU design and security.
🚀 Advanced Scenarios & Other Use Cases
Beyond standard deployments, Windows Server installation can be customized for advanced environments like virtualization, containerization, and automated provisioning. These methods help IT professionals scale faster, deploy consistently, and manage infrastructure more efficiently.
- Docker on Windows Server: Install the Docker Engine using PowerShell commands or the Windows Features panel to run Windows containers. This setup allows you to isolate applications efficiently and manage workloads using Docker CLI or Kubernetes.
- Installing in Virtual Environments / Hypervisors: Deploy Windows Server inside VMware, Hyper-V, or VirtualBox by mounting the ISO to a virtual machine. This is ideal for testing, lab setups, or production clusters requiring scalability.
- Using Command Line / Unattended Installs: Create automated deployments using unattended XML answer files or PowerShell scripts. These configurations streamline repetitive installations across multiple servers.
- Installing via Network (WDS): Set up Windows Deployment Services (WDS) to install Windows Server over a local network. It's useful for enterprise-scale rollouts where multiple systems need to be imaged simultaneously.
Implementing these advanced approaches saves significant time in enterprise environments and minimizes manual configuration errors.
If you're setting up Windows Server in a virtual machine or remote environment, make sure to review our step-by-step Windows VPS Configuration guide for performance and security optimization tips.
☁️ Azure Arc and Hotpatch
If you connect a Windows Server 2025 machine to Azure Arc, it becomes eligible for Hotpatch. Hotpatch applies most security updates without a reboot, which cuts monthly restarts down to the quarterly baseline updates. It's a paid subscription and it's optional. Even so, for servers that have to stay up, I'd consider it one of the best reasons to be on 2025.
🧰 Troubleshooting Windows Server Installation Failures
Even with careful preparation, issues during Windows Server installation can still occur, from missing drivers to corrupted installation media. Understanding the root causes and applying targeted fixes can help you quickly resolve the "Windows Server installation has failed" error and complete the setup successfully.
| Error / Symptom | Possible Cause | Recommended Fix |
| Drive Not Detected / Setup can't find a disk | Missing storage controller or RAID driver | Load drivers manually during setup using the "Load Driver" option |
| Media Failure / Corrupted ISO | Damaged USB or incomplete ISO download | Recreate installation media and verify checksum integrity |
| "Windows can't be installed to this disk" | MBR disk booted in UEFI mode, or GPT disk booted in Legacy mode | Match the firmware mode, or run diskpart → clean → convert gpt |
| Installation Stuck at Copying Files | Faulty USB drive or unstable hardware | Replace media or test system RAM and disk health |
| BitLocker option unavailable | No TPM 2.0 | Turn on TPM in the firmware (it's only needed for that feature) |
| Instability after install | Damaged system files | DISM /Online /Cleanup-Image /RestoreHealth, then sfc /scannow |
| File System Error (Format NTFS) | Wrong file system format during media creation | Ensure NTFS is used for USB drives when installing from UEFI |
To avoid recurring installation issues, always verify your media integrity and hardware compatibility before reinstalling.
🧠 Best Practices & Common Mistakes to Avoid
A smooth Windows Server installation doesn't just depend on following the setup steps; it also requires smart preparation and awareness of common pitfalls.
| Best Practice / Task | Why It Matters | Common Mistakes to Avoid |
| Backup Before You Start | Protects critical data in case of setup failure or disk formatting | Skipping backups and losing configuration files or databases |
| Use Correct Edition & Licensing | Ensures legal compliance and access to the right features | Installing with the wrong key or an evaluation copy for production |
| Avoid Installing on Dynamic Disks | Prevents partitioning and boot issues during setup | Converting to dynamic disks before OS installation |
| Don't Skip Post-Setup Security Updates | Closes vulnerabilities and ensures stability | Ignoring Windows Update after installation |
| Validate Hardware Compatibility | Ensures drivers and firmware support new Windows Server 2025 features | Installing on unsupported or outdated hardware |
A well-planned installation, combined with correct licensing and post-setup maintenance, guarantees long-term server performance and reliability.
🎯 Conclusion
In 2025, if the installation of Windows Server were to take place following a method that was structured and broken down into steps, it would be easier and more trustworthy than ever. The various phases that go through the preparation of installation media, setting BIOS options, error troubleshooting, and Active Directory creation are interlinked and thus contribute to the realization of a server policy in terms of stability and security.
To recap: pick the edition and installation option first, confirm the hardware meets the minimums, verify the ISO, install in UEFI mode, and then work through the post-install checklist in order. Once that's done, set up AD DS, harden RDP, and decide whether Hotpatch is worth paying for.
Thereafter, a series of technical measures, such as best practices, system updating, and hardware compatibility checking, are ways to avoid common failures and attain maximum performance. For enterprises in search of a robust infrastructure with expert help on hand, Windows VPS Configuration or Buy Windows VPS from 1Gbits is the choice to make, as the quick deployment, full-day, seven-day-a-week support, and polite data centers across the globe will ensure that your Windows Server is operating at its peak.
If you'd rather not deal with physical hardware, running Windows Server on a hosted VPS gets you to the post-install stage in minutes. For businesses seeking scalable and high-performance hosting, you can easily Buy Windows VPS from 1Gbits, offering instant setup, 24/7 support, and global data centers. If you're outgrowing virtualized environments entirely, a Windows Dedicated Server gives you full hardware control for the most demanding workloads.

Leave A Comment