
If you're responsible for maintaining your organization's critical infrastructure, you know that standing still in the world of technology is like going backwards. The topic of upgrading Windows Server is hotly debated, for reasons ranging from security to performance improvements. That's why we're going to take a look at why this upgrade is so important and how you can make the most of your Windows Server upgrade with minimal hassle.
Here's the short version: an in-place upgrade takes your existing Windows Server, keeps its roles, settings, and installed apps, and moves it to a newer version — without wiping the box. Sounds convenient, right? It is. But before you mount an ISO and run setup.exe, you need to verify that your source-to-target path is actually supported. Skip that step and Setup may refuse to keep your files at all.
📦 What is a Windows Server Upgrade?
A Windows Server upgrade is the process of installing a newer version of Windows Server (such as moving from 2022 to 2025) on the same physical or virtual hardware. The key to a successful upgrade is keeping all existing settings, active Server Roles, and your data. The main goal is to take advantage of newer features while your critical configurations and data remain unchanged.
What an In-Place Upgrade Preserves
A Windows Server in-place upgrade generally keeps your server roles, feature configuration, installed applications, local accounts, drivers (where compatible), and most settings. That's the appeal — you don't rebuild everything from scratch.
What an In-Place Upgrade Does Not Guarantee
Preservation isn't the same as compatibility. Just because Setup carries an app forward doesn't mean that app runs cleanly on the new build. Third-party drivers, legacy line-of-business applications, and old agents can misbehave after the jump. Validate — don't assume.
🔄 In-Place Upgrade vs Clean Install vs Side-by-Side Migration
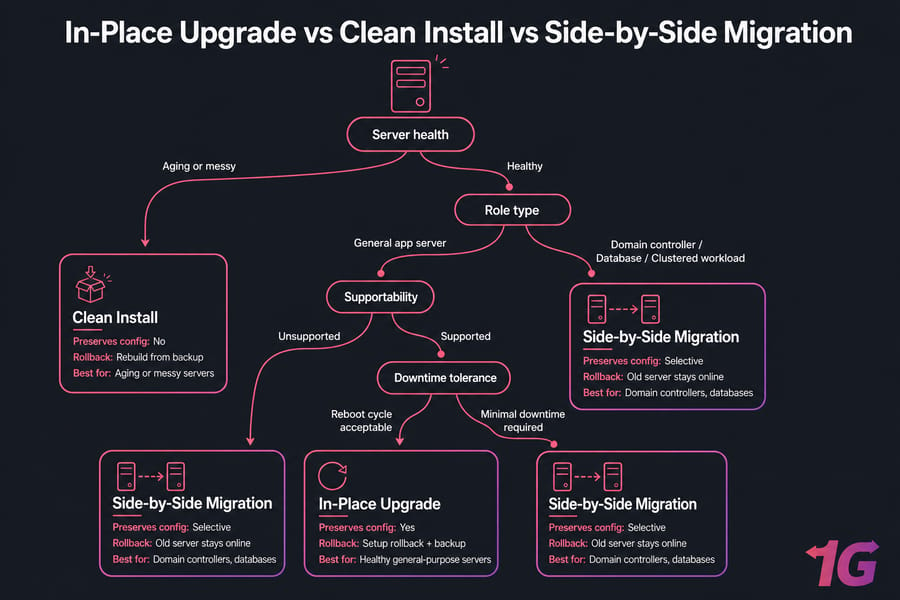
You face two main paths in server upgrade, and choosing the right path greatly affects the success and stability of your system.
| Feature | In-Place Upgrade | Clean Install (Side-by-Side) |
| Data & Settings | Preserved (seamless transfer) | Removed (requires manual backup/recovery) |
| Downtime | Minimal (faster process) | Significant (requires reconfiguration and app installation) |
| Implementation Complexity | Easier (fewer steps) | More complex (reconfigure roles, networking, etc.) |
| Stability | Risk of carrying over legacy issues or clutter | Optimized performance; completely fresh start |
Method Comparison
| Method | Preserves config? | Rollback ease | Best for |
| In-place upgrade | Yes | Automatic setup rollback + backup | Healthy general-purpose servers |
| Clean install | No | Rebuild from backup | Aging or messy servers |
| Side-by-side migration | Selective | Old server stays online | Domain controllers, databases |
1. In-Place Upgrade
This method involves running the installation process of the new operating system through the installation media on the server that is currently active. During this process, you will select the "Keep files and settings" option.
Advantages
- Preservation of settings and data: All system configurations, installed programs and user data are preserved.
- Less downtime: The process is faster than a clean install and results in minimal service disruption.
Disadvantages
- Migration of old problems: Hidden problems, redundant files, and registry bloat may be transferred.
- Compatibility check required: Some older drivers or applications may not work with the new OS.
- Risk of failure: If the upgrade process fails due to incompatible drivers, it can lead to system instability.
2. Clean Install or Side-by-Side Migration
In this method, you install a new server with Windows Server 2025 and then manually migrate data, roles, and applications from the old server to the new server. For the utilities that handle the heavy lifting, see our guide to Windows Server migration tools.
Advantages
- Clean Slate: Ensures a fresh start and removes all previous problems or misconfigurations.
- Optimum performance: Often results in a more stable and faster system.
- Remove old problems: Old and potentially problematic files and registry entries are completely removed.
Disadvantages
- Time-consuming: Requires backing up data, reinstalling the OS, reconfiguring settings, and reinstalling programs.
- More potential downtime: A longer process can lead to more downtime.
- Complexity: More complex than an in-place upgrade and requires careful planning.
Decision Table by Server Role
| Role | In-place reasonable? | Notes |
| General app server | Usually yes | Validate apps afterward |
| AD DS (domain controller) | Often migrate instead | Side-by-side is frequently safer |
| SQL / databases | Extra validation | Application-consistent backup required |
| Failover Clustering | Special handling | Follow Microsoft cluster OS rolling upgrade |
| Hyper-V host | Case by case | Drain VMs first |
When to Upgrade vs When to Reinstall?
Decide to upgrade in-place: When your server is relatively new (e.g., 2022 to 2025) and has little technical debt. This method is suitable for servers with complex roles, where your goal is to minimize service disruption.
Decide to install clean: If the server is old (e.g., Windows Server 2016 to 2025), has frequent failures, or hosts critical roles such as Domain Controllers or large databases, a clean install is safer for long-term stability.
📊 Supported Windows Server Upgrade Paths
To ensure Microsoft support, you must follow the direct upgrade paths. Always confirm your exact path against current Microsoft documentation before you commit. Check the official supported Windows Server upgrade paths and cross-reference our Windows Server versions compared: 2012 to 2025 breakdown.
| Source / Destination Version | Windows Server 2016 | 2019 | 2022 | 2025 |
| Windows Server 2012 | ✔︎ | – | – | – |
| Windows Server 2012 R2 | ✔︎ | ✔︎ | – | ✔︎ |
| Windows Server 2016 | – | ✔︎ | ✔︎ | ✔︎ |
| Windows Server 2019 | – | – | ✔︎ | ✔︎ |
| Windows Server 2022 | – | – | – | ✔︎ |
Windows Server 2022 to 2025
The cleanest jump available today. If your Windows Server 2022 box is patched and healthy, this in-place upgrade is generally straightforward.
Windows Server 2019 to 2025
Also a direct, supported path.
Windows Server 2016 to 2025
Supported directly, but 2016 is old enough that third-party drivers and agents deserve extra scrutiny.
Windows Server 2012 R2 to 2025
There's no clean direct in-place path here. Since 2012 R2 is past end of support, the sensible move is to migrate or upgrade Windows Server 2012 R2 via side-by-side migration to fresh infrastructure.
Handling Unsupported Paths
You should plan a multi-step upgrade; for example, first from 2012 R2 to 2016, and then from 2016 to 2025. However, each jump increases the risk of upgrade failure. Experts recommend using a middle path or a clean install instead of jumping straight in.
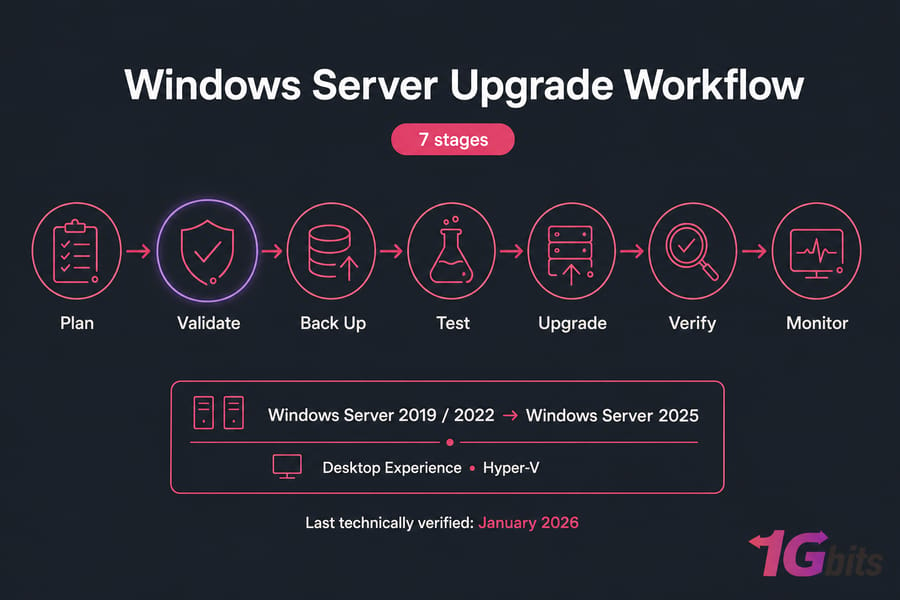
📋 Upgrade Preparation: The Foundation for Success
The success of an upgrade is 70% about preparation and 30% about execution. Run through this checklist before touching Setup:
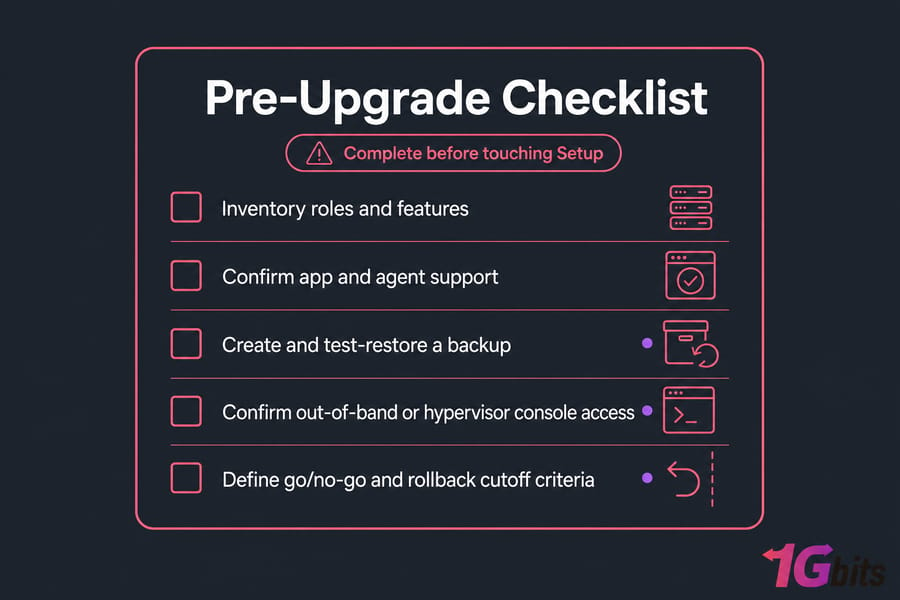
- Record current OS version and build (
winver) - Inventory installed roles, features, and applications
- Document service accounts and scheduled tasks
- Note IP, DNS, routes, and firewall rules
- Export certificates and share permissions
- Patch the source server fully
- Confirm ISO edition and language match the server
- Verify free disk space
- Confirm vendor support for your apps and agents
- Create and test-restore a backup — an untested backup is a wish, not a plan
- Capture a performance baseline for later comparison
- Test the upgrade in an isolated environment first
- Define go/no-go and rollback cutoff criteria
- Confirm out-of-band or hypervisor console access
1. The Golden Rule: Lab Environment and Snapshot Testing
You should never perform an upgrade on a critical production server without repeating the exact process on a non-production environment. If the server is a virtual machine (VM), the first step is to take a full Snapshot right before you begin the upgrade. Need to build a fresh test environment first? See our guide to Windows Server installation for step-by-step setup instructions. For a quick isolated testing environment, a Windows 10 VPS or Windows 11 VPS gives you a sandbox to simulate the upgrade before touching production.
2. Check Hardware and Software Compatibility
Make sure your current hardware meets the requirements. Start with the Windows Server 2025 system requirements guide.
| Hardware Component | Minimum Requirements (Windows Server 2025) | Recommended for Better Performance |
| Processor (CPU) | 64-bit, at least 1.4 GHz, supporting NX, DEP, SLAT, SSE4.2, POPCNT | 2.0 GHz or higher, multi-core (4 cores or more) |
| Memory (RAM) | Minimum 512 MB for Server Core / 2 GB for Desktop Experience | 8 GB to 16 GB (depending on server role) |
| Storage (Disk) | Minimum 32 GB of free space | SSD or NVMe drive with 64 GB or more |
| Network Adapter (NIC) | At least 1 Gbps, PCIe compatible | 1–10 Gbps network card with offloading and teaming support |
Also, check with your vendors for all critical applications — do they officially support Windows Server 2025?
3. Backup and Disaster Recovery Plan
You should have a complete recovery strategy! Perform a complete backup of the system state, including all data, applications, and system files. Verify the integrity and functionality of this backup immediately.
4. Active Directory Preparation (for Domain Controllers)
Make sure that the domain and forest functional levels are compatible with Windows Server 2025. Using PowerShell or the netdom query fsmo command, make sure that all five FSMO roles are properly enabled and available.
5. Disable Interferers and Unnecessary Services
Temporarily disable or preferably uninstall all antivirus software, host firewalls, and third-party monitoring tools, as they often cause stop errors. Also disconnect USB drives, printers, scanners, and inactive network cards.
6. Use Microsoft Compatibility Tools
Setup.exe itself has a built-in compatibility checker. Before you begin, make sure the latest Cumulative Updates are installed on the source system. Carefully review the installer's compatibility report; if you see any warnings about a specific program or driver, fix the problem first.
🔒 Domain Controller Upgrade Considerations
Should You Upgrade a Domain Controller In Place?
Often, no. Introducing a fresh domain controller running 2025, letting AD replicate, then demoting the old one is cleaner and safer in most environments. You keep a working fallback the whole time.
Active Directory Health Checks
Before anything, verify AD is healthy:
dcdiag /v
repadmin /replsummary
Then confirm DNS health, SYSVOL and NETLOGON shares, FSMO role availability, and replication across all DCs. Our domain controller upgrade checklist walks through each check. If your server handles authentication for network access, also review our Windows Server RADIUS guide to ensure authentication services survive the upgrade intact.
System-State Backup and Recovery Planning
Take a proper system-state backup. A VM checkpoint is not a substitute for a tested, AD-aware backup. Snapshotting a domain controller can cause USN rollback and replication chaos.
🛠️ How to Upgrade Windows Server In Place (Step-by-Step)
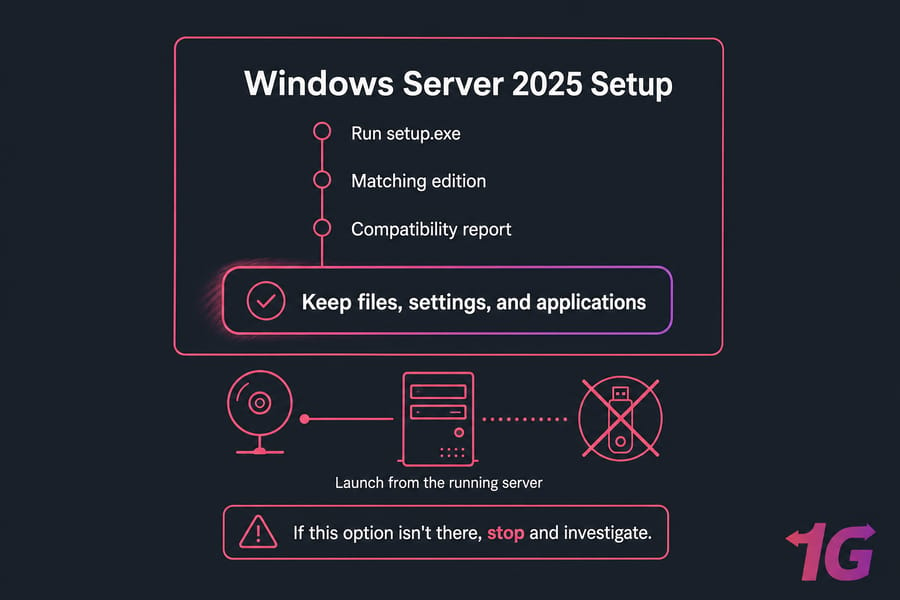
Step 1 – Download ISO / Create Installation Media
You will need to obtain the Windows Server 2025 installation media (ISO file) from the Microsoft Volume Licensing Service Center (VLSC) or Evaluation Center. Verify that the ISO you receive matches the edition you are running (Standard or Datacenter) and the language of your system.
Step 2 – Mount the ISO and Run Setup.exe
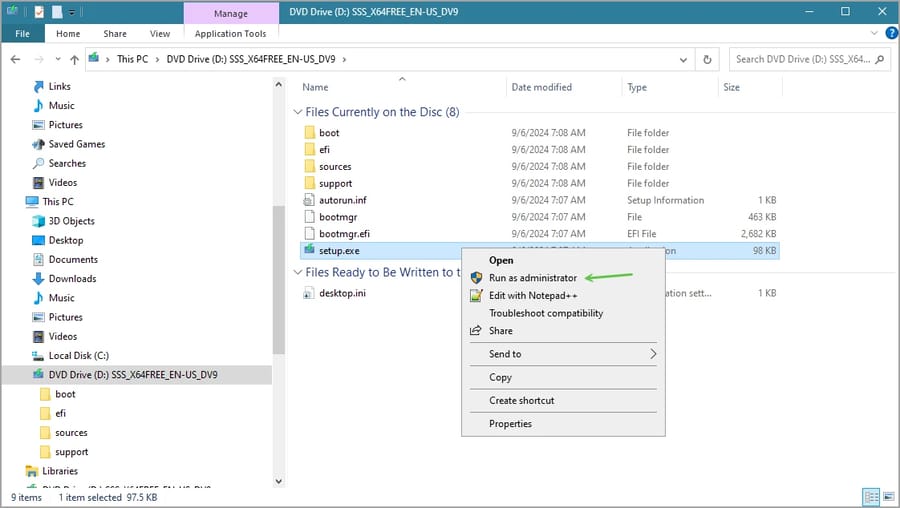
Mount the ISO file on your virtual machine or physical server. Then, navigate to the root folder and run the setup.exe file. On the "Windows Setup" screen, select "Download and install updates (recommended)" to get the latest updates and drivers during installation.
Step 3 – Select "Keep files and settings" (Critical Step)
This is the most important step to determine your upgrade type.
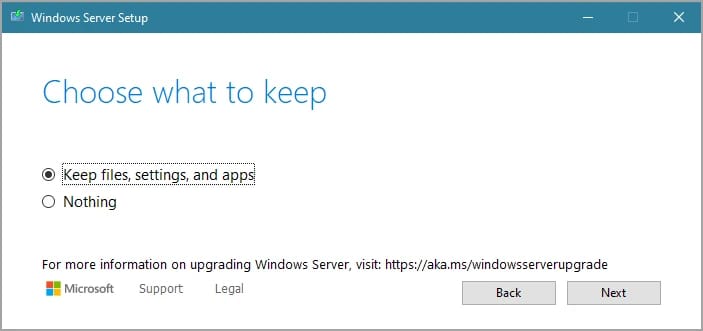
On the screen that asks you what you want to keep, you must select "Keep personal files and apps". This selection confirms the in-place upgrade process so that all your roles and data are preserved.
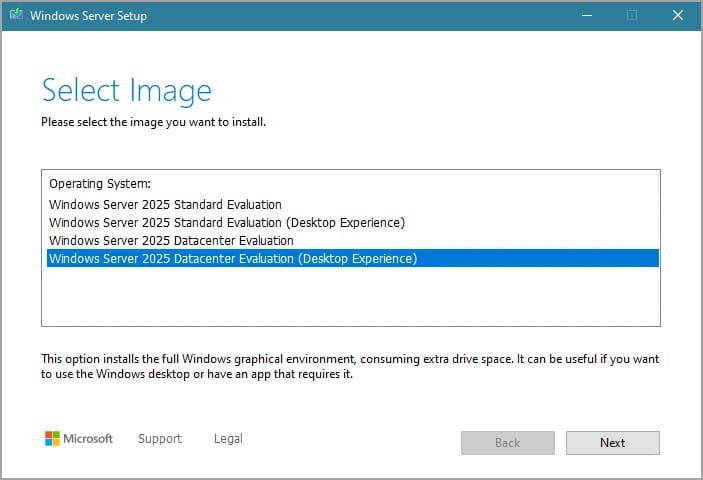
If you are in a Core or Desktop Experience environment, you may be asked to select your desired installation type. Make sure that the installation type matches the running configuration.
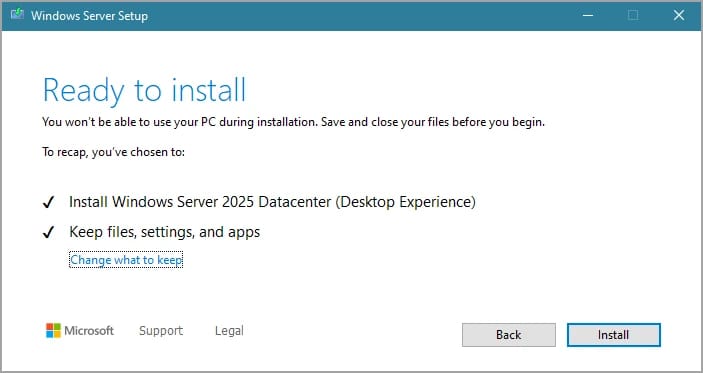
If the "Keep files and apps" option is greyed out — stop. Don't continue until you've identified the edition, language, installation-type, or compatibility mismatch causing it.
Step 4 – Complete Setup and Confirm After Upgrade
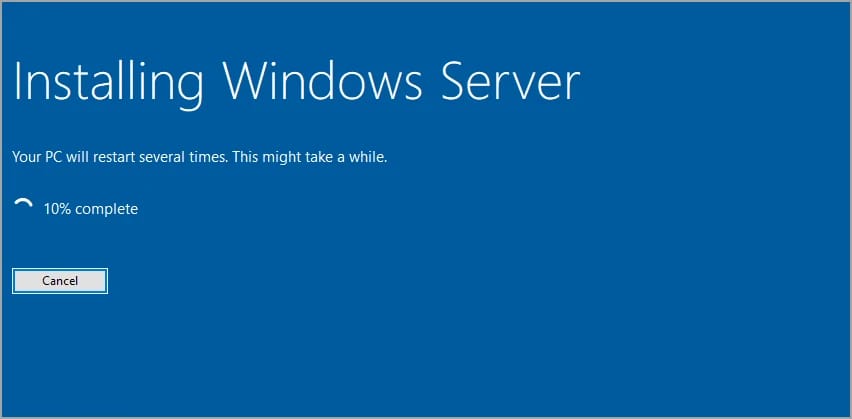
The upgrade process will now begin. The server will reboot several times. This process can take anywhere from half an hour to several hours, depending on the hardware. Warning: don't run this over plain RDP — the server reboots several times and you'll lose your session. Use hypervisor or out-of-band console access.
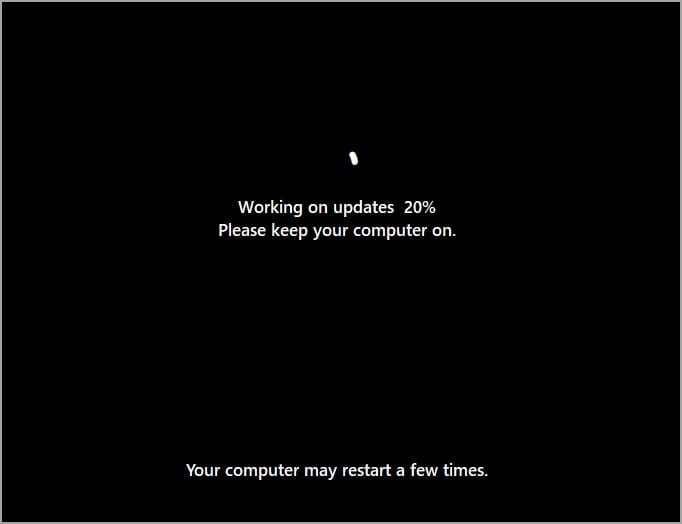
When the process is complete, you will see the login page for your new Windows Server 2025 environment. Sign in and run winver to confirm the build.
✅ Post-Upgrade Validation Checklist
The upgrade "finishing" doesn't mean it worked. Validate.
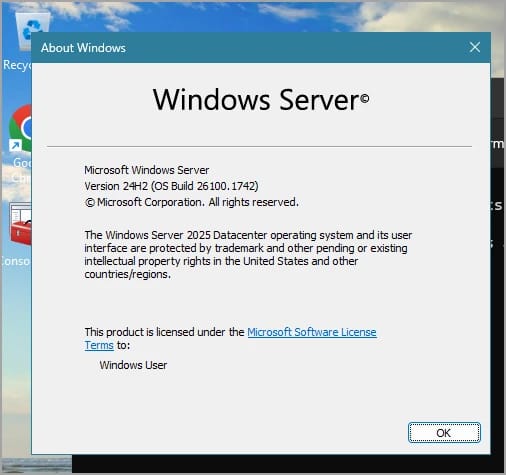
| Role | Minimum Checks |
| AD DS | Replication, DNS, SYSVOL, NETLOGON, event logs |
| DNS | Internal/external resolution, zones, forwarders |
| DHCP | Service, scopes, leases, failover |
| IIS | Sites, bindings, certificates, app pools |
| File server | Shares, NTFS permissions, SMB access |
| Hyper-V | VM startup, virtual switches, integration services |
| Applications | Service health, login, transactions, dependencies |
- Check the new version: Run
Get-ComputerInfoin PowerShell to confirm the version and build. - Install the latest updates: Use Windows Update to get the latest security patches and Cumulative Updates.
- Check services and roles: Test all key roles and services such as AD, DNS, DHCP, and IIS.
- Check the upgrade logs: Check
C:\$WINDOWS.~BT\Sources\Panther; files such assetuperr.logandsetupact.logrecord details of any errors. - Enable monitoring: Re-enable or reconfigure tools like System Center, Zabbix, or Nagios.
- Confirm activation: Use
slmgr /xprto verify edition and activation status.
After completing the post-upgrade steps, you can optimize your server setup by following our Windows VPS Configuration guide for smooth and efficient performance. If you're building a new target server for side-by-side migration, a Windows VPS gives you a clean environment to deploy and test before cutting over.
⚠️ Troubleshooting a Failed Windows Server Upgrade
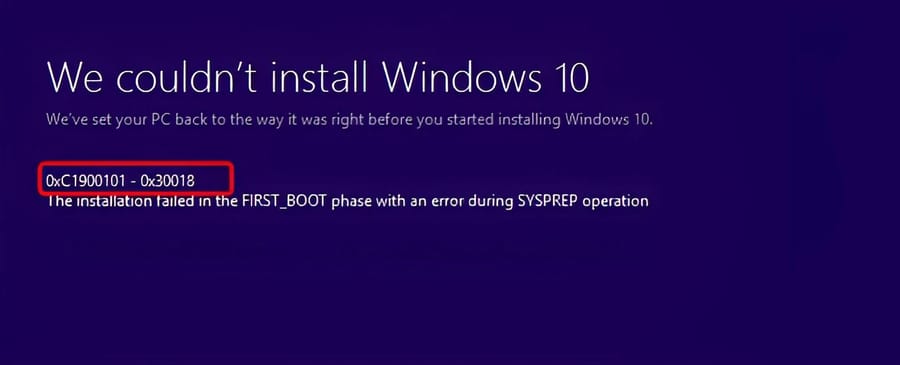
Error codes rarely have one single cause. Work the logs, don't guess. Microsoft's SetupDiag parses the upgrade logs and tells you why Setup failed. Run it first, then inspect the raw logs:
| Log / Tool | Location |
setupact.log, setuperr.log |
C:\$WINDOWS.~BT\Sources\Panther |
| Rollback logs | C:\$WINDOWS.~BT\Sources\Rollback |
| Driver install log | setupapi.dev.log |
Common Error Categories
| Error | Likely Categories | Safe Next Step |
0xC1900101 |
Driver incompatibility, setup rollback | Update/remove the flagged driver, retry in test |
0x8007001F |
Device/driver or file access issue | Inspect logs before blaming antivirus |
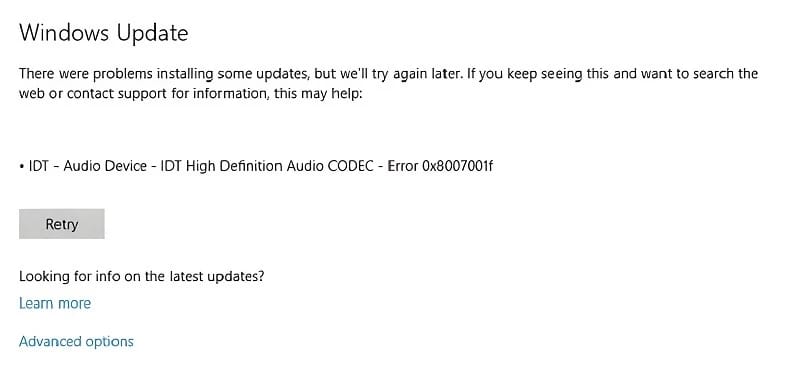
The Troubleshooting Sequence
- Record the complete error.
- Review SetupDiag output.
- Inspect setup and rollback logs.
- Identify driver or application blocks.
- Restore production service if needed.
- Fix it in a test clone before retrying — never loop retries on production.
🔄 Rollback and Recovery Options
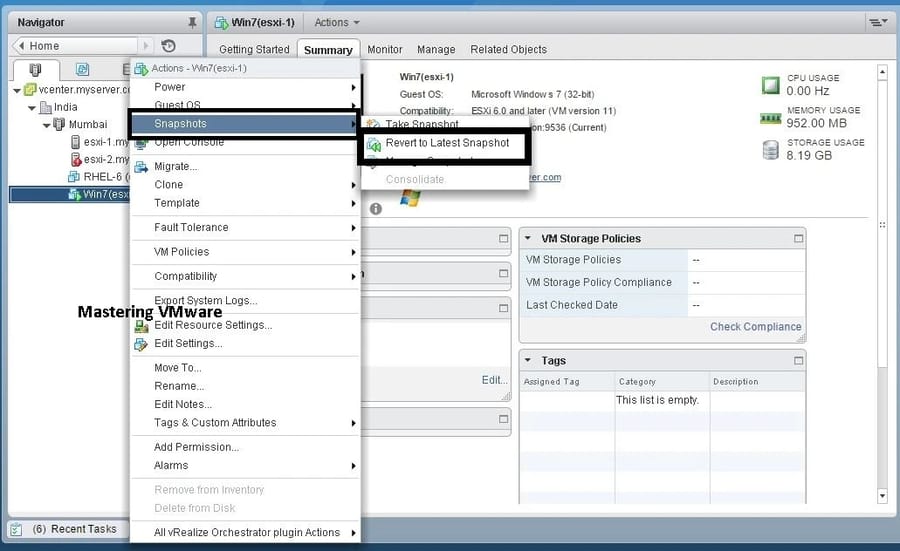
If the upgrade fails, the system will automatically attempt to revert to the previous version of Windows Server. If this automatic rollback fails: if you used a VM Snapshot, restore it immediately. Otherwise, the only safe option is to restore the entire system from the comprehensive backup you created during the preparation phase.
Know your recovery options before the maintenance window. Automatic setup rollback handles many failures on its own. Beyond that, you've got snapshot/checkpoint restoration (short-term only), system-state restoration, bare-metal recovery, and side-by-side failover. Long-lived snapshots hurt performance and storage, so don't lean on them as a real DR strategy.
💡 Best Practices for a Smooth Windows Server Upgrade
| Best Practice | Description |
| Test in a Lab Environment | Run the upgrade in a test environment first to identify potential issues safely. |
| Incremental Upgrade | Avoid big version jumps; upgrade step by step (e.g., 2016 → 2019 → 2025). |
| Full Documentation & Backup | Record all configurations and take a verified full backup before starting. |
| Planned Downtime Window | Schedule the upgrade during off-peak hours and allow buffer time for issues. |
| Check Driver Compatibility | Verify all hardware drivers are supported in the target Windows Server version. |
| Disable Third-Party Software | Temporarily disable antivirus and monitoring tools to avoid interference. |
| Ensure Adequate Disk Space | Make sure the system drive has enough free space for setup and temporary files. |
| Post-Upgrade Monitoring | Re-enable and configure monitoring tools to track system health. |
| Performance & Load Testing | Test server performance under real workloads after the upgrade. |
🏁 Conclusion
Upgrading to Windows Server 2025 is a necessary investment for the future of your IT infrastructure. Sometimes fresh infrastructure beats an in-place upgrade — especially for a side-by-side migration where the old server stays online as your fallback. However, if your current infrastructure is outdated, complex, or too fragile to risk failing with an in-place upgrade, it may be time to move to a modern, powerful hosting platform.
Our Windows VPS services at 1Gbits give you servers with instant configuration, dedicated resources, and 24/7 support — exactly what you need to run enterprise applications or test server upgrades. For a broader comparison of providers, see our guide to the best Windows VPS options.

Leave A Comment