
This tutorial will explain the process of installing phpMyAdmin on CentOS 7 with Nginx. The method mentioned in this article will be the same for newer CentOS versions (like CentOS 8).
PHPMyAdmin is a web-based GUI (graphical user interface) that allows administrators to create, store and edit databases created with MySQL. While you can interact directly with the system console from the MySQL prompt, having a GUI is preferred by many database administrators.
This tutorial will show you how to install phpMyAdmin with Nginx on CentOS 7.
Prerequisites
Before we get started, you will need the following:
- Connection to the server via SSH
- LEMP is installed on your CentOS server.
- Access to the root user or a user with Sudo privileges
- Basic understanding of Linux commands
Now that LEMP is set up, you can proceed with installing phpMyAdmin on your CentOS server. For a step-by-step guide on how to do this using Nginx, refer to our detailed article on installing phpMyAdmin with Nginx on CentOS.
Step 1: Installing phpMyAdmin
Now that we have access to the server via SSH and the server is equipped with the LEMP stack let’s install phpMyAdmin. Since it’s unavailable from the CentOS default repository, we will download the EPEL repository.
To install EPEL, enter the following command:
sudo yum install epel-release
Now, we can go ahead and install phpMyAdmin.
sudo yum install phpmyadmin
Before running this command, be sure that you have Nginx and PHP 7 installed on your system. This is crucial for the tutorial to proceed further.
If you haven't installed Nginx yet, check out our detailed guide on installing Nginx on CentOS to ensure your server is set up correctly before continuing with the phpMyAdmin installation.
Once the installation is complete, we must create a symbolic link between the installation files and our Nginx document. This needs to be done so that the Nginx web server can correctly find and serve the phpMyAdmin files.
sudo ln -s /usr/share/phpMyAdmin /usr/share/nginx/html
Restart the PHP processor and Nginx so that the changes made will come into effect:
sudo systemctl restart php-fpm
systemctl restart nginx
With that, our phpMyAdmin installation is now operational. The tutorial's next part is connecting to the phpMyadmin web interface.
Step 2: Accessing the phpMyAdmin web interface
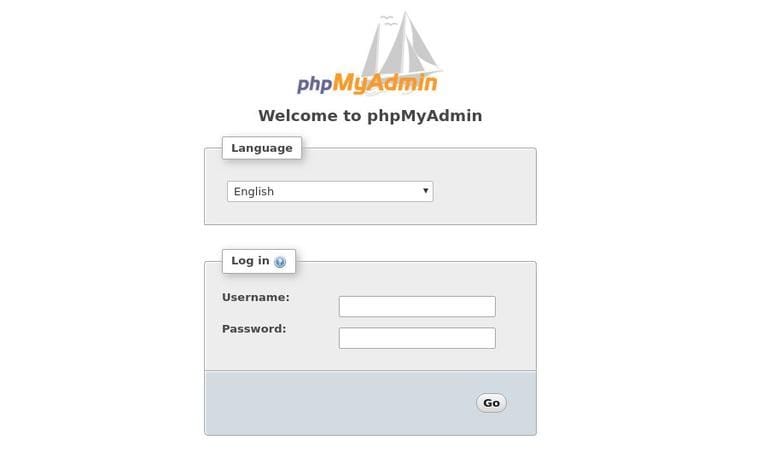
Now that the server is up and running, you can access the web user interface through the web browser. Enter the following command on your web browser.
http(s)://your_domain_or_ip_address/phpmyadmin
Don’t forget to enter your IP address (or domain name).
Enter the username and password and click on Go.
Once you log in, you’ll see the phpMyAdmin dashboard, which will look something similar to this one:
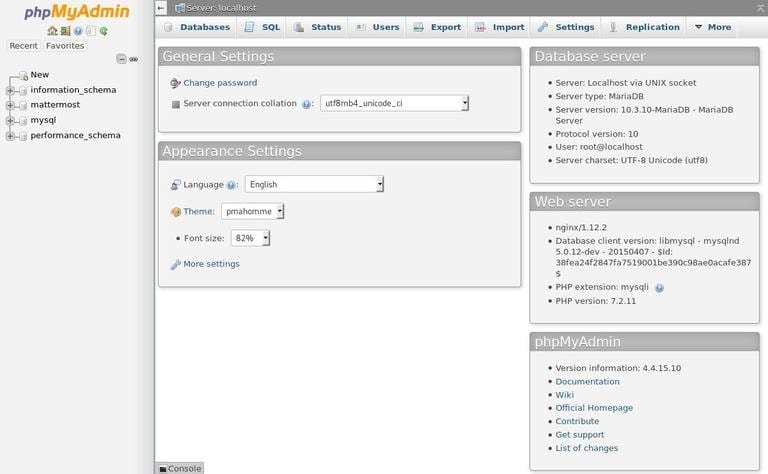
You can click around to get familiar with the interface and what each of them does.
Step 3: Change the login URL
The web interface makes the work easier, but it also poses a security threat. By doing this, we have exposed our MySQL system to the rest of the world. To combat this, we will change the URL of the web interface.
For our Nginx web server to find and serve our phpMyAdmin files, we created a symbolic link from the phpMyAdmin directory to our document root in an earlier step. To change the URL, we will need to change the name of the symbolic link. To do this, enter the following commands:
cd /usr/share/nginx/html
ls -l
-rw-r--r-- 1 root root 537 Aug  5 08:15 50x.html
-rw-r--r-- 1 root root 612 Aug  5 08:15 index.html
lrwxrwxrwx 1 root root  21 Aug  6 17:29 phpMyAdmin -> /usr/share/phpMyAdmin
As you can see, we have a symbolic link called phpMyAdmin in this directory, and we should change it to something else. This will change the location where phpMyAdmin can be accessed from a browser, which can help obscure the access point from hard-coded bots.
To rename the link enter the following:
sudo mv phpMyAdmin notimportant
ls -l
-rw-r--r-- 1 root root 537 Aug  5 08:15 50x.html
-rw-r--r-- 1 root root 612 Aug  5 08:15 index.html
lrwxrwxrwx 1 root root  21 Aug  6 17:29 notimportant -> /usr/share/phpMyAdmin
Now to access the web interface, instead of using the previous URL, you will need to use the following:
http://server_domain_or_IP/ notimportant
Step 4: Web server authentication
As an additional layer of security, we will now set up authentication for Nginx. To do this, first, we will create a password file to store the authentication credentials. Enter the following command but remember to change the tester to match your username.
htpasswd -c /etc/nginx/.htpasswd tester
New password:
Re-type new password:
Adding password for user tester
There should now be a .htpasswd file containing your username and encrypted password. You can check with:
cat /etc/nginx/.htpasswd
username:$apr1$vXURQ.rv$f6S86nCX.fKfjbYNTUPzV.
Now we are ready to modify our Nginx configuration file. Open this file using the nano text editor to get started:
nano /etc/nginx/conf.d/default.conf
Within this file, we need to add a new location section. This will target our location for our phpMyAdmin interface (we selected /notimportant in this tutorial).
Create this section within the server block but outside of any other blocks. Within this block, we need to set the value of a directive called auth_basic to an authentication message that our prompt will display to users. We do not want to indicate what we are protecting to unauthenticated users, so do not give specific details. We will just use "Admin Login" in our example.
To further secure your CentOS server, consider setting up a complete LAMP stack as it offers an alternative environment for hosting dynamic web applications alongside Nginx. For detailed steps on how to install LAMP on CentOS 7, you can refer to our guide on installing LAMP stack on CentOS 7. This can complement your setup, allowing for more versatile configurations.
We then need to use a directive called auth_basic_user_file to point our web server to the authentication file we created. Nginx will prompt the user for authentication details and check that the inputted values match what it finds in the specified file.
The file should look like this:
server {
    ...
    location / notimportant {
        auth_basic "Admin Login";
        auth_basic_user_file /etc/nginx/.htpassword;
    }
    ...
}
To implement the changes on the web server, enter the following command:
systemctl restart nginx
Now, if we visit our phpMyAdmin location in our web browser. You should be prompted for the username and password you added to the .htpassword file:
http://server_domain_or_IP/ notimportant
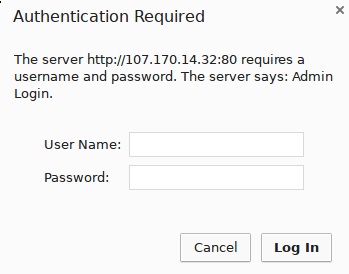
Once you enter your credentials, you will be taken to the normal phpMyAdmin login page.
Conclusions
Congratulations on successfully installing and securing phpMyAdmin with Nginx on CentOS 7. You can now manage your MySQL databases from a reasonably secure web interface. This UI exposes most of the functionality that is available from the MySQL command prompt. You can view databases and schema, execute queries, and create new data sets and structures. also, With their reliable services and top-notch infrastructure, 1gbits buy CentOS VPS that cater to your specific hosting needs. Whether you require a robust hosting environment for your website or a secure platform for your applications, 1gbits' CentOS VPS solutions provide the performance and stability you seek. Don't hesitate to choose 1gbits for your CentOS VPS needs.
If you're looking for a seamless remote desktop solution for managing your CentOS server, consider setting up XRDP. You can follow our comprehensive guide on how to install XRDP on CentOS to enable remote desktop access, allowing you to manage your server efficiently from a graphical interface. This adds even more flexibility to your CentOS environment alongside phpMyAdmin.
People also read:
- How To Install phpMyAdmin on Ubuntu 18.04
- How To Install XCache for PHP on CentOS
- How To Install Kloxo MR on CentOS 7
- How To Install Gnome GUI on CentOS 7
- How To Install MySQL on Centos 7
Leave A Comment