
Have trouble installing the LAMP stack on your system? Don’t worry; we got you covered. This tutorial will follow the steps needed to set up LAMP on your CentOS server.
The LAMP stack is a bundle of software used to serve dynamic web pages and web applications. LAMP stands for:
- A Linux operating system (CentOS 7)
- An Apache server
- A MySQL (MariaDB) database server
- The PHP programming language
Each layer in the LAMP stack represents open-source software required for developing web applications. The backend will be stored in the MySQL database, and the dynamic processing will be handled through PHP. This tutorial will go through the steps to set it up on a CentOS 7 server.
For added security after installing LAMP, consider disabling ping responses on your CentOS server. Check out our guide on How to Disable Ping in CentOS for step-by-step instructions.
Note: The following steps will be exactly the same if you want to set it up on CentOS 8.
Prerequisites
Before we get started with the installation, you will need to have the following:
- SSH access to a CentOS 7 VPS
- Access to the root user account or an account with sudo privileges
- A basic understanding of basic Linux commands
The installation process will be completed in 5 different steps. We have divided the process into 5 easy steps so that you will have a better understanding, and it is also the easiest (fastest) way to get it set up on your CentOS server:
- Step 1: Update package repository
- Step 2: Install Apache
- Step 3: Install MySQL (MariaDB)
- Step 4: Install PHP
- Step 5: test PHP processing
Step 1: Update package repository
First, you will need to update the package repository. First, clean all the cache and update the yum repository using the following two commands.
sudo yum clean all
sudo yum update
This is done to remove old packages on CentOS and get the latest versions. Once the system is updated, we can move toward the second step.
Step 2: Install Apache
The first step of assembling the LAMP stack is installing the web server, as you already have a CentOS operating system. The easiest way to install Apache is through CentOS’s package manager: How to use the yum command in Linux
Enter the following command to install Apache on CentOS 7:
sudo yum install httpd
Don’t forget to press y when prompted to continue with the installation. Once the installation is completed, you will need to start Apache by running the following command:
sudo systemctl start httpd.service
To have Apache running even after a system boot up, enter the following systemctl command:
sudo systemctl enable httpd.service
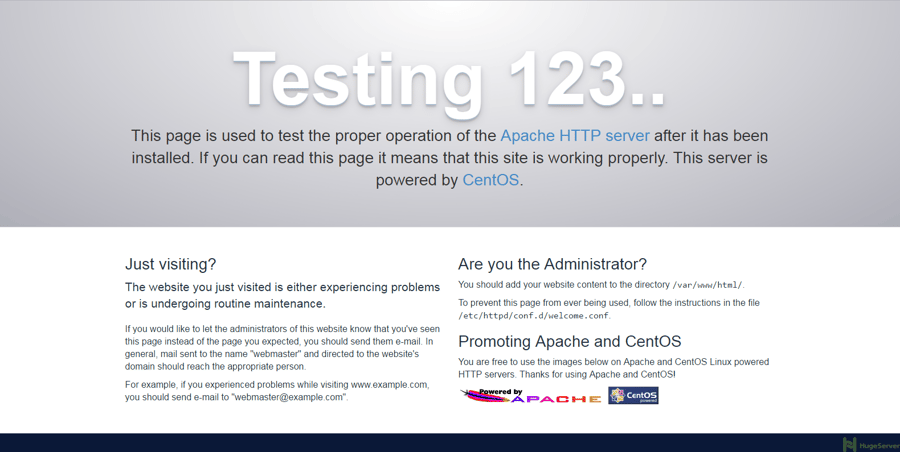
Your Apache server should be running. to verify if the service is running, you can enter your server IP address on your favourite web browser. If you see the following, your Apache server is running successfully, and we can move to step 3.
If you're looking for additional control panel options for managing your CentOS server, consider checking out our guide on How to Install cPanel on CentOS 7, which provides a comprehensive walkthrough of setting up cPanel to simplify server management.
Step 3: Install MySQL (MariaDB)
MariaDB is an open-source database management system that is a backwards-compatible replacement for MySQL. It is a multi-threaded relational database management system. You can check our article using the link for the complete MariaDB installation with all the details.
To install MariaDB, enter the following yum command:
sudo yum install mariadb-server mariadb
Don’t forget to press y when prompted to continue!
Once the installation is completed, enter the command below to start the service:
sudo systemctl start mariadb
MariaDB comes with a secure installation script that should be run to have the proper configurations. You can run the secure installation script by:
sudo mysql_secure_installation
During the setup, you will be prompted to
- Change the root password
- Remove anonymous users
- Disallow root logins remotely
- Remove the test database and access to it
- Reload privilege tables
Each step will be explained in detail, and we recommend to answer with y to all questions mentioned.
Once the secure script is run, we will enable MariaDB to start up during bootup:
sudo systemctl enable mariadb.service
Step 4: Install PHP
PHP is the last part of the LAMP stack. PHP processes the code for showing dynamic content, and once connected with the MySQL database, it will process and be displayed through the Apache webserver.
So let’s go ahead and install PHP:
sudo yum install php php-mysql
Once the installation is completed, after you press y, you need to restart the Apache webserver.
sudo systemctl restart httpd.service
Now your Apache server is co-working with PHP.
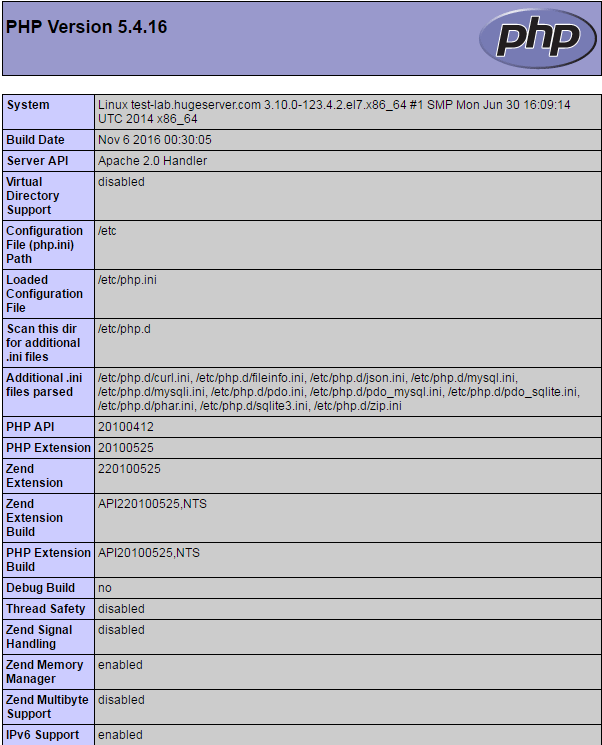
Step 5: Test PHP processing
We will need to make configuration changes to locate and serve websites. To test if the server is working, you should enter the directory /var/www/html/ which is the default directory for Apache to place websites.
Enter the directory and create an info.php file using the nano text editor.
sudo nano /var/www/html/info.php
Once you enter the text editor, copy and paste the following:
<?php
phpinfo ();
?>
Save and exit the text editor.
Now, head over to your web browser and enter the following URL. You will see the following image if everything is set up correctly.
http://server_ip_address/info.php
Additional configurations (optional)
If your server has a firewall enabled, you must open a route for the HTTP traffic to enter. You can do that by:
sudo firewall-cmd --permanent --zone=public --add-service=http
Now enter the following command to do the same for HTTPS traffic:
sudo firewall-cmd --permanent --zone=public --add-service=https
Now restart the firewall for the changes to come to effect:
sudo firewall-cmd --reload
There are a lot of additional PHP modules that you can install on your server for better performance. To look at the names and descriptions of these additional modules, enter the following command:
yum search php-
If you see a module you like, simply enter “sudo yum install”, followed by a space and the module name.
Once all the optional configurations are made, you should restart the Apache webserver for the changes to take effect:
sudo systemctl restart apache2
Conclusion
Congratulations on successfully installing the LAMP stack on your CentOS server. We hope you had a smooth installation process using the abovementioned guidelines. Now you are ready to explore all the possibilities that the LAMP stack has to offer.
If you have any problems, don’t hesitate to contact us in the comment section below! We’re here to assist you and ensure your experience is seamless. We would love to hear your feedback, so don’t forget to leave a comment in the comment section below. Your insights help us improve and assist others in their journey with the CentOS server.
If you're interested in managing your server with an efficient control panel, consider checking out our guide on Installing Plesk on CentOS 7. Plesk offers a user-friendly interface and robust features that simplify server administration.
People also read:
Leave A Comment