
Django is a robust Python Web framework that encourages rapid development and clean, pragmatic design. Built by experienced developers, it takes care of the hassle of Web development. A full-featured framework like Django allows you to get your applications and sites up and running quickly without worrying about the standard structural code to tie it together.
It is open-source software that lets you focus on the individual portions of the applications while the in-built tools will take care of the heavy lifting. Django’s primary goal is to ease the creation of complex applications and takes care of internal structures.
This tutorial will go through various methods of installing Django on a CentOS 7 server. Throughout this guide, we will cover four main ways of installing Django.
If you encounter issues with your server access, such as forgetting your root password, you may find our guide on How to Reset Forgotten Root Password on CentOS helpful. This resource will provide you with the necessary steps to regain access and continue with your installations seamlessly.
Django installation methods
There are multiple ways to install and set up Django on your CentOS server. Each method will make a different configuration in your development environment with unique advantages. Here are the four ways that we will discuss in this blog post:
- Installation through PIP: The pip tool is a Python package manager. Once you install pip on your system, it’s super easy to install Django on the system level to be used by any user. This method usually always contains the latest stable version release.
- Installation through PIP in a Virtualenv: The Python virtualenv package allows you to create self-contained environments for various projects. Using this technology, you can install Django in a project directory without affecting the whole system. This type of installation will provide you with the most flexibility.
- Global installation from packages: You can install Django easily from the EPEL repository. This is very simple but might not be as flexible as other methods. One more thing to note is that the repository might not contain the most recent version of Django.
- Installation from git: If you wish to install the latest development version instead of the stable release, you will have to acquire the code from the git repository. Development versions do not have the same stability, but you can get the latest features and fixes.
Now let’s get to the installation process.
If you're also looking to manage DNS effectively on CentOS 7, consider checking our guide on Installing BIND on CentOS 7. This resource will help you set up a robust DNS server to complement your network management.
Prerequisites
Before we get started, you will need the following:
- A CentOS 7 server (VPS)
- A basic understanding of Linux commands
- A root user or a user with Sudo privileges
Installing the EPEL repository
We will need to install the EPEL repository for all the mentioned installation types beforehand. The EPEL repository contains extra packages not maintained as part of the core distribution. It is effortless to install the EPEL repository. Enter the following command:
sudo yum install epel-release
Once the installation is completed, update the system. We also recommend rebooting the system to have all the configurations in place.
sudo yum update -y && sudo reboot
After the reboot is finished, log in with the same user.
1. Installation through PIP
When installing Django using pip, we will first install the pip package manager on the system. You can directly install the pip package manager from the EPEL repository by entering the following command:
sudo yum install python-devel python-setuptools python-pip
sudo pip install --upgrade pip
Now that pip is installed on the system, enter the following command to install Django globally:
sudo pip install Django
That’s all! You can verify the installation by entering the following command:
django-admin --version
You will see an output with the Django version that was installed.
2. Installation through pip in a virtualenv
We believe the most flexible way to install Django is through the virtualenv tool. With this tool, you can create virtual Python environments where you can install Python packages without affecting the rest of the system. This will allow you to select different Python packages on a project basis which will not conflict with other projects running on the system.
To ensure your web server is fully operational and supports your Django applications, consider installing a LAMP stack on CentOS 7. For a comprehensive guide, check out our article on How to Install LAMP Stack on CentOS 7.
First, we will install pip from the EPEL repository:
sudo yum install python-devel python-setuptools python-pip
sudo pip install --upgrade pip
Now, we will install the virtualenv package:
sudo pip install virtualenv
Now, whenever you start a new project, you can create a virtual environment for it. Let’s start this by creating a new directory and entering it (Replace newproject with the name of your project).
mkdir ~/newproject
cd ~/newproject
To create a virtual environment within the project, enter the following:
virtualenv testenv
This will install a standalone version of Python and pip into an isolated directory structure within your project directory. We chose to call our virtual environment testenv, but you should name it something descriptive.
To install packages into the isolated environment, we must activate them first. To do that, enter the following:
source testenv/bin/activate
Once you enter this command, your shell prompt will change to something like this: (testenv)username@hostname:~/newproject$
Now we can go ahead and install Django. Here you won’t need to use Sudo since you will be installing it locally:
pip install django
To verify the installation, enter the following:
django-admin --version
You will see an output with the Django version that was installed.
If you want to exit your virtual environment, enter the command anywhere in the system.
deactivate
If you exited successfully, your prompt should revert to the conventional display. Reactivate the virtual environment by moving into the project directory when you wish to work on your project.
cd ~/newproject
source testenv/bin/activate
3. Global installation from packages
Installing Django from the local repository is straightforward. You can use the yum command to download and install the relevant packages:
sudo yum install python-django
Once the installation is completed, you can test if everything was set successfully by entering the following command:
django-admin --version
You will see an output with the Django version that was installed.
4. Installation through git
If you want to install the development version of Django, you can download it directly from its git repository. To do this, you will need to install git on your system. Once it is installed, we can install the pip Python package manager to handle the installation of Django once it has been downloaded.
sudo yum install git python-pip
Once you have git on your system, you can clone the Django repository. This repository will have more up-to-date software with many features but probably at the expense of stability. You can clone the repository to a directory called django-dev within your home directory by typing:
git clone git://github.com/django/django ~/django-dev
Once the repository is cloned, let’s go ahead and install it using the pip command. We will use the –e option to install it in editable mode.
sudo pip install -e ~/django-dev
Once the installation is completed, enter the following command to check the version of Django installed on the system.
django-admin --version
You will see an output with the Django dev version that was installed.
Creating a sample Django project
Now that we covered four different ways of installing Django on your system, let’s go ahead and create a sample project.
We will create a directory called tst1 in the working directory and store all the necessary files.
django-admin startproject tst1
cd tst1
Now run the following commands. First, to bootstrap the database on more recent versions of Django, enter this command:
python manage.py migrate
Now you will need to create an administrative user. This will be done manually using the following command:
python manage.py createsuperuser
You will be prompted to enter a username, an email address and a password for the user. Once the user is set in place, we can start a Django development server to see what a new Django project looks like in the browser.
Only use this for development purposes:
python manage.py runserver 0.0.0.0:8000
Since we’re specifying port 8000, we will need to allow access to it from the firewall. To do this, enter the following command and restart the firewall to make the changes permanent.
sudo firewall-cmd --zone=public --permanent --add-port=8000/tcp
sudo firewall-cmd –reload
Now go to your browser and enter your server IP address as shown below:
server_ip_address:8000
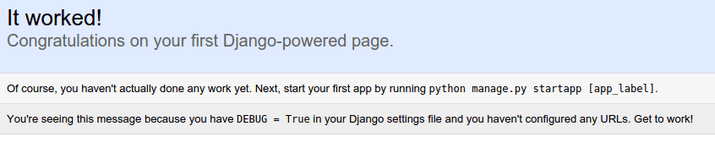
If you do something like this, congratulations! You have successfully created a Django project.
Now we can go ahead and view the admin side of things by making a small change to the URL as shown below:
server_ip_address:8000/admin

If you enter the admin username and password you just created, you should be taken to the site’s admin section. Once you finish working on the site, go to your terminal and press CTRL + C to quit the application.
The Django project you’ve created provides the structural basis for designing a complete site. Check out the Django documentation for more information about how to build your applications and customize your site.
Conclusion
Now, after going through the tutorial, you should be able to install and configure Django on your CentOS server successfully. Django provides the essential tools needed to create and manage powerful web applications, enabling you to develop robust solutions tailored to your needs. We also covered the procedure for creating a sample project and launching the developer server from the web browser.
If you’re looking to expand the capabilities of your server, consider checking out our guide on Installing the IonCube Loader on CentOS. This will help you ensure your server can run PHP applications that require this loader, further enhancing your development environment.
With proper integration of the complete web framework of Django, it’s possible to make development faster and focus more on your applications' unique aspects. By leveraging Django on your CentOS server, you can streamline your workflow, enhance performance, and ensure your applications are scalable and maintainable.
Dive into the world of web development with Django on your CentOS server and unlock the potential of your projects today!
People also read:
Leave A Comment