
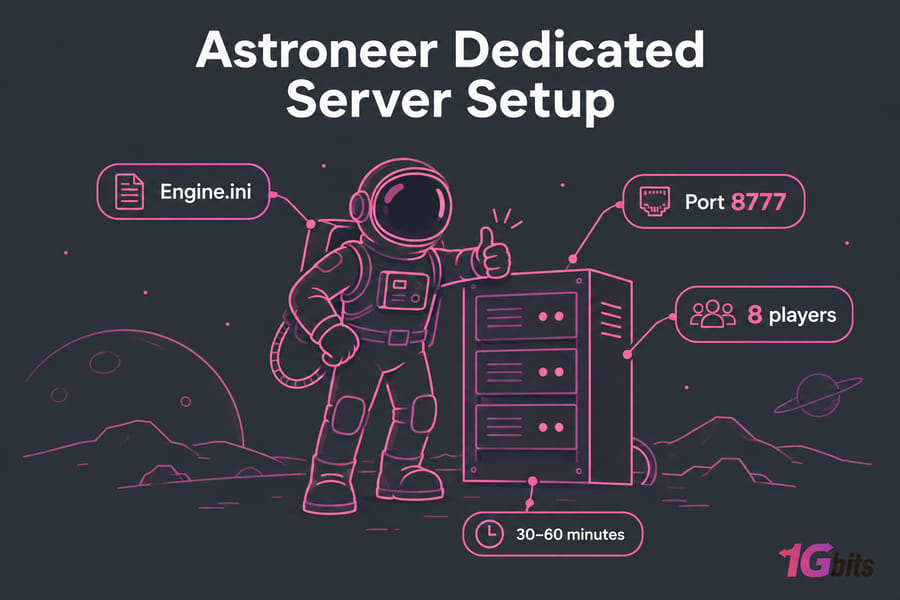
If you're searching for an Astroneer dedicated server setup guide for beginners, you probably want one thing: a world your friends can join whenever they like, without waiting for you to launch the game. You can build one yourself for free. It takes about 30–60 minutes the first time, and most of that goes into editing two config files and opening one port.
Quick answer: Install the free ASTRONEER Dedicated Server tool from Steam or SteamCMD. Run it once so it creates its config files. Set Port=8777 in Engine.ini, then add your PublicIP and owner details in AstroServerSettings.ini. Open and forward the port, and join from the in-game server list.
Warning: Self-hosting means changing your firewall and router settings. System Era says openly that its host-your-own directions come with no warranty or support, and that opening your network to outside connections is at your own risk.
What Is an Astroneer Dedicated Server?
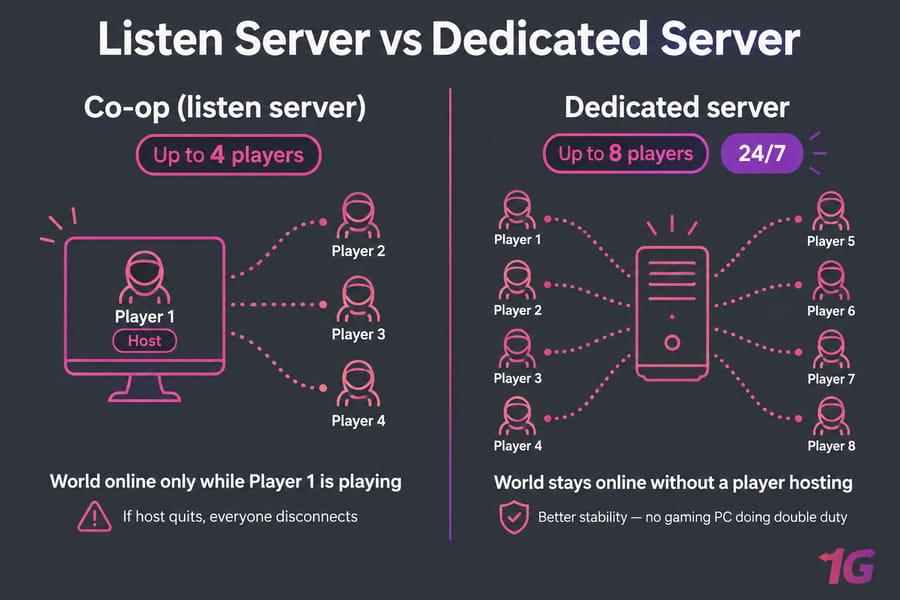
An Astroneer dedicated server is a separate "headless" program that runs your world with nobody sitting at the screen. In normal co-op, one player's game acts as the host (a listen server). When that player quits, everyone else gets kicked.
A dedicated server fixes that. Here's how the two compare:
- Co-op (listen server): up to 4 players, and the world only exists while the host is playing.
- Dedicated server: up to 8 players, and the world stays online around the clock.
- Stability: no one's gaming PC is doing double duty, so frame drops on the host don't cause lag for everyone else.
System Era Softworks publishes the server as a free tool. You don't need to buy a second copy of the game to run it.
Astroneer Server Hosting Options: Self-Hosted vs Managed
Before you install anything, decide who's going to run the machine. You've got two broad paths.
When Self-Hosting Makes Sense
With self-hosting, you install the files, edit the configs, open the ports and keep the server running. That gives you full control and costs nothing if you already own a spare Windows PC. The catch is simple: if that PC goes to sleep, your world goes offline too.
When a Managed Astroneer Host Is Better
Managed providers like GPORTAL and Nitrado give you a web panel, file uploads and backups, and they handle the hardware. They also matter for crossplay, because official provider servers are the route System Era points people to for wider platform support (more on that below).
Home PC vs VPS vs Dedicated Server
| Option | Best for | Difficulty | Cost | Uptime | Control |
| Home PC | Testing, weekend sessions | Medium (router work) | Free | Only while your PC is on | Full |
| VPS (virtual private server) | Small groups that want 24/7 access | Medium | Low monthly | High | Full (admin access) |
| Dedicated server | Big bases, several game servers on one box | Medium | Higher monthly | High | Full, with all hardware to yourself |
| Managed game host | People who never want to touch an INI file | Easy | Low–medium monthly | High | Limited to the panel |
If you want full control without keeping your own PC on, a Windows game VPS hosting plan is a good middle ground. Larger groups, or people running several game worlds, may be better off with game dedicated server hosting.
Astroneer Crossplay and Platform Compatibility Explained
Read this section before you install anything. It's the step people skip most often, and skipping it wastes the most time. I've seen people spend an evening on port forwarding only to learn their Xbox friend could never have joined.
| Player platform | Self-hosted server | Official provider server | Notes |
| Steam (PC) | Yes | Yes | This is the native platform for the host-your-own tool |
| Epic Games Store | Yes | Yes | Crossplays with Steam and PlayStation |
| PlayStation | Yes (per community wiki) | Yes | In the same crossplay group as Steam and Epic |
| Xbox / Microsoft Store | No | Yes, on the Microsoft-side server version | Separate crossplay group |
| Nintendo Switch | No | No | No dedicated server option at all |
According to the Astroneer community wiki, Steam, Epic and PlayStation versions crossplay with each other but not with Microsoft Store, Xbox or Switch. Providers therefore sell two separate server versions. Parts of that wiki page are marked as possibly outdated, and platform support can change after patches, so check the official Discord's #self-host-talk channel if you're unsure.
Key takeaway: if anyone in your group plays on Xbox or through the Microsoft Store, go straight to an official provider server.
How Many Players Can Join?
Up to 8 at the same time. That limit is the same whether you host the server yourself or rent one.
Astroneer Server Requirements for Beginners
The official host-your-own method uses Steam or SteamCMD and Windows config files (the folder is literally called WindowsServer). Community Linux builds exist, but this guide sticks to Windows because that's what System Era documents.
Here's what you need:
- A Windows PC, a Windows VPS or a Windows dedicated server
- Steam, or SteamCMD (Valve's command-line installer)
- A text editor such as Notepad or Notepad++
- Access to your router's admin page and to Windows Firewall
- A public IP address, meaning the one the internet sees, not your 192.168.x.x LAN address
- A machine that can stay online while people play
System Era doesn't publish an official spec sheet for the server. The numbers below are practical recommendations drawn from hosting providers' documentation, not official minimums. Astroneer servers often use 2–4 GB of RAM at first and grow past 6 GB once bases get complex, mostly because of tethers and item counts.
| Resource | Minimum (small group) | Recommended |
| CPU | 2 vCPU | 4 vCPU with high clock speed |
| RAM | 4 GB | 8 GB |
| Storage | SSD | NVMe SSD |
| Network | Stable upload with a public IP | Data center connection |
How to Install an Astroneer Dedicated Server
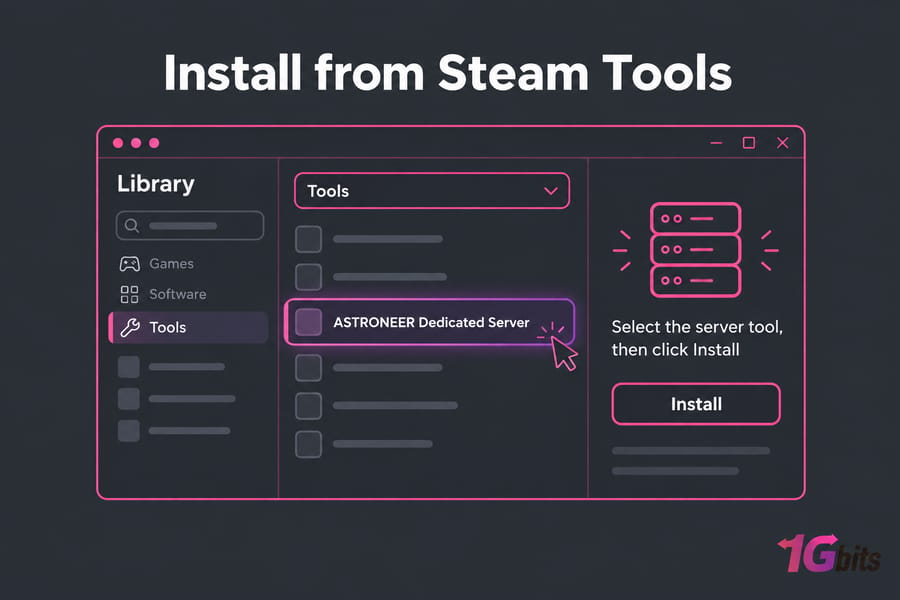
Method 1: Install from Steam Tools
- Open Steam and go to Library.
- Change the dropdown filter to show Tools.
- Find ASTRONEER Dedicated Server and click Install.
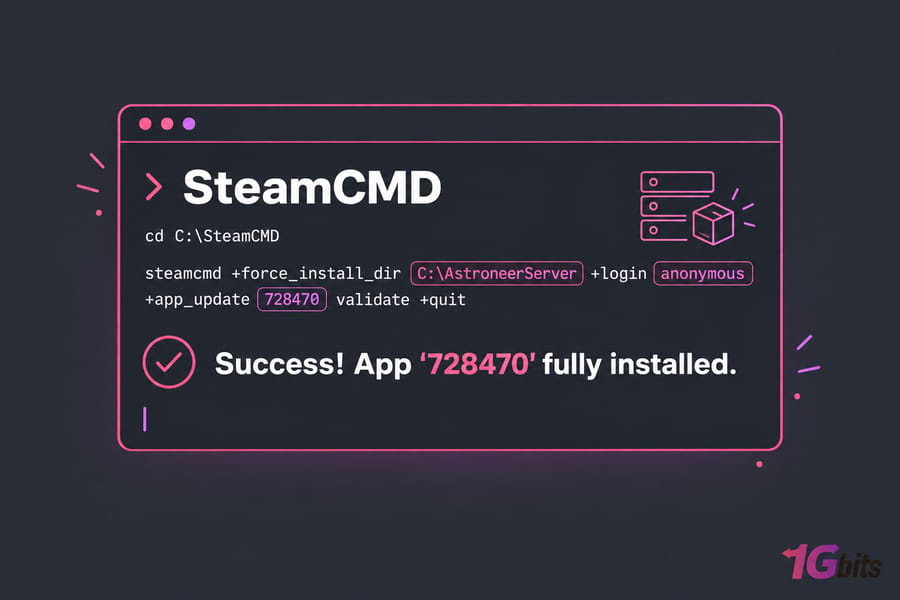
Method 2: Install with SteamCMD Using App ID 728470
Use SteamCMD on a remote VPS or dedicated server where you don't want the full Steam client. It logs in anonymously, so you don't need to put your own Steam account on the box. If you're new to remote machines, start with this guide on how to connect to a VPS.
Extract SteamCMD to C:\SteamCMD, open Command Prompt as administrator, and run:
cd C:\SteamCMD
steamcmd +force_install_dir C:\AstroneerServer +login anonymous +app_update 728470 validate +quit
Run the same command again whenever the game updates. It updates the server files in place.
Run the Server Once to Generate Config Files
Don't skip this step. The config files often don't exist until the server has started once.
- Double-click
AstroServer.exein the install folder. - If Windows asks you to install a Microsoft Visual C++ redistributable or UE4 prerequisites, accept.
- Wait about a minute, then close the server window.
Pro tip: if the window flashes and closes straight away on first launch, that's often expected. Check whether the Config folder has appeared before you start troubleshooting.
Astroneer Server Settings: How to Edit Engine.ini and AstroServerSettings.ini
Both files are in:
ASTRONEER Dedicated Server\Astro\Saved\Config\WindowsServer\Warning: Don't edit either file while the server is running. System Era's guide says changes made while it runs won't be saved. I learned this the hard way. Close the server, edit, save, then start it again.
Set Port=8777 in Engine.ini
Open Engine.ini and add:
; Engine.ini
[URL]
Port=8777
You can pick another port, but 8777 is the one most guides use. This line only tells Astroneer which port to listen on. It doesn't open anything in your firewall.
Add PublicIP, OwnerName, and OwnerGuid
Open AstroServerSettings.ini. Some fields will already be there. Edit them to match this:
; AstroServerSettings.ini
PublicIP=YOUR.PUBLIC.IP.HERE
OwnerName=YourSteamName
OwnerGuid=0
ServerName=My Astroneer Server
ServerPassword=
ActiveSaveFileDescriptiveName=SAVE_1
To find your public IP, search "what is my IP" from the server machine. If the difference between public and private addresses is new to you, this explainer on what is an IP address covers it in about five minutes.
Set Server Name, Password, and Active Save
| Setting | File | Example | What it does |
Port |
Engine.ini | 8777 | Sets the port the server listens on for players |
PublicIP |
AstroServerSettings.ini | 203.0.113.50 | The address players type in to connect |
OwnerName |
AstroServerSettings.ini | YourSteamName | The Steam name that becomes server owner when it first joins |
OwnerGuid |
AstroServerSettings.ini | 0 | Leave at 0. The server fills it in once the owner connects |
ServerName |
AstroServerSettings.ini | My Astroneer Server | The name shown in the server list |
ServerPassword |
AstroServerSettings.ini | (blank) | Optional. Fill it in to make the server private |
ActiveSaveFileDescriptiveName |
AstroServerSettings.ini | SAVE_1 | Chooses which save file the server loads |
Astroneer Port Forwarding and Firewall Setup
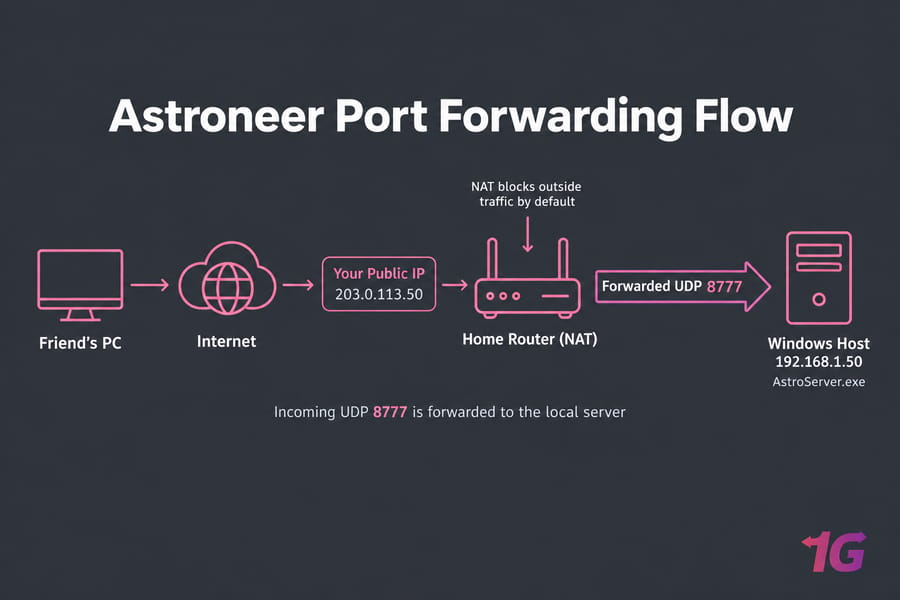
This is where most setups fail. You need two things: a firewall rule on the server and, if you're hosting at home, a port forward on your router. If either one is missing, nobody outside your house can connect.
Open the Astroneer Server Port in Windows Firewall
- Open Windows Defender Firewall with Advanced Security.
- Go to Inbound Rules → New Rule → Port.
- Choose UDP and enter
8777. - Allow the connection, apply it to all profiles, and name it "Astroneer Server".
On a VPS, check whether your provider also has a network firewall. This guide on how to configure a firewall on your VPS walks through both layers.
Forward UDP 8777 in Your Router
Every router brand hides this in a different menu, which is why System Era doesn't document it. The idea is always the same: send incoming UDP traffic on port 8777 to your server's local IP. Give that machine a static LAN IP first, or the forward will break the next time your router hands it a different address. If you need help, see how to do port forwarding.
UDP (User Datagram Protocol) is the connection type games use for fast traffic. NAT (Network Address Translation) is how your router shares one public IP across all your devices. Port forwarding makes an exception in NAT so outside traffic reaches your server.
Verify the Port and Test the Connection
Pro tip: test with a friend outside your home network. Connecting from your own LAN doesn't prove the server works publicly, because many routers won't loop traffic back to their own public IP.
How to Join Your Astroneer Dedicated Server
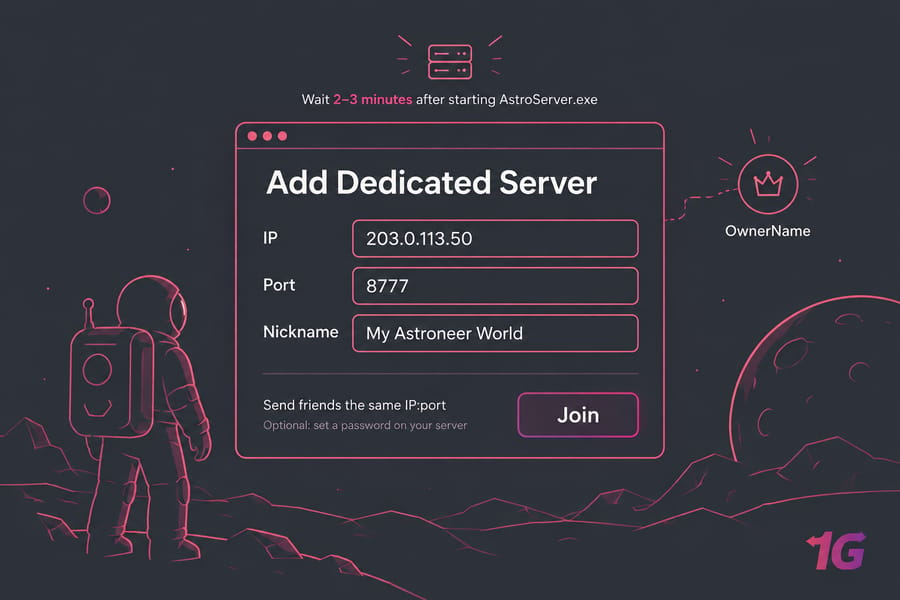
- Start
AstroServer.exeand give it 2–3 minutes to register. - Launch Astroneer and open the server list.
- Choose Add Dedicated Server.
- Enter the IP and port, for example
203.0.113.50:8777. - Give the server a nickname, then click Join.
If your Steam name matches OwnerName, the server makes you the owner when you join. Press ESC and a crown icon should appear. That's the admin menu, where you can promote friends, kick players and manage the whitelist. Send friends the same IP:port and the password, if you set one.
How to Upload a Save to an Astroneer Server
You can move an existing local world onto the server. On your gaming PC, local saves are usually in:
%LocalAppData%\Astro\Saved\SaveGames\- Stop the server.
- Copy your
.savegamefile into the server'sAstro\Saved\SaveGames\folder. - Look at the filename. It will be something like
MYWORLD$2024.05.10-18.22.41.savegame. The part before the$is the descriptive name. - Set
ActiveSaveFileDescriptiveName=MYWORLDinAstroServerSettings.ini. - Restart the server and join to check the world loaded.
Quick summary: copy the save, set ActiveSaveFileDescriptiveName, restart, test. On managed hosts you'll do the same thing through FTP or a web panel instead of Windows Explorer. Always keep the original file until you've confirmed the migration worked.
Astroneer Server Troubleshooting for Common Setup Problems
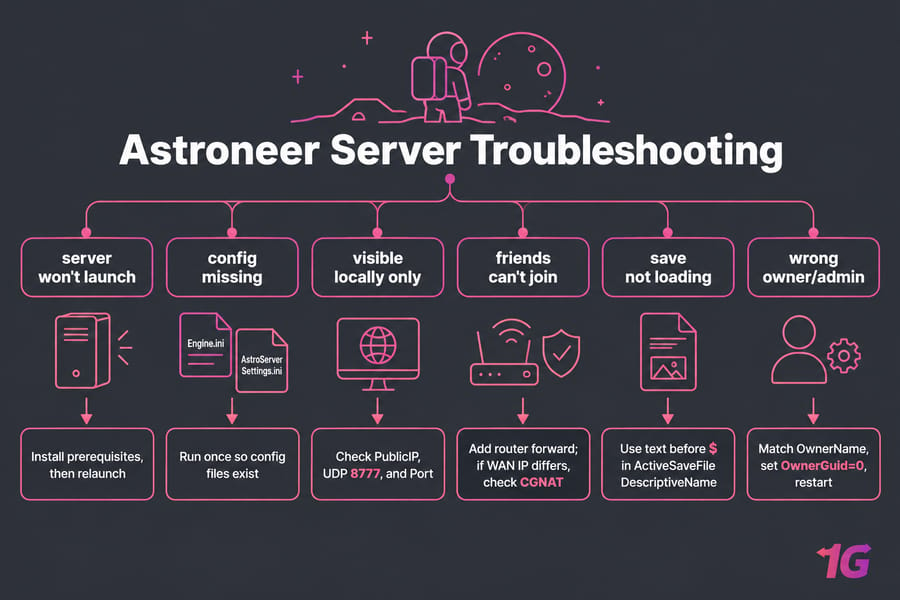
| Symptom | Likely cause | Fix |
| Server starts, then closes | First-run behaviour, or the C++ redistributable is missing | Install the prerequisites, confirm the config files now exist, then relaunch |
| Config changes disappear | You edited while the server was running | Stop the server, edit again, save, restart |
| Server not showing up in the list | Wrong PublicIP, firewall rule missing, or wrong port |
Re-check your public IP, the UDP 8777 rule, and that Port matches |
| Works locally, friends can't connect | No router forward, or CGNAT from your internet provider | Add the forward. If the router's WAN IP differs from your public IP, you're behind CGNAT |
| One friend can't join at all | Their platform isn't compatible (Xbox or Microsoft Store) | Use an official provider's Microsoft-side server |
| No crown or admin menu | Your Steam name doesn't exactly match OwnerName |
Fix the name, set OwnerGuid=0, restart |
| New world loads instead of your save | The filename and ActiveSaveFileDescriptiveName don't match |
Use only the text before the $ |
To confirm the server is actually listening, check open ports in Windows with netstat -ano | findstr 8777. If nothing comes back, the problem is the server or its config, not your network.
CGNAT (carrier-grade NAT, where your provider shares one public IP among many customers) is the one problem you can't fix at home. If you're behind it, moving the server to a machine in a data center removes almost every home-network obstacle.
Best Astroneer Dedicated Server Hosting for Beginners
Most groups outgrow home hosting within a few weeks. Someone wants to play at 2 a.m., your PC restarts for a Windows update, or your upload speed can't keep up with eight players moving across a planet.
Hosted infrastructure fixes those problems:
- Uptime: your world stays online whether or not your gaming PC is on.
- Low latency: data center networks give steadier ping than a home connection.
- No router work: you get a real public IP with no CGNAT, so all you need is a firewall rule.
- Dedicated resources: NVMe storage and enough RAM for tether-heavy bases.
Which should you pick? If you'd rather never open an INI file, a managed game host with a control panel is the simplest option. If you want full admin access and room to run other games too, a VPS or dedicated server is the better fit. You follow the same steps from this guide, just without the router. 1Gbits offers Astroneer dedicated server hosting on Windows machines with full control. You still set up the server yourself, but you don't have to deal with a home network.
Skip the home-network headaches: Explore Astroneer hosting plans and keep your world online around the clock.
Running more than one game? The same process works for a Valheim dedicated server setup, our Satisfactory dedicated server guide, and a Project Zomboid dedicated server setup.
Final Setup Checklist and Next Steps
- Confirmed every player is on a compatible platform
- Installed ASTRONEER Dedicated Server through Steam Tools or SteamCMD
- Ran
AstroServer.exeonce to create the config files - Set
Port=8777inEngine.iniwith the server stopped - Added
PublicIP,OwnerNameandOwnerGuid=0 - Opened UDP 8777 in Windows Firewall
- Forwarded UDP 8777 on your router, if hosting at home
- Joined through Add Dedicated Server and saw the admin crown
- Imported your save (optional)
- Tested with a friend outside your network
Got everything ticked? Then your world is live. If keeping a home PC on all the time is getting old, view Astroneer dedicated server plans or compare game VPS options and move the server somewhere that stays online.

Leave A Comment