

Satisfactory Dedicated Server Setup in Under 30 Minutes
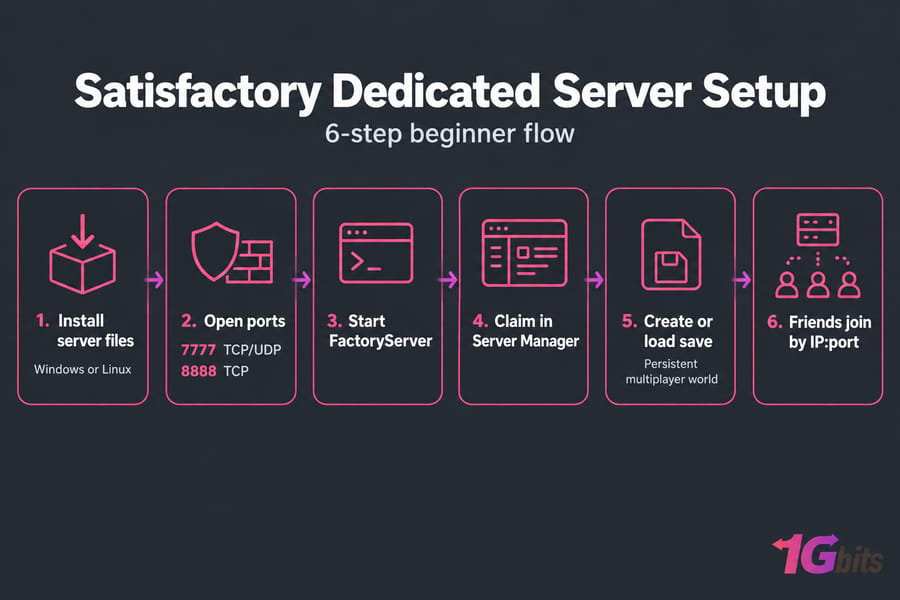
A Satisfactory dedicated server setup gives you a persistent multiplayer world that runs on Windows or Linux without the host player being online. Install the dedicated server files, open port 7777 (TCP and UDP) plus port 8888 (TCP), start the server, claim it inside Satisfactory Server Manager, set an admin password, then create or load a save.
That's the whole thing in one paragraph. The rest of this beginner guide fills in the details — the exact commands, the firewall rules, and the four or five places where people get stuck and give up.
I've set these up on home PCs, on a €5 VPS, and on proper bare metal. They all work. They just fail in different ways, which is why the troubleshooting section further down is the part you'll probably bookmark.
What Is a Satisfactory Dedicated Server and How Does It Work?
Coffee Stain Studios ships a free, standalone server application separate from the game itself. It runs headless — no graphics, no player character, just the simulation ticking away on a machine somewhere.
Dedicated server vs player-hosted session
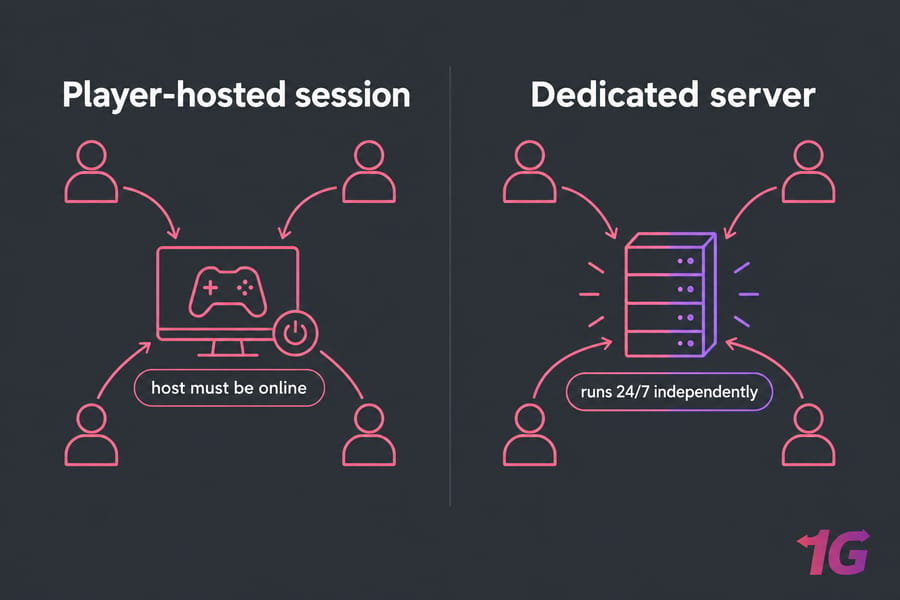
- Player-hosted: one person's game client is the server. They log off, everyone gets kicked. Their framerate tanks, everyone lags.
- Dedicated: the world lives on its own machine. Your friend in another timezone can build at 3 AM while you sleep.
When it's actually worth the effort
If you play with 2–6 people on wildly different schedules, it's worth it. If two of you always play together at the same time, honestly? Just use a regular session. The dedicated route means managing ports, updates, and backups — real work, not a huge amount, but real.
Both Windows and Linux are supported server-side, and you don't need a second copy of the game. The server app is free via Steam. You do need Satisfactory installed on some PC to access Server Manager, since that's the only way to claim and configure the thing. If you'd rather skip the hardware side entirely, Satisfactory dedicated server hosting handles the boring parts.
Satisfactory Dedicated Server Requirements
The official wiki lists 8 GB RAM as the minimum. That number is honest for a fresh save with a few players — and misleading for anything else, because memory use scales with building count, not player count.
A four-player server on a 40-hour megafactory will eat far more than a twelve-player server on a fresh world. Plan around your factory, not your friend list.
| Scenario | Players | RAM (practical) | CPU | Storage |
| New world, casual co-op | 2–4 | 8–12 GB | High clock speed, 2+ cores | 25 GB SSD |
| Growing factory, mid-game | 4–8 | 12–16 GB | Strong single-thread, 4 cores | 40 GB NVMe |
| Megafactory / late game | 4–16 | 16–32 GB | Fast modern CPU, 4–6 cores | 60 GB+ NVMe |
Here's the part most guides gloss over: Satisfactory heavily favours single-core performance. The wiki suggests a single-thread rating around 2000 or higher. A 16-core budget chip with weak per-core speed will feel worse than a 4-core screamer. Don't buy cores. Buy clock speed.
NVMe storage matters for save/load times more than gameplay, but when your save file balloons past 100 MB, you'll appreciate it. And a home PC that sleeps, auto-reboots for Windows updates, or shares an upload link with Netflix is a bad host — not because of specs, but because of uptime.
Before You Start: The Prep Checklist
Run through this first. Five minutes now saves an hour later.
- A host machine — home PC, VPS, or dedicated server — with admin or
sudorights - Satisfactory installed on your gaming PC (needed for Server Manager)
- Router access if you're self-hosting at home
- A static LAN IP or DHCP reservation for the host machine, so your port forward doesn't break next week
- Ports 7777 and 8888 free on the host
- SSH access if you're going the Linux route — our SSH into your server walkthrough covers the basics
- A backup plan for existing saves you want to migrate
Now pick one path below. Windows or Linux — follow one, ignore the other.
Satisfactory Dedicated Server Setup on Windows
This is the easy path, and it's what I'd tell a nervous beginner to do first.
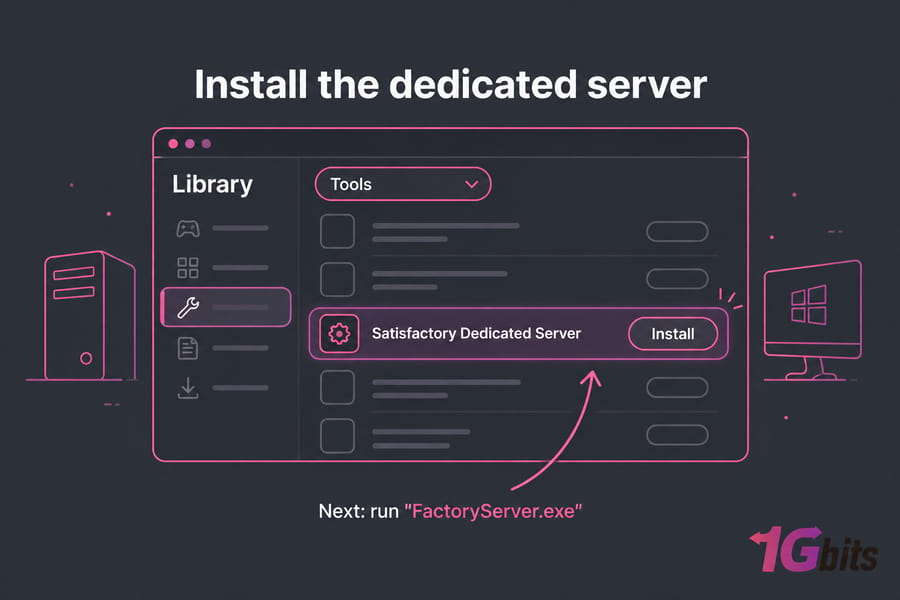
- Open Steam and go to your Library. In the filter dropdown, tick Tools.
- Find Satisfactory Dedicated Server in the list. Install it. (It's free and doesn't require owning the game on that account, though owning it helps.)
- Right-click the tool → Manage → Browse local files. Note this folder path.
- Run
FactoryServer.exe. A black console window opens and starts spitting out log lines. If Windows prompts you to install DirectX or a Visual C++ runtime, say yes. - Leave it running. When you see the server finish initialising and start listening, you're good.
Allow it through Windows Firewall
Windows will block inbound connections by default. Open PowerShell as Administrator and run:
New-NetFirewallRule -DisplayName "Satisfactory UDP 7777" -Direction Inbound -Action Allow -Protocol UDP -LocalPort 7777
New-NetFirewallRule -DisplayName "Satisfactory TCP 7777" -Direction Inbound -Action Allow -Protocol TCP -LocalPort 7777
New-NetFirewallRule -DisplayName "Satisfactory Reliable TCP 8888" -Direction Inbound -Action Allow -Protocol TCP -LocalPort 8888
Those three lines create inbound allow rules for the game port on both protocols and the reliable messaging port. You can do the same thing clicking through Windows Defender Firewall → Advanced Settings → Inbound Rules → New Rule, but it takes six times longer.
Running it in the background
Optional, but nice: use NSSM or Windows Task Scheduler set to "run at startup, whether user is logged on or not" so the server survives reboots. If you're renting a game dedicated server on Windows, the provider usually handles this for you.
Satisfactory Dedicated Server Setup on Linux with SteamCMD
Linux uses less RAM for the OS itself, which means more headroom for your factory. That's the real argument for it.
Step 1 — install SteamCMD and create a service user:
sudo apt update && sudo apt install -y software-properties-common
sudo add-apt-repository multiverse && sudo dpkg --add-architecture i386
sudo apt update && sudo apt install -y steamcmd
sudo useradd -m -s /bin/bash satisfactory
That installs SteamCMD (Valve's command-line downloader) and creates a dedicated satisfactory user. Never run a game server as root. It's a bad habit that costs you the whole box if the server process is ever compromised.
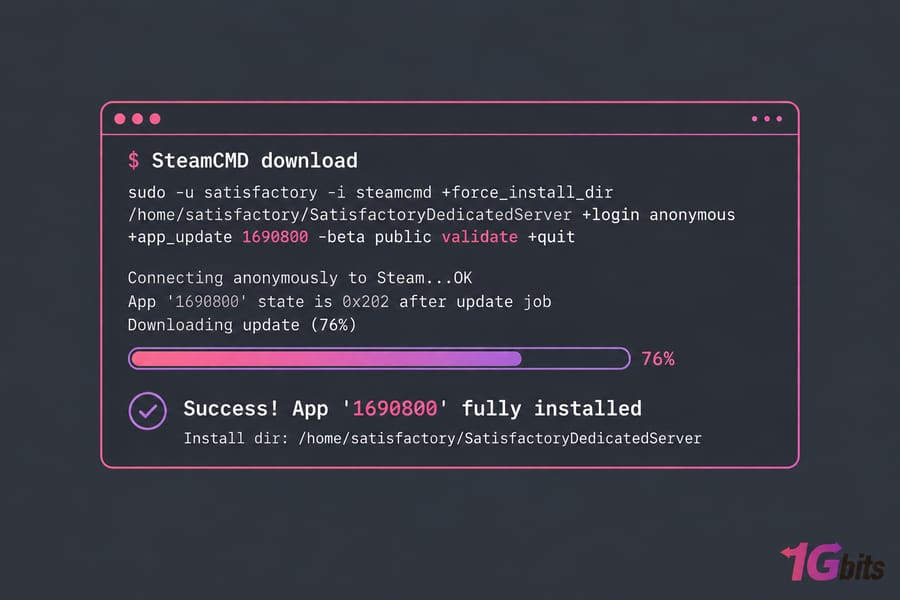
Step 2 — download the server app:
sudo -u satisfactory -i
steamcmd +force_install_dir /home/satisfactory/SatisfactoryDedicatedServer \
  +login anonymous +app_update 1690800 -beta public validate +quit
App ID 1690800 is the Satisfactory Dedicated Server. login anonymous means no Steam account needed. validate verifies file integrity — run this same command again whenever you need to update.
Step 3 — first launch:
cd /home/satisfactory/SatisfactoryDedicatedServer
./FactoryServer.sh
Watch the output. If it complains about missing libraries, install them, then rerun. Once it's listening, hit Ctrl+C and set up a proper service.
Create a systemd service
Save this as /etc/systemd/system/satisfactory.service:
[Unit]
Description=Satisfactory Dedicated Server
After=network.target

[Service]
User=satisfactory
WorkingDirectory=/home/satisfactory/SatisfactoryDedicatedServer
ExecStart=/home/satisfactory/SatisfactoryDedicatedServer/FactoryServer.sh
Restart=on-failure
RestartSec=15
KillSignal=SIGINT
TimeoutStopSec=90

[Install]
WantedBy=multi-user.target
Then enable and start it:
sudo systemctl daemon-reload
sudo systemctl enable --now satisfactory
sudo journalctl -u satisfactory -f
The first command reloads systemd's config, the second starts the server and makes it boot with the machine, and the third tails the live log. If systemd syntax is new to you, our guide on how to manage Linux services with systemctl fills the gaps.
Warning, and this one bites people: stopping the service does not reliably trigger a save. The Satisfactory wiki is explicit about this. Before any restart, make sure no players are connected, and enable autosave-on-disconnect in your session settings. Better yet, wait for an autosave tick, then stop.
How to Claim Your Server in Server Manager
Your server is running. Nobody can join it yet. This is where 80% of "my setup failed" posts come from — the server is fine, it's just unclaimed.
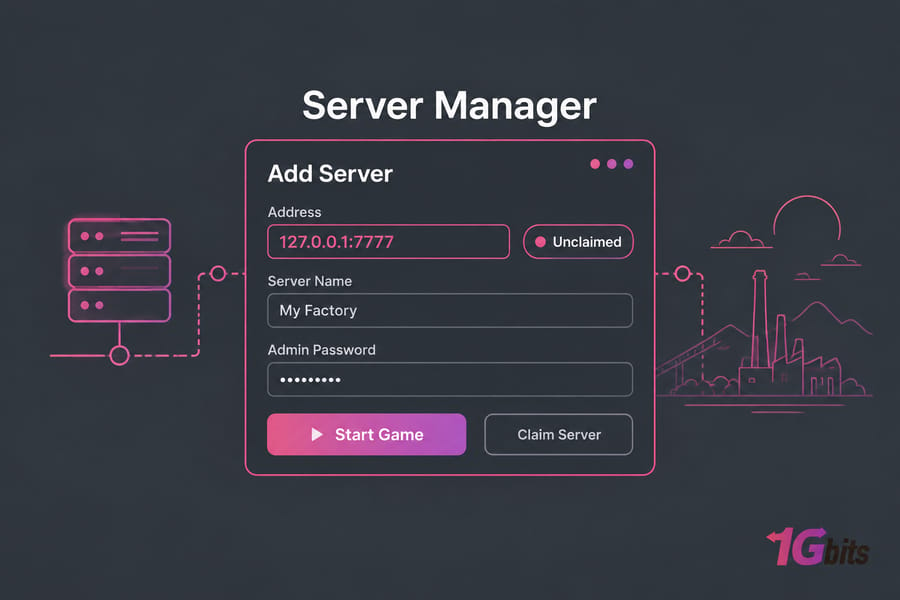
- Launch Satisfactory on your PC. From the main menu, open Server Manager.
- Click Add Server. Enter the address as
IP:7777— use127.0.0.1:7777if the server runs on the same machine, the LAN IP for a home host, or the public IP for a VPS. - The server shows as unclaimed. Give it a name, then set an admin password. Write it down somewhere real — recovering it means deleting a settings file.
- Pick your starting map/session or upload an existing save.
- Hit Start Game. Give it 30–60 seconds to load the world.
Friends join through Server Manager the same way, using your public IP and port. They don't need the admin password unless you want them to have admin rights.
Ports, Firewall, and Port Forwarding
Patch 1.0 killed the old ports — 15777 and 15000 do nothing now. Forwarding them is wasted effort. Patch 1.1 then added a second port for reliable messaging, which is why some 2024-era guides leave you with a server you can see but can't join.
| Port | Protocol | Purpose | Required? |
| 7777 | TCP + UDP | Game traffic and server discovery | Yes |
| 8888 | TCP | Reliable messaging (session join) | Yes (1.1+) |
| 15777 / 15000 | — | Legacy query/beacon | No — removed in 1.0 |
Port 7777 does not support redirection. External and internal port numbers must match — don't forward 7778 to 7777 and expect it to work. The reliable port can be remapped with -ExternalReliablePort if you're running multiple servers on one box.
Hosting at home? You need both layers: a local firewall allow rule and a NAT forward on your router pointing at the host's LAN IP. Our guides on port forwarding and how to port forward on your router cover the router-specific menus.
On a VPS or dedicated server? No router, no NAT. Just open the ports in ufw, firewalld, or your provider's cloud firewall. Much simpler — one of the quiet reasons people move off home hosting.
Save Files, Backups, and Updates
Config and save files live inside the install directory:
- Windows:
FactoryGame\Saved\Config\WindowsServer\ - Linux:
FactoryGame/Saved/Config/LinuxServer/
Game.ini and Engine.ini live there; save files sit under FactoryGame/Saved/SaveGames/server/. Autosaves rotate on a limited number of slots by default — meaning a corrupted save can overwrite your good ones if you don't notice fast enough.
My update routine, in order: tell players to log off, wait for an autosave, stop the server, copy the whole Saved folder somewhere off-box, run the SteamCMD update, restart, then join and verify the world loaded. Five steps, three minutes.
Automate it with a cron job — see schedule automatic backups. Even if you're on managed hosting, pull a copy down to your own machine monthly. Backups that live only on the server aren't backups.
Troubleshooting Common Errors
| Symptom | Likely cause | Fix |
| Server not showing up in Server Manager | Wrong IP, or port 7777 blocked | Test with 127.0.0.1:7777 on the host first, then work outward |
| Server appears, join times out instantly | Port 8888 TCP not open | Add the reliable messaging port to firewall and router |
| Can't claim the server | Version mismatch between client and server | Update both to the same branch (public vs experimental) |
| Friends can't join from outside | No NAT forward, or CGNAT from your ISP | Forward ports; if CGNAT, move to a VPS — you can't fix CGNAT locally |
| Port already in use | Another service or a zombie FactoryServer process | Kill the process, or launch with -Port=7778 and forward to match |
| Forgot admin password | Stored in server settings | Delete ServerSettings.7777.sav and re-claim |
| Crashes after an update | Outdated mods / plugin errors | Remove mods, verify with validate, reinstall mods one at a time |
| Stutter, rubber-banding, OOM kills | RAM exhaustion as the factory grows | Check free -h or Task Manager during play; add memory |
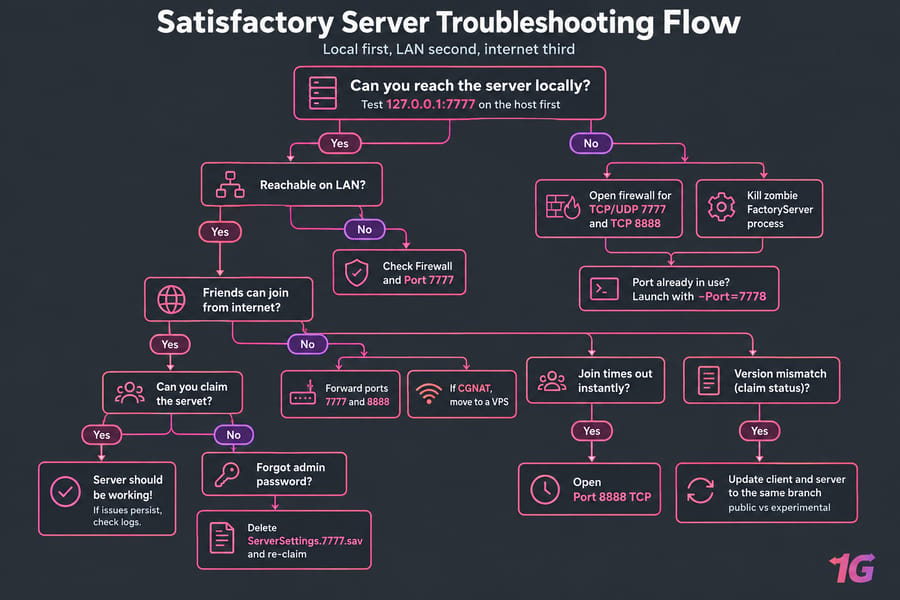
Work from the inside out. Local first, LAN second, internet third. If you skip that order, you'll spend an hour on your router when the problem was a local firewall rule. Stuck on something odd? Our support team deals with game server networking daily.
Self-Host vs VPS vs Dedicated Server
| Home PC | VPS | Dedicated server | |
| Cost | $0 + electricity | $10–$40/mo | $70–$200+/mo |
| Uptime | Whenever your PC is on | 24/7 | 24/7, no noisy neighbours |
| Setup effort | High (NAT, static IP, firewall) | Medium (firewall only) | Medium |
| Best for | Testing, 2–3 friends, same timezone | Most co-op groups | Megafactories, multiple worlds, mods |
Casual weekend co-op with two friends? Home PC is fine. Start there. The moment someone says "can I play while you're at work," you've outgrown it — that's the game VPS hosting moment, ideally a Linux VPS with NVMe storage and 16 GB RAM.
When the save file gets big and the CPU pegs during train-heavy load, virtualised resources start showing their limits. That's when a full dedicated server earns its cost. If you're weighing the two, the VPS vs dedicated server breakdown goes deeper on the trade-offs.
Want 24/7 uptime without touching your router? Compare Satisfactory hosting plans and get a correctly-sized server running today.
Final Pre-Launch Checklist
- Server files installed and updated via Steam Tools or SteamCMD
- Ports 7777 TCP/UDP and 8888 TCP open in the local firewall
- Router forwarding configured (home hosting only), internal port = external port
- Server process running, ideally as a service that survives reboots
- Claimed in Server Manager with the admin password saved somewhere safe
- Session created or existing save uploaded and verified loading
- First backup taken and copied off the server
- One friend tested a connection from outside your network
Point 8 is not optional. Testing from your own LAN proves nothing about the internet-facing path. Get someone external to click join before you announce the server.
That's the complete Satisfactory dedicated server setup. Install, open ports, start, claim, load, test. Now go build something absurd.

Leave A Comment