
Webmin is n open-source web control panel made for Linux operating systems. This allows the system administrators to manage the server via a simple web interface. Webmin makes it possible to remove the command line interface and provides a GUI to interact with the server.
If you're new to CentOS, check out our detailed guide on What is CentOS to better understand the operating system before installing Webmin.
With Webmin, you can:
- Manage user accounts
- Configure DNS settings
- Change settings for common packages
- Changing user passwords
- Installing, updating and removing software packages
- Configuring firewall
- Creating virtual hosts
And so much more. In this tutorial, we will go through the journey to install Webmin on CentOS 7. The following method will also work perfectly for CentOS 8.
Prerequisites
Before we get started, there are some things that we’re going to need:
- A CentOS 7 server (can be interchanged with CentOS 8)
- A root account or an account with Sudo privileges
- A basic understanding of bash scripting language
Installing Webmin on CentOS 7
Now that we’re all set with the basics, let’s install Webmin on the server. First, we will open the following repository file using the nano text editor. You can use an alternate text editor if you don't have a nano.
Note: If you’re using the root user account, you can ignore the sudo command and enter the rest of the command as is!
sudo nano /etc/yum.repos.d/webmin.repo
Paste the following in the file:
[Webmin]
name=Webmin Distribution Neutral
#baseurl=https://download.webmin.com/download/yum
mirrorlist=https://download.webmin.com/download/yum/mirrorlist
enabled=1
Save the file and close the editor. To do this, press CTRL + X, press Y and ENTER.
The above text is to add the Webmin repository to our package manager to easily install and update Webmin.
Now we will add the Webmin author’s PGP key. This lets your system trust the new repository.
sudo rpm --import http://www.webmin.com/jcameron-key.asc
All set, now let’s install the latest version of Webmin using the following command:
sudo yum install webmin
When prompted to continue, don’t forget to press y. Once the installation is finished, you will see an output similar to this.
Webmin install complete. You can now login to https://your_server_ip_or_hostname:10000/ as root with your root password.
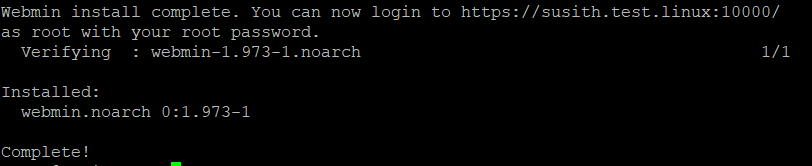
That’s all; you have successfully installed Webmin on your CentOS 7 server.
Configuring the firewall
By default, Webmin listens for connections on port 10000 on all network interfaces. You'll need to open the Webmin port if you have a firewall running on your CentOS server.
To allow traffic on port 10000, run the following commands:
sudo firewall-cmd --zone=public --add-port=10000/tcp --permanent
sudo firewall-cmd --reload
If you're setting up multiple services on your CentOS 7 server, you might also want to learn how to install LEMP on CentOS 7 to handle your web server, database, and PHP processing needs.
Accessing Webmin through the browser
All is set from the server side, and we can go ahead to access the Webmin portal through the browser. Once the installation is completed, Webmin will start automatically and be ready to use. To access Webmin, type your server’s hostname name or public IP address followed by the Webmin port 10000:
https://your_server_ip_or_hostname:10000/
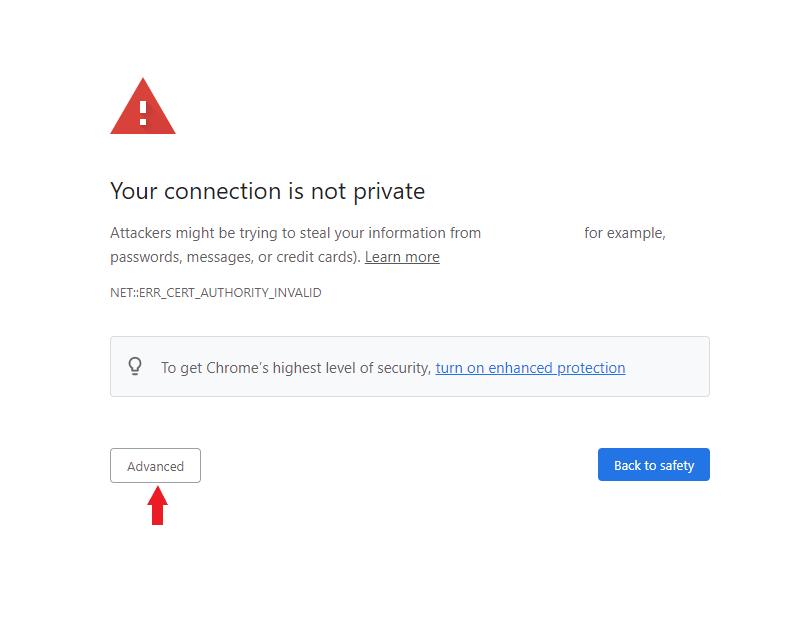
When you enter this and proceed further, you will encounter a warning message. It will say that your connection is not secure but worry not. This message comes because Webmin comes with a self-signed SSL certificate which is not validated by a CA (certificate authority).
To bypass this security warning, click on Advanced.
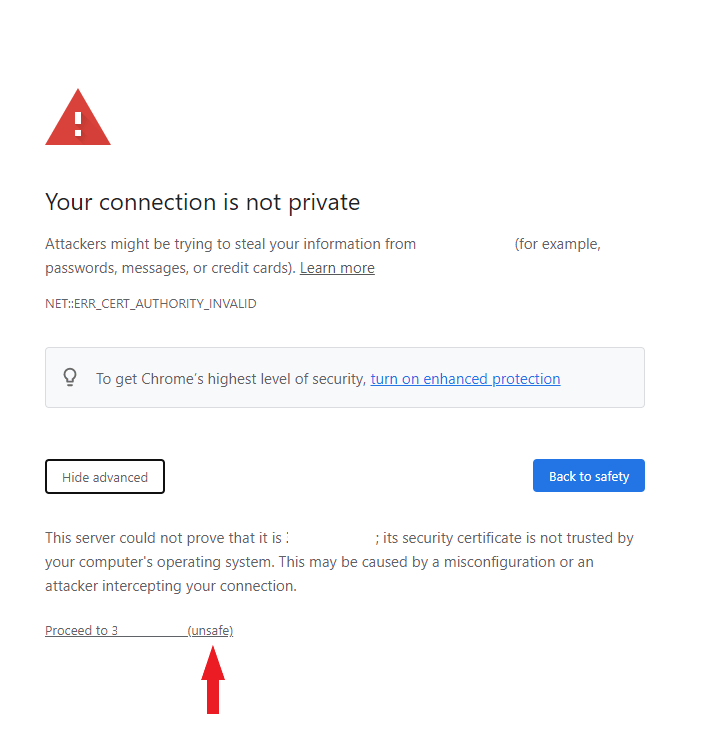
Now you will see a link at the bottom that says “proceed to <IP Address> (unsafe)”. Click on this link to enter your Webmin console.
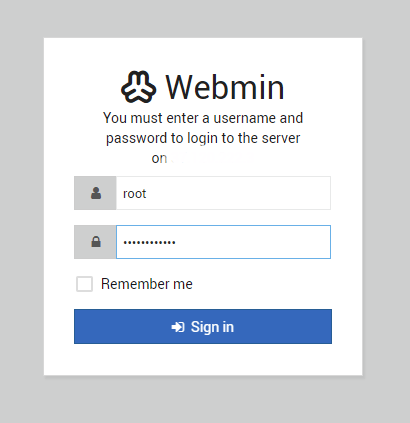
Now You will see a window where you need to enter the username and password. Here you can enter your credentials used for accessing the server. It can be through the root account or a user account. Enter your credentials and click on Sign in.
After signing in, if you're also looking to set up a MySQL database on your CentOS server, check out our detailed guide on how to install MySQL on CentOS 7.
You will see your brand new Webmin dashboard!
You will be presented with a dashboard, as seen above, that gives an overview of key system metrics such as CPU & RAM utilization. It also provides other system details such as hostname, Operating system, system uptime, etc.
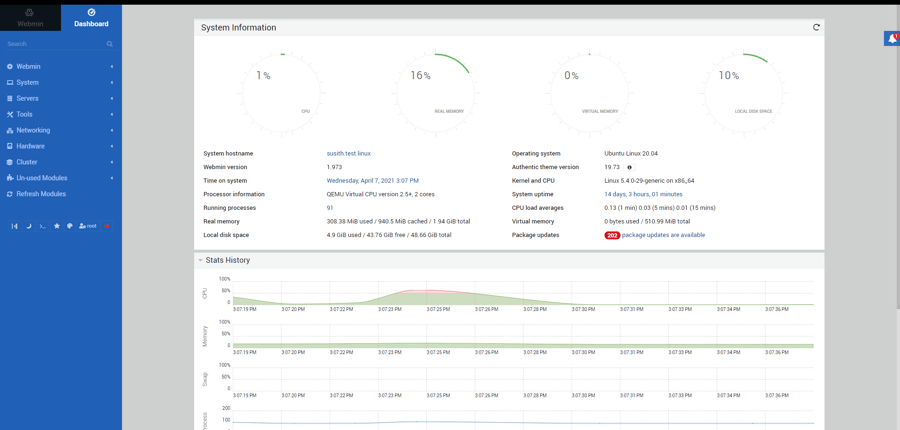
On the left pane is a list of options that give you access to various server functionalities. From here, you can perform a list of system administration tasks as discussed earlier in the introduction.
The Webmin panel can be used to manage the Linux system. The panel on the left includes the following:
- Webmin
- System
- Servers
- Tools
- Networking
- Hardware
- Cluster
- Un-used Modules
- Refresh Modules
- Other configurations
You have complete control over the server through this panel. Click on any of the panels, which will open up several options.
Final words
You have successfully installed and set up Webmin on your CentOS server running CentOS 7. The next step would be to start configuring either a LAMP or LEMP stack and manage all your services conveniently through the Webmin web interface.
If you're interested in setting up a lightweight and efficient web server, check out our guide on how to install Lighttpd on CentOS 7 for a great alternative to heavier options like Apache or Nginx.
People also read:
Leave A Comment