

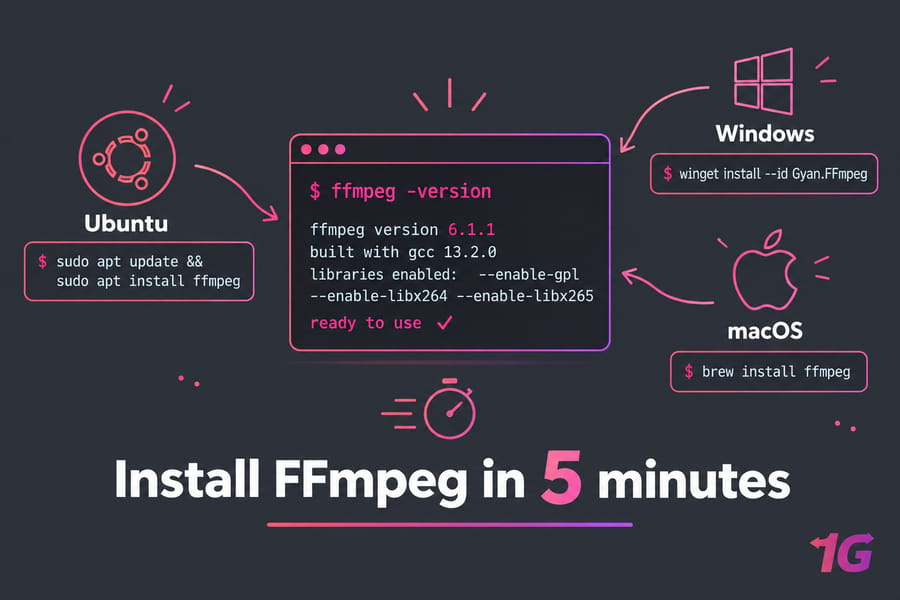
The quickest way to get FFmpeg running is to use your operating system's package manager, so that's where this guide starts. On Ubuntu or Debian, run sudo apt update && sudo apt install ffmpeg. On macOS, run brew install ffmpeg. On Windows, run winget install --id Gyan.FFmpeg or add a downloaded build's bin folder to PATH. Then check it with ffmpeg -version. Most people are done in under five minutes.
The commands are the easy part. The questions I see most come after the install: "Why does my terminal say command not found?" or "Why is my version three releases behind?" This guide answers those too.
Before you start, you'll need:
- Terminal, PowerShell, or Command Prompt access
- Admin or
sudoprivileges - A stable internet connection
- Homebrew on macOS, or winget on Windows (built into current Windows 10 and 11)
- On Linux servers, working repository access and a fresh package index
What Is FFmpeg and Why Install It?
FFmpeg is a free, open-source multimedia framework that you run from the command line. You give it a media file and tell it what you want, and it decodes, filters, and re-encodes the file using dozens of codecs (H.264, AAC, VP9, Opus and many more). It has no GUI. Many tools that do have a GUI, such as HandBrake and OBS, are built on FFmpeg's libraries.
Common FFmpeg use cases for video, audio, and streaming
- Converting formats: MP4 to WebM, MOV to MP4, WAV to MP3
- Compressing video: shrinking a 2 GB screen recording to around 200 MB
- Extracting audio: pulling the soundtrack out of a video
- Streaming: pushing RTMP or HLS streams from a server
- Automation: batch jobs, cron scripts, and upload pipelines in web apps
What comes with FFmpeg: ffmpeg, ffprobe, and ffplay
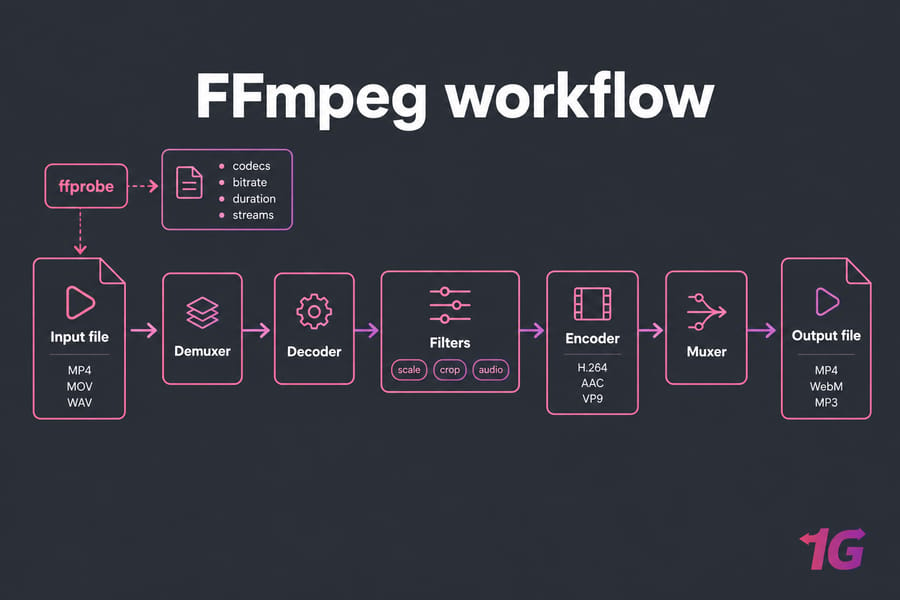
Most packages ship three tools. ffmpeg does the converting. ffprobe inspects files and reports codecs, bitrate, duration, and streams. ffplay is a minimal media player that's handy for quick previews. Some server packages leave out ffplay because it needs display libraries.
One more thing before the install steps. The FFmpeg project officially distributes source code. It doesn't ship its own installers. The official download page sends you to package maintainers and third-party builders instead: it lists Windows builds from gyan.dev and Windows builds by BtbN, plus Linux static builds.
Best Way to Install FFmpeg on Each Operating System
You have three ways to install FFmpeg. For most readers, only one of them makes sense.
Fastest method vs most flexible method
The fastest is your package manager. It takes one command, sets up PATH for you, and handles updates. The most flexible is building from source, which lets you pick every codec and flag. It's also slower and easier to break. I've watched people spend an afternoon compiling FFmpeg to convert one file. Don't do that.
Package manager vs manual build vs source install
| OS | Recommended Method | Command | Sets Up PATH? | Best For |
| Ubuntu / Debian | APT (recommended) | sudo apt install ffmpeg |
Yes | VPS, servers, desktops |
| Fedora | DNF + RPM Fusion | sudo dnf install ffmpeg |
Yes | Workstations, full codec support |
| CentOS Stream / RHEL clones | EPEL + RPM Fusion | sudo dnf install ffmpeg |
Yes | Enterprise Linux servers |
| Arch Linux | Pacman | sudo pacman -S ffmpeg |
Yes | Users who want the newest release |
| Windows 10/11 | Winget (recommended) or manual ZIP | winget install --id Gyan.FFmpeg |
Winget: yes / ZIP: manual | Desktop editing, scripts |
| macOS | Homebrew | brew install ffmpeg |
Yes | Intel and Apple Silicon Macs |
If you're new to Linux package tools, my guide on how to install packages in Linux covers the basics. Otherwise, skip ahead to your OS.
Install FFmpeg on Ubuntu and Debian
Install FFmpeg with APT
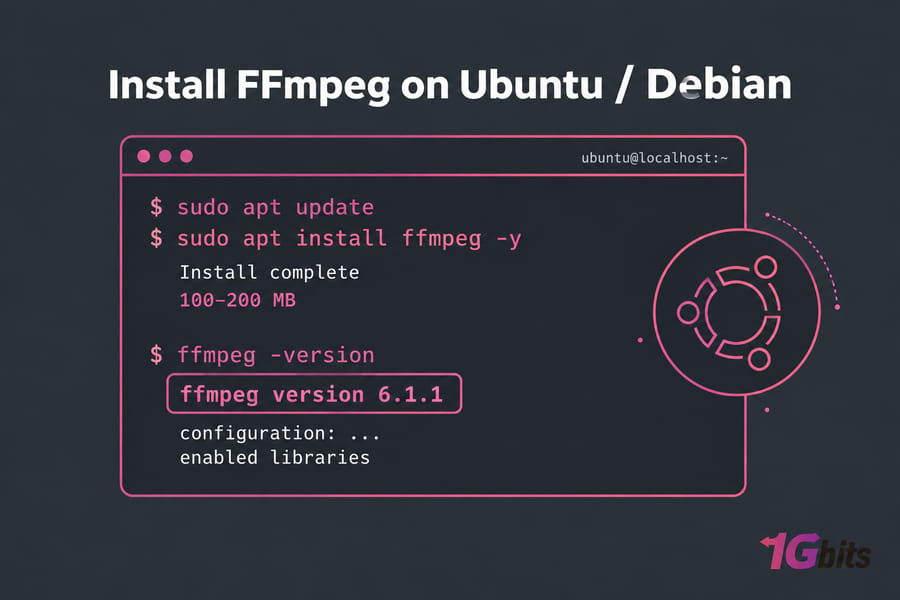
sudo apt update
sudo apt install ffmpeg -y
That's the whole install. The first command refreshes the package index. The second pulls in FFmpeg and its libraries (usually 100–200 MB on a minimal server). It works the same on Debian 12 and on Ubuntu desktop or server. On Ubuntu, the package comes from the universe repository. That's enabled by default on most installs, though some stripped-down cloud images turn it off. If you'd like a refresher on APT itself, see this apt package manager guide.
Verify the Ubuntu or Debian installation
ffmpeg -versionThe first line shows the version, followed by a long configuration: string listing the enabled libraries. If you see that, you're done.
Ubuntu version notes for 22.04 and 24.04
Here's the catch: APT gives you whatever version your release froze on. On Ubuntu 22.04 the listing shows Package: ffmpeg (7:4.4.2-0ubuntu0.22.04.1 and others) [security] [universe], which is FFmpeg 4.4.2. Ubuntu 24.04 (Noble) ships FFmpeg 6.1.1. Meanwhile the FFmpeg download page offers ffmpeg-9.0.2.tar.xz as the current source release.
| Platform | Source | Package/Build Notes |
| Ubuntu 22.04 LTS | Official repo (universe) | FFmpeg 4.4.2 |
| Ubuntu 24.04 LTS | Official repo (universe) | FFmpeg 6.1.1 |
| macOS | Homebrew core | Tracks current stable (9.x) |
| Windows | Gyan.dev / BtbN via winget | Current release and nightly builds |
Pro tip: For basic conversion, compression, and streaming, 4.4 or 6.1 is fine. You only need a newer version for specific features, such as newer AV1 encoders or recent hardware acceleration. In that case, use a static build from the FFmpeg download page or build from source. I'd avoid random PPAs on production servers.
Install FFmpeg on Fedora, CentOS Stream, and Arch Linux
Install FFmpeg on Fedora
Fedora's official repositories ship ffmpeg-free, a cut-down build without patent-encumbered codecs such as H.264 encoding. For the full version, enable RPM Fusion first:
sudo dnf install https://mirrors.rpmfusion.org/free/fedora/rpmfusion-free-release-$(rpm -E %fedora).noarch.rpm
sudo dnf swap ffmpeg-free ffmpeg --allowerasing
ffmpeg -version
If ffmpeg-free isn't installed yet, run sudo dnf install ffmpeg after adding RPM Fusion.
Install FFmpeg on CentOS Stream with RPM Fusion
Don't expect the base CentOS Stream repos to have FFmpeg. FFmpeg can be installed via EPEL and RPM Fusion repositories on RPM-based distributions. On CentOS Stream 9:
sudo dnf install epel-release
sudo dnf config-manager --set-enabled crb
sudo dnf install https://mirrors.rpmfusion.org/free/el/rpmfusion-free-release-9.noarch.rpm
sudo dnf install ffmpeg ffmpeg-devel
ffmpeg -version
If you're on an older box that still uses yum, the syntax is almost identical. See how to use the yum command.
Install FFmpeg on Arch Linux with pacman
sudo pacman -S ffmpeg
ffmpeg -version
Arch is a rolling release, so you'll usually get the latest upstream version within days of release.
Need more power for FFmpeg jobs? A laptop is fine for an occasional conversion. Recurring transcoding, streaming, and media automation run more reliably on a server that never sleeps. You can deploy FFmpeg on a Linux VPS hosting plan with full root access and run jobs 24/7.
Install FFmpeg on Windows 10 and Windows 11
Windows is where most people get stuck. There's no official installer from ffmpeg.org, so you'll either use winget or set up a ZIP build by hand.
Install FFmpeg with Winget
Open PowerShell or Windows Terminal and run:
winget install --id Gyan.FFmpegThis installs the Gyan.dev full build. If you want a smaller download, the essentials build installs with winget install --id Gyan.FFmpeg.Essentials. Winget adds FFmpeg to PATH for you. You do have to close and reopen your terminal before the ffmpeg command works. Almost everyone skips this, then thinks the install failed.
Install FFmpeg manually and add it to PATH
Warning: Only download builds from sources linked on the official FFmpeg download page (gyan.dev or BtbN on GitHub). Random "ffmpeg.exe" download sites are a malware risk.
- Go to ffmpeg.org/download.html, click the Windows icon, and choose gyan.dev or BtbN.
- Download a release build (for example
ffmpeg-release-essentials.zip). - Extract it and rename the folder to something simple, like
C:\ffmpeg. - Check that
C:\ffmpeg\bin\ffmpeg.exeexists. - Press Win, type "environment variables," and open Edit the system environment variables.
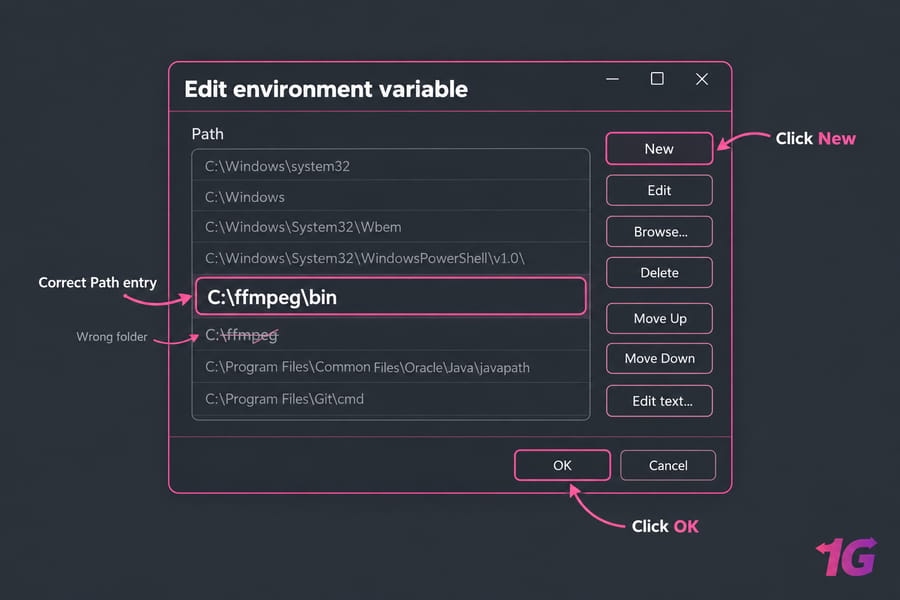
- Click Environment Variables, select Path under User or System variables, and click Edit.
- Click New, enter
C:\ffmpeg\bin, and click OK in every dialog.
The most common mistake is adding C:\ffmpeg instead of C:\ffmpeg\bin. Windows looks inside the exact folder you add, so it has to point at bin.
Verify FFmpeg in Command Prompt or PowerShell
Open a new window and run:
ffmpeg -version
where ffmpeg
where shows which ffmpeg.exe Windows is using, which helps if you have several copies installed. New to the shell? Our Windows Command Prompt guide covers the basics. The same steps work on Windows Server.
Install FFmpeg on macOS with Homebrew
Install or update Homebrew first
Run brew --version. If you get an error, install Homebrew with the one-line script from brew.sh. If you already have it, run brew update first.
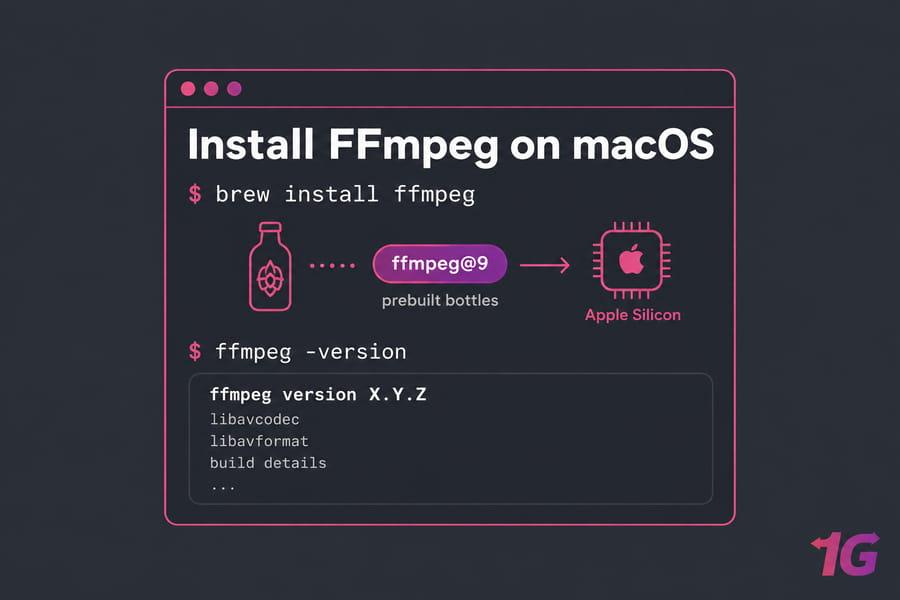
Run brew install ffmpeg
brew install ffmpegHomebrew's core formula tracks the current stable release (the formula is also known as: ffmpeg@9), and it ships prebuilt bottles for Apple Silicon and Intel Macs, so nothing has to compile. If you need extra libraries, the formula page notes that ffmpeg-full includes additional tools and libraries that are not included in the regular ffmpeg formula.
Verify FFmpeg on macOS
ffmpeg -versionQuick summary: brew install ffmpeg followed by ffmpeg -version is all most Mac users need.
Verify the FFmpeg Installation and Check the Version
Run ffmpeg -version
ffmpeg -versionExpected output: a line starting with ffmpeg version X.Y.Z, then build details and library versions (libavcodec, libavformat, and so on).
Check ffprobe and ffplay
ffprobe -version
ffplay -version
Pro tip: Test ffprobe too. Plenty of tools, including yt-dlp, media servers, and Python libraries, call ffprobe directly and fail with confusing errors if it's missing.
Run a simple test conversion
ffmpeg -f lavfi -i testsrc=duration=5:size=1280x720:rate=30 test.mp4This creates a 5-second test video without needing a source file. If test.mp4 plays, your encoder works. If you're still getting used to the terminal, keep our basic Linux commands list nearby.
Fix FFmpeg Command Not Found and Other Common Errors
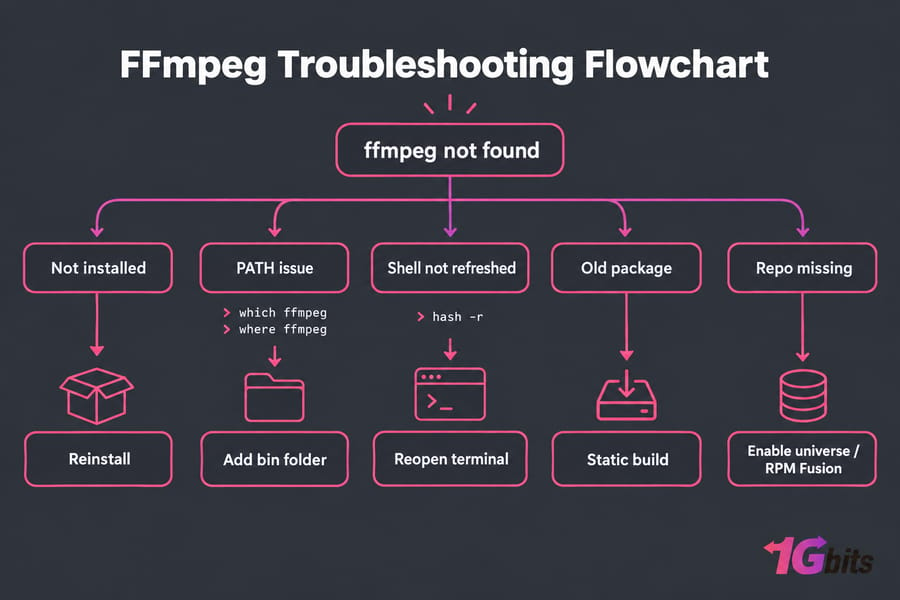
Nine times out of ten, "command not found" means a PATH problem, not a broken install.
| Error | Likely Cause | Fix | OS |
ffmpeg: command not found |
Package never installed | Re-run the install and read the output for errors | Linux/macOS |
| "'ffmpeg' is not recognized…" | PATH points to the wrong folder, or no PATH entry | Add the ...\bin folder to PATH |
Windows |
| Works in one window, not another | Terminal opened before PATH changed | Close all terminals and open a new one | All |
| Not found after brew install | Shell missing the Homebrew environment | Add eval "$(/opt/homebrew/bin/brew shellenv)" to ~/.zprofile |
macOS |
Unable to locate package ffmpeg |
Stale index or universe disabled | sudo add-apt-repository universe && sudo apt update |
Ubuntu |
No match for argument: ffmpeg |
RPM Fusion not enabled | Add EPEL + RPM Fusion, then retry | Fedora/CentOS |
| Unknown encoder 'libx264' | Limited build (e.g. ffmpeg-free) | Install the full build | Fedora, minimal builds |
apt: command not found |
Not a Debian-based distro | Use dnf, pacman, or your distro's tool | Linux |
PATH is not set correctly
On Linux and macOS, run which ffmpeg. If it prints nothing, your shell can't find the binary. On Windows, run where ffmpeg or $env:Path in PowerShell and look for the bin folder.
Package not available in your repository
This happens with minimal cloud images and RHEL-family systems. If APT itself is missing, you're probably not on Debian or Ubuntu. Here's how to fix apt command not found.
Old version installed from system repositories
This isn't a bug. LTS distros freeze versions for stability. If you really need newer features, use a static build or Homebrew on Linux. Don't mix builds from several repositories.
Permission and shell refresh issues
Installing without sudo fails quietly on some systems. After installing, run hash -r in Bash or open a new shell. Also, switching from Bash to Zsh means a different profile file, so PATH lines you added to ~/.bashrc won't apply.
Build FFmpeg From Source on Linux or macOS
Warning: This method is optional and meant for advanced users. Most people never need it.
When building from source makes sense
Build from source when you need a specific non-default codec (fdk-aac, for example), custom hardware acceleration flags, or a stripped-down binary for embedded or container use.
Basic configure, make, and make install flow
tar xf ffmpeg-9.0.2.tar.xz
cd ffmpeg-9.0.2
./configure --enable-gpl --enable-libx264
make -j$(nproc)
sudo make install
Each --enable-* flag needs the matching development package installed first (for example libx264-dev). If you're unsure about any shell syntax here, our Bash commands guide explains it.
Trade-offs of source builds
External libraries are off by default, so a plain ./configure gives you a fairly bare FFmpeg. The build needs GNU Make. You also won't get automatic security updates, so you'll have to rebuild by hand. If that sounds like a chore, go back to your package manager.
What to Do After You Install FFmpeg
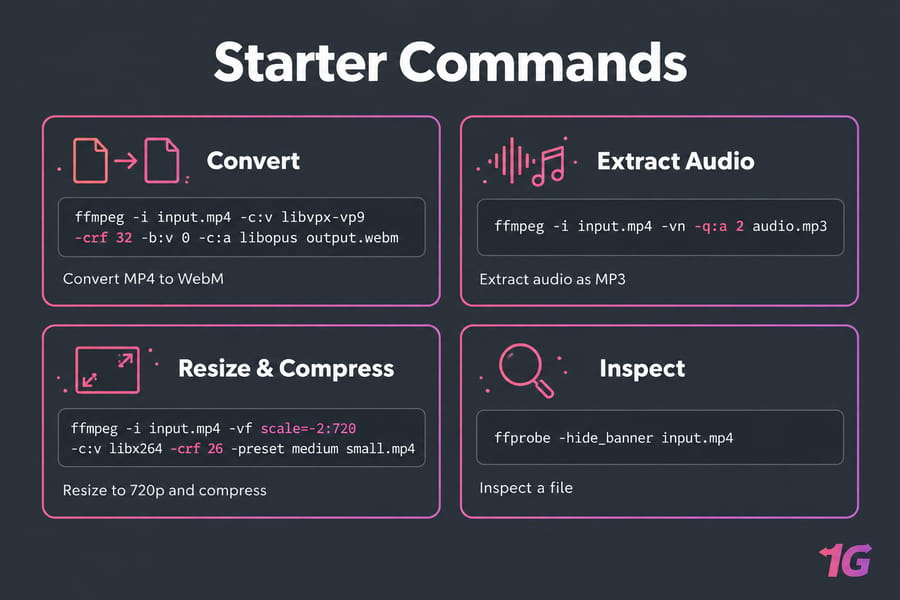
Your first useful FFmpeg commands
# Convert MP4 to WebM
ffmpeg -i input.mp4 -c:v libvpx-vp9 -crf 32 -b:v 0 -c:a libopus output.webm

# Extract audio as MP3
ffmpeg -i input.mp4 -vn -q:a 2 audio.mp3

# Resize to 720p and compress
ffmpeg -i input.mp4 -vf scale=-2:720 -c:v libx264 -crf 26 -preset medium small.mp4

# Inspect a file
ffprobe -hide_banner input.mp4
The -crf value controls quality: lower is better and larger. Around 23–28 is a good range for H.264.
When to run FFmpeg on a VPS or streaming server
Encoding an hour of 1080p video can keep a laptop's CPU at 100% for 30 minutes or more. That's annoying once and unworkable every day. A server makes more sense for batch transcoding, user-upload pipelines, or 24/7 restreaming. It runs while you sleep, has stable bandwidth, and you can script it with cron. A streaming VPS is built for that kind of work. If you want to go further, follow our guide to create a Linux streaming server.
Related 1Gbits tutorials for Linux, Docker, and streaming
Many teams run FFmpeg inside containers so every environment uses the same build. Start with how to install Docker, and look at Docker VPS hosting if you'd rather not manage the host yourself.
Run FFmpeg on a fast, root-access server. Whether you're compressing media, automating video pipelines, or running a streaming workflow, 1Gbits gives you Linux VPS and high-bandwidth infrastructure built for it. Get a streaming-ready VPS.

Leave A Comment