This tutorial will show you how to create a Linux streaming server. Nowadays, we access video streaming platforms very frequently. Isn’t it? Platforms like Netflix, Prime Video, Hotstar, and many more. Tons of users consume both recorded and live data displayed there endlessly.
These videos reach a huge number of masses. Now, there are other cases where people do not tend to share their videos on such a large scale. One such example is Linux, an open-source software. For those unfamiliar with the operating system, understanding its features and capabilities can enhance your streaming experience. To learn more about Linux and its significance in the tech world, check out our post on What is Linux?.
Now, before beginning the process, you must have answers to these questions:
- What is the number of viewers you are expecting?
- Quality of stream that you want.
- Where will you store all the streamed data?
- Who all can access it?
- Your system requirements.
Once you are clear of these pointers, you can safely move ahead. We recommend you conduct proper research about your requirements and needs and proceed.
There are many other factors too that you need to consider.
One of them is to handle live streaming successfully. There are chances that the streaming may interrupt, as there are a lot of factors that may lead to doing that. For instance, streaming involves encoding, transfer, display, buffer, etc. All these pointers can delay the live streaming or cause hindrance.
To ensure smooth and uninterrupted streaming, consider using a Linux dedicated server, which can provide the necessary resources and stability for handling high-quality live broadcasts.
Moving ahead, let us quickly discuss how to install the server? You can buy linux vps to practice it on a routine basis. For those looking to manage user access effectively, you may also find it helpful to check out our guide on how to list users in Linux.
Step 1: Prepare Linux Server
In this tutorial, we will deal with the Ubuntu distribution. Therefore, download the Ubuntu server into your system. After that, start the installer and select the settings per your requirements.
When the installation concludes, simply reboot the system if there is no automatic restart of the system.
Once the system is rebooted, check for updates. If there are any, install them, and you are good to go.
For a deeper understanding of the underlying technology and advantages of using Linux for streaming, check out our comprehensive guide on What is a Linux Server?.
sudo apt updatesudo apt upgrade
After you are done with upgrading your Ubuntu server (if any), move on to the next step. The next step is to select a web streaming server. We are taking the Nginx streaming server as this is one of the most powerful and credible options available in the market.
Follow this below-mentioned command to install Nginx:
Once you've successfully installed Nginx, you can enhance your server's capabilities by exploring the details in our guide on installing Nginx on Ubuntu for further configuration options and best practices.
sudo apt install nginx
Now, the question is how will the server handle media streams. For that, you have to get the RTMP module. Well, have a look!
sudo add-apt-repository universesudo apt install libnginx-mod-rtmp
Now, in order to deliver or accept the media stream, simply set the Nginx’s configuration.
No, it’s not cumbersome; just add this below-mentioned code to the bottom of your config file.
rtmp {
        server {
                listen 1935;
                chunk_size 4096;
                application live {
                        live on;
                        record off;
                }
        }
}
After writing this piece of code, save the particular config file. It shall be used later.
Now, you have to restart the server prior to your first stream on the platform. Type the below-mentioned Linux command to restart:
sudo systemctl restart nginx
That’s it. You have successfully set up the server.
Moving on, after the server is up and running, the next step is to set up the streaming software.
Step 2: Set the Streaming Software
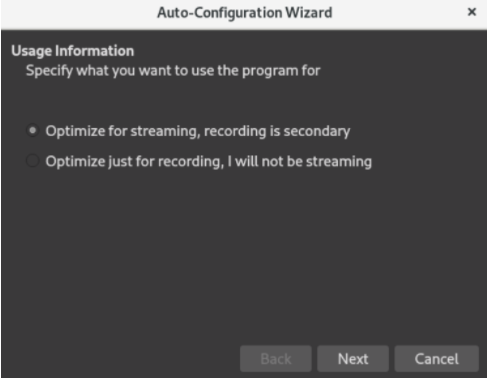
We will use OBS or Open Broadcaster Software for the process. Start the installation process for OBS. A first-time run wizard appears on the screen. Next, follow the below-mentioned steps.
- Start configure the OBS settings that match best with the hardware requirements.

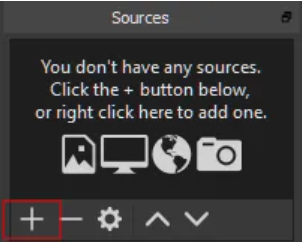
- Click on +just to add the streaming source as shown below.

- Now, to carry out the testing, click on Display Capture. Enter source name.
- Press ok.
Now that the video stream is configured let us deliver it to the server.
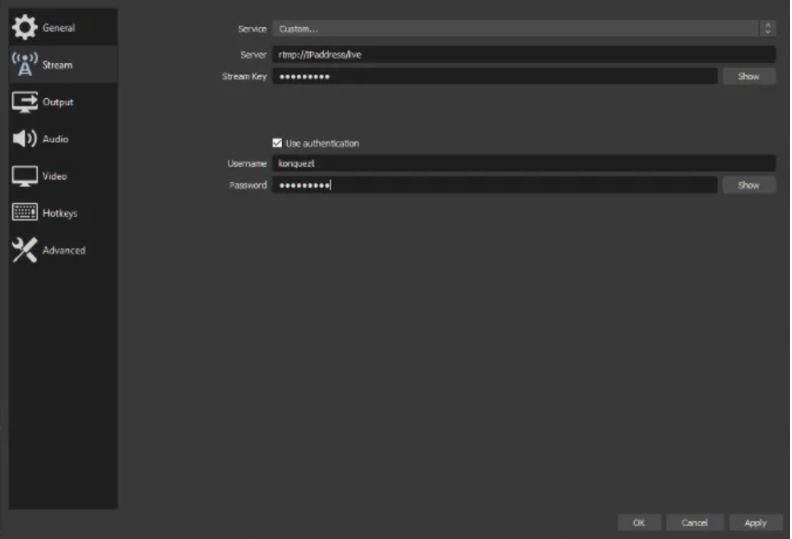
Go to the OBS, click on File, and then Settings. You see a Stream section, select that and then process to set the Stream type. Select Custom Streaming server.
Now, head towards the URL and enter the rtmp://IP address of streaming server/ live. The next step is to enter a special identifier that helps you to view the stream, that is, a Stream key. Enter the desired key, and then press Apply and click OK.

Everything is set now. You can initiate your first stream. Just choose and start streaming.
As soon as you choose this, you will see such a box shown below.
![]()
Now, be your first visit. As you have RTMP, install one of the most compatible open-source media players, the VLC media player, to get things going. Open the VLC and click on Media. Go to Open network stream. Now, remember you had set a stream key while setting up OBS? Enter that path to the stream and press play.
Congratulations! Here is your first live stream.
Now, here are some additional tips for your comfort. Have a look.
Additional pointers
Control the access: by default, the setup lets any user access or stream from the server. Therefore, you can limit access to the server for better protection and control. There are tons of ways to conclude this task. For instance, a .htaccess file, an OS firewall, or several built-in controls in the RTMP module.
Record your media streaming: as you have seen above, we have set Nginx web server; the configuration of Nginx lets you stream and not save the videos. If you wish to save your media, follow these simple steps.
- Go to Nginx config and head toward the RTMP module.
- Here you have to set the location and recording options as well.
- Mention the path where you wish to save the videos carefully.
Take a look at the below-mentioned snippet.
application live {
             live on;
             record all;
             record_path /var/www/html/recordings;
             record_unique on;
}
Conclusion
This article provided a step-by-step guide to setting up your own server for streaming on Linux. Do follow the above-given steps to accomplish your objective or goal. We think the listed commands will help you. We hope that the information helps you with an easy installation. If you think there is any other missed step, list them via the comment box.
For additional insights on managing your server effectively, check out our guide on how to host a website on Linux VPS.
People are also reading:


