

So you've got a cPanel server and you're worried it's a sitting duck. Fair enough. Knowing how to secure cPanel isn't about flipping one magic switch — it's about stacking layers so that if one fails, another still holds. Let's get the priorities straight before you touch anything.
How to Secure cPanel: What to Do First
The single most important thing to understand: cPanel account security protects one account, while WHM/root hardening protects the entire server. These are not the same job, and confusing them is where most beginners go sideways.
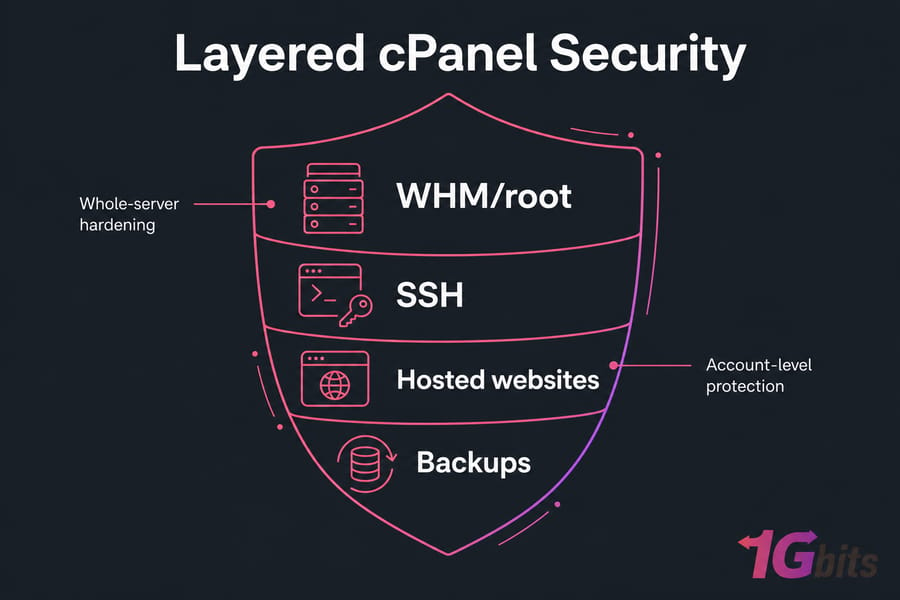
cPanel account security vs WHM server security
If your plan is shared hosting, you only have a cPanel account. You can handle passwords, two-factor authentication, SSL, and backups — but SSH hardening, cPHulk policy, and firewall rules stay with your provider. On a cPanel VPS, you get root WHM and full control. That control comes with responsibility for every layer.
| Control | cPanel User | Root WHM |
| Change account password | Yes | Yes |
| Enable 2FA | If provider allows | Yes |
| Enable cPHulk | No | Yes |
| Configure firewall/CSF | No | Yes |
| Harden SSH | No | Yes |
| Update OS and cPanel | No | Yes |
The first 15-minute checklist
Start here. These give you the biggest risk reduction for the least effort:
- Enable two-factor authentication in WHM.
- Set a strong minimum password policy.
- Turn on cPHulk brute-force protection.
- Confirm you have a working backup and console access.
Then, over the first hour: update the platform, harden SSH, configure the firewall, and enable ModSecurity. Ongoing? Backups, monitoring, and monthly audits. And remember — a vulnerable WordPress plugin can hand an attacker the keys even if your server config is flawless. Server hardening pairs with our broader guide on how to secure your VPS.
Back Up Your cPanel Server Before Hardening
Before you change any firewall or login setting, create a recovery path. I've watched people lock themselves out of a fresh VPS in under five minutes. Don't be that person.
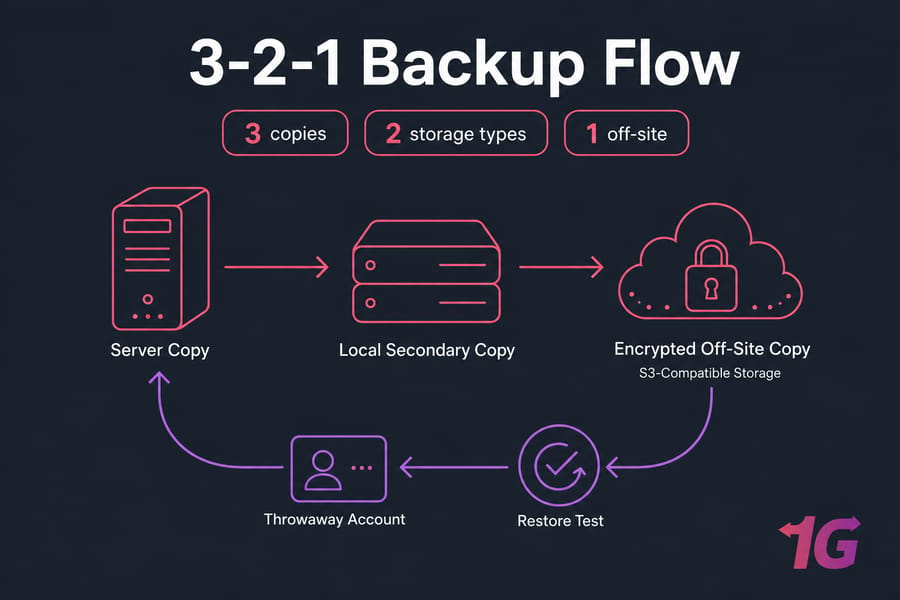
A snapshot from your provider is your fastest rollback. A WHM system backup captures accounts and configs. A single cPanel account backup? Useful, but not disaster recovery. And a backup sitting on the same disk that just got wiped is worth nothing.
A backup that has never been restored is not proven recoverable.
Send copies off-server — S3-compatible storage or another remote destination — and encrypt them. Then actually test a restore into a throwaway account. Automate the whole thing following our walkthrough on how to schedule automatic Linux backups.
Update cPanel and the Operating System
Patched software still needs strong identity controls — but unpatched software is the easiest door to kick in. In WHM, head to Server Configuration » Update Preferences and set the release tier to a stable option for production. Don't chase bleeding-edge builds on a live box.
There are four separate update streams people forget about: cPanel itself, OS packages (on AlmaLinux, Rocky Linux, or CloudLinux), EasyApache 4 components, and your actual web applications. All four matter. CentOS 7 is done — if you're still on it, migrating is the real fix, not another patch.
Run updates in a maintenance window, then test hosted apps after any PHP or EasyApache change. Our general guide on how to update Linux covers the package side in more depth.
Secure cPanel and WHM Login With 2FA
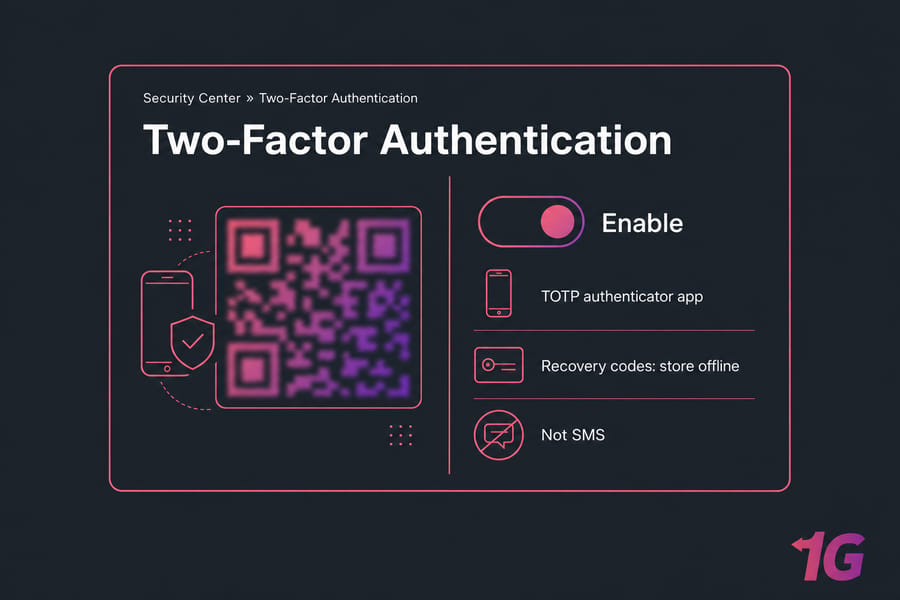
Account takeover is the most common way these servers fall. So lock the front door properly. In WHM, open Security Center » Two-Factor Authentication, enable it, and require it for accounts where supported. Use a TOTP authenticator app — not SMS, which is weaker than people assume.
Use a password manager and unique credentials everywhere. Set a strong minimum password strength in WHM, remove unused accounts and stale delegated admins, and scope your API tokens tightly. Store your recovery codes somewhere safe and offline.
Warning: Don't try to "secure" cPanel by randomly changing ports 2083 or 2087. Those are the standard secure HTTPS endpoints. Restrict access and enforce MFA instead — port games break tooling without stopping a determined attacker. Pick genuinely strong secrets using our tips on how to choose a strong password.
Harden SSH and Root Access
After securing admin logins, tighten the server's shell access. This is where lockouts happen, so read carefully.
Warning: keep your current root session open the entire time. Test every change in a second terminal before you commit.
- Create a named sudo administrator and confirm it works.
- Generate an Ed25519 key pair and add the public key. See how to generate an SSH key.
- Protect the private key with a passphrase.
- Only after key login works, disable password authentication.
- Validate config with
sshd -tbefore reloading.
Changing the SSH port cuts log noise — it does not reduce real risk, so don't rely on it. Restricting root login is a solid move once you've got that alternate admin; details in our guide on how to disable direct root login safely. Also use SFTP, never plaintext FTP.
Configure a cPanel Firewall and cPHulk
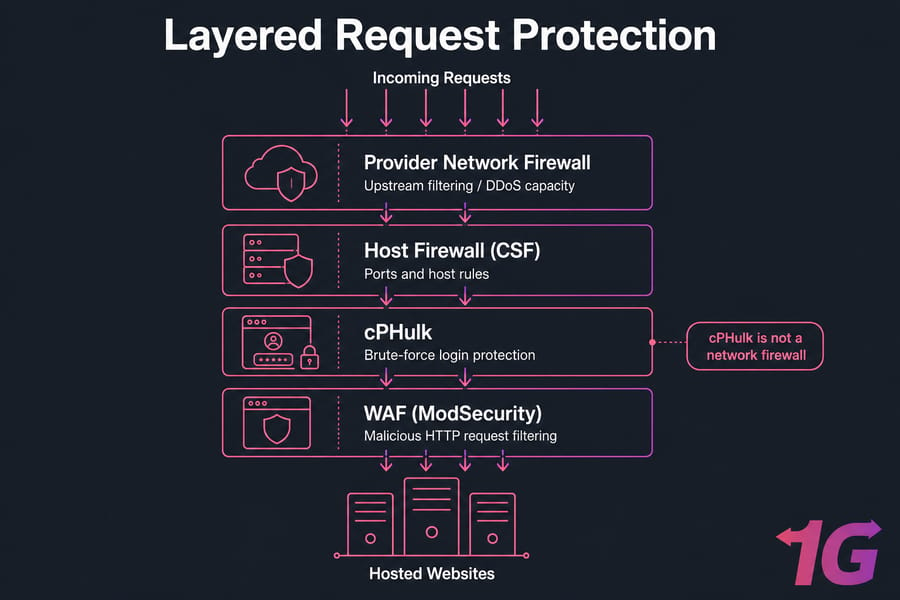
Now reduce your network exposure. First, inventory what actually runs: web (80/443), DNS, mail, SSH, and cPanel/WHM (2083/2087). Close what you don't need — but check the current official cPanel port list first, because breaking a required service is worse than a phantom risk.
Configure cPHulk under Security Center » cPHulk Brute Force Protection. Add your trusted IPs to the whitelist first (so you don't lock yourself out), set sane lockout thresholds, and turn on notifications. cPHulk guards authentication — it is not a network firewall.
| Tool | Type | Job |
| cPHulk | Native | Blocks brute-force login attempts |
| CSF | Third-party | Full host firewall + rules |
| Imunify360 | Commercial | Firewall, WAF, malware, all-in-one |
Set up a proper host firewall — our guide on how to configure a firewall on your VPS covers CSF. And no host firewall absorbs a large volumetric flood. For targeted sites, layer in upstream DDoS-protected VPS capacity. Test everything from a second connection before trusting it.
Need a cPanel VPS You Can Control?
Deploy cPanel on a 1Gbits VPS with full root WHM access, then apply this checklist before launch. Compare plans at cPanel VPS hosting, or if you'd rather not babysit updates and monitoring, look at managed VPS hosting.
Enable ModSecurity and Malware Protection
ModSecurity is a web application firewall — it filters malicious HTTP requests before they hit your sites. Enable it in WHM under Security Center » ModSecurity, then attach a maintained ruleset like the OWASP Core Rule Set.
Start in a monitored mode where production risk is high, review the audit log, then tighten. When a WordPress site throws a false positive, disable the specific rule — never the whole ruleset. That's like removing your smoke detector because the toast burned.
For malware, ClamAV is the free scanner; Imunify360 adds real-time detection and cleanup. Neither catches everything. Scan on a schedule, quarantine suspicious files rather than deleting blindly, and remember: malware symptoms may point to a deeper root compromise. If things look bad, follow our steps on what to do if your VPS is hacked.
Protect SSL, DNS, Email, and Hosted Accounts
Server controls need application hygiene behind them. Enforce HTTPS with AutoSSL, redirect HTTP carefully, and use SFTP for transfers. For email authentication, set up SPF and DKIM, then add DMARC in monitoring mode before enforcing.
Give unrelated customer sites their own cPanel accounts — an agency should never cram five clients into one. CloudLinux with CageFS isolates accounts so one breach doesn't spread. Patch CMS cores, plugins, and themes; enforce least-privilege permissions; and never, ever use 777. Harden your sites with our guide to secure a WordPress site on a VPS. SSL encrypts traffic — it does not stop malware.
Configure Backups, Logs, and Monitoring
Protection is useless if you can't detect and reverse an attack. Set backup frequency to match your change rate — daily for busy stores, weekly for static sites — with remote storage and sensible retention. Then run restore drills and assign someone to own recovery.
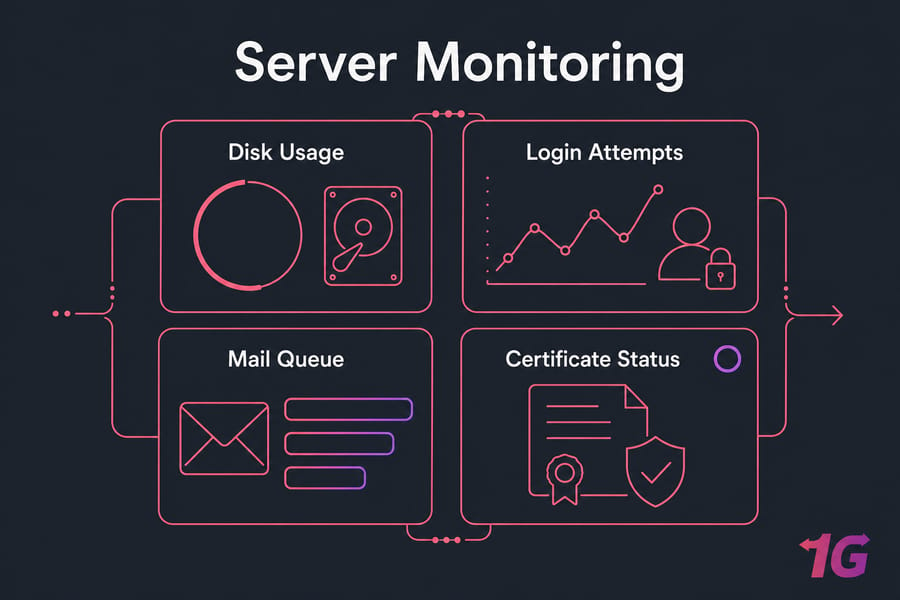
Watch your logs: authentication (/var/log/secure), web server, ModSecurity audit, and mail. Use WHM's Contact Manager to route alerts for disk usage, inode exhaustion, CPU spikes, mail queue jumps, and certificate failures. Our guide on how to monitor Linux security logs goes deeper.
Audit Your cPanel Security and Verify Everything
Finish by validating each control from outside the server. Run WHM's Security Advisor and read its recommendations — but don't apply all of them blindly, since some conflict with legitimate setups.
Verify open ports from an authorized external system (get permission before any scan). Test HTTPS login, MFA, SSH key access, a real backup restore, and your alerts. Review inactive users and old API tokens monthly.
| Control | Test | Expected |
| HTTPS Login | Open port 2083 | Valid certificate |
| MFA | Log in without code | Blocked |
| Backup | Restore to test account | Clean restore |
| Firewall | Scan from outside | Only needed ports open |
One hard truth: if root compromise is confirmed, cleanup isn't enough. Rebuild from trusted media and restore verified-clean data. It's slower, but it's the only way to be sure.
Choose the Right Level of cPanel Control
Go with a cPanel VPS if your team can handle updates, SSH, firewall rules, backups, monitoring, and incident response. If you'd rather offload the day-to-day server administration, review managed VPS hosting before you deploy production sites. Either way, no configuration makes a server perfectly secure — but a layered setup makes you a genuinely hard target, and that's the real goal.

Leave A Comment