
This guide will show you how to install CloudLinux OS on a Linux VPS. CloudLinux is a highly popular operating system offered by almost all hosting providers, especially in shared environments, due to its robust support for various web hosting control panels such as cPanel, Plesk, and DirectAdmin.
This specialized Linux-based operating system is predominantly used in shared hosting environments to isolate each user within their own Lightweight Virtualized Environments (LVE). In an LVE, each user consumes a predefined amount of resources. The unique architecture of CloudLinux ensures that each user can utilize their allocated resources without negatively affecting the performance or stability of other users on the same server.
Consider exploring the best Cloud VPS options to ensure that your CloudLinux server setup benefits from robust performance, reliability, and scalability.
Each user is allocated a predefined amount of resources. If a user fully utilizes their assigned resources, other users will not be affected. Only that specific user will experience limitations, typically encountering a "Resource limit reached" error when attempting to access their website. Now that we have a basic understanding of how CloudLinux OS works, let's proceed with the CloudLinux installation steps.
⚙️ How to Install CloudLinux OS
Installing CloudLinux OS on your server involves a series of straightforward steps. Follow this detailed guide to get your system up and running securely and efficiently:
- First, download the CloudLinux ISO image from the official CloudLinux website. Ensure you download the correct version for your server architecture.
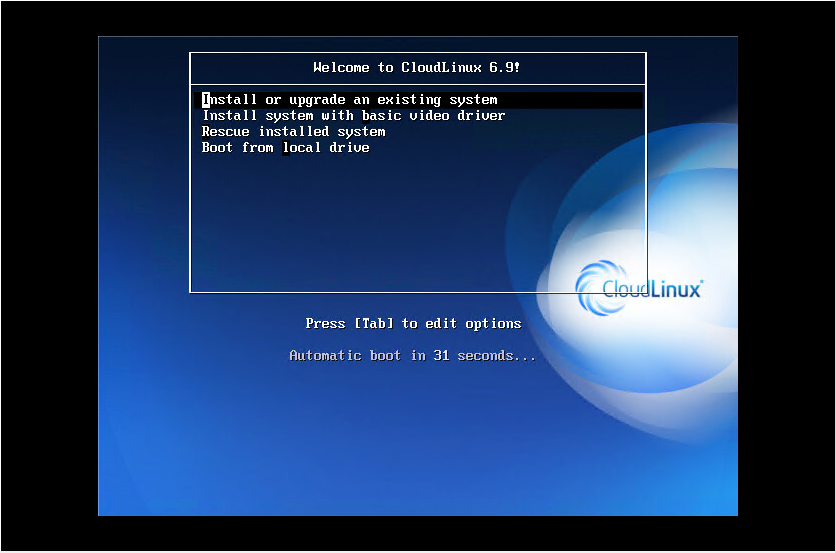
- Insert or boot your server with the installation media. At the initial prompt, select the 'Install or upgrade existing system' option.
- Allow the system to initialize and start the installation process on your VPS Server. This may take a moment.

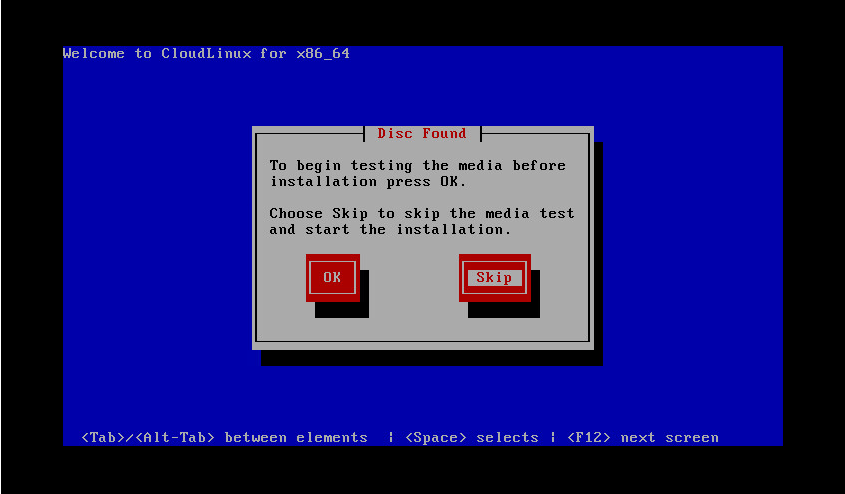
- The installer will prompt you about media testing. You have the option to choose to skip the installation media check to save time, especially if you are confident in your media's integrity.
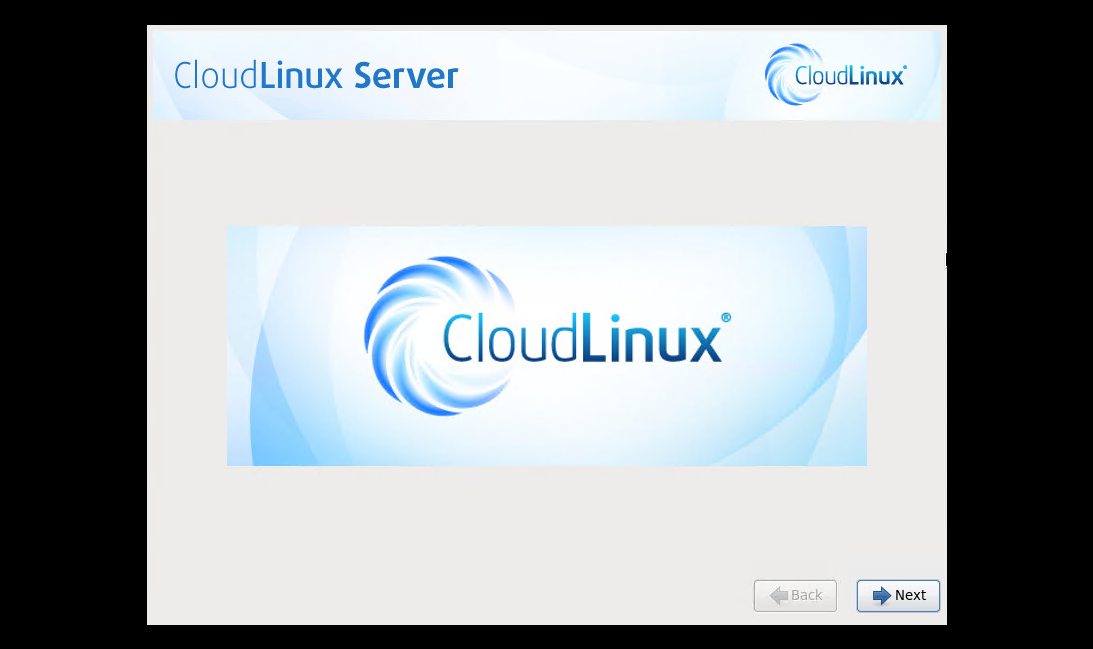
- When you are greeted with the CloudLinux welcome screen, simply press ‘Next’ to proceed with the setup.
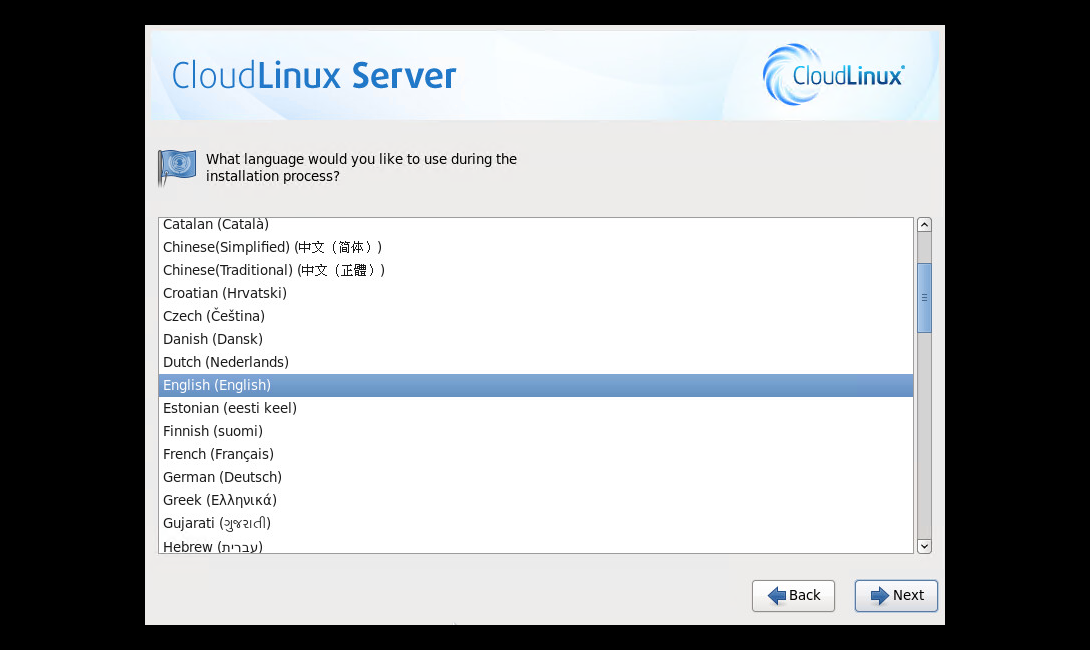
- Now, choose your preferred installation process language from the list provided.
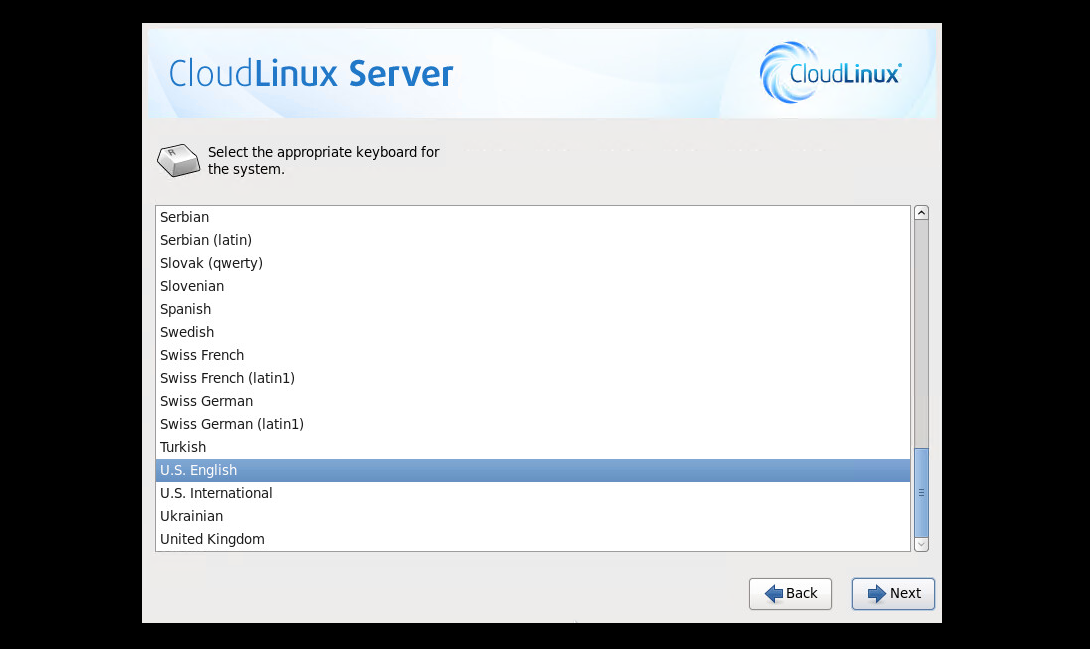
- Select your required Keyboard layout to match your physical keyboard.
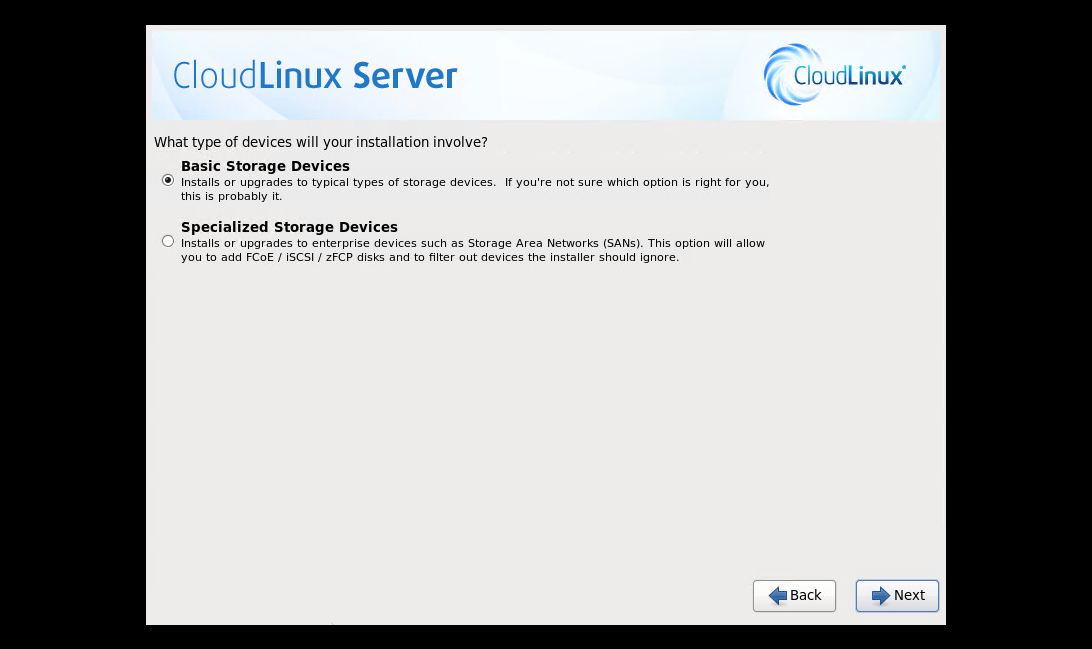
- If your hard drive is physically attached to the server, select a basic storage device. However, if your storage is connected remotely or via a network, then select specialized storage devices.
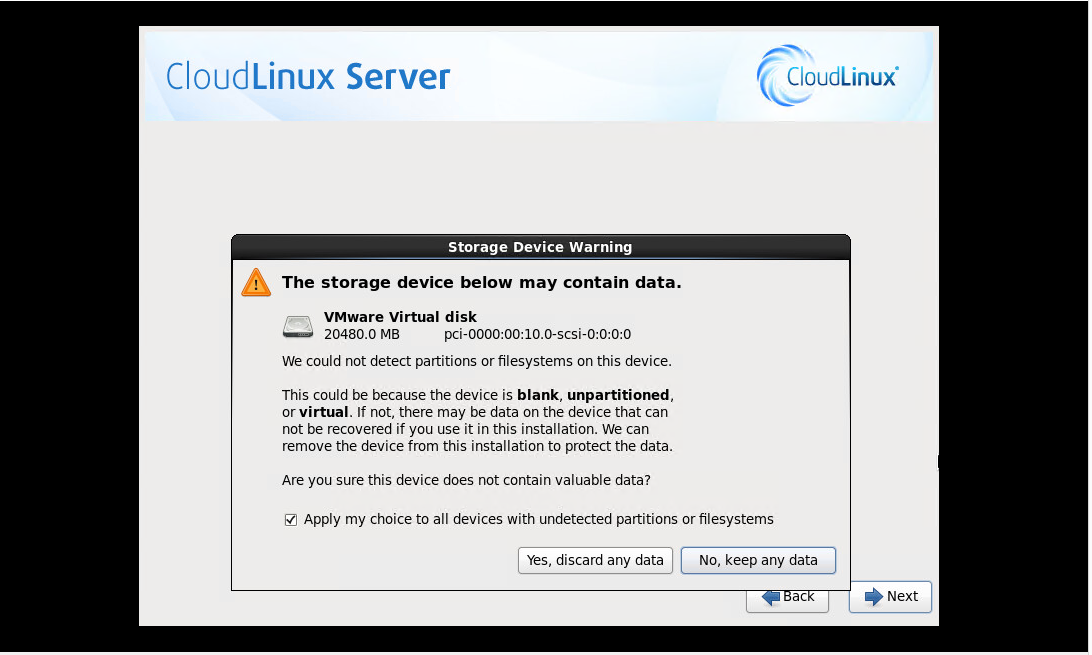
- Since our hard storage is empty and we do not have critical data on it, we can safely click Yes, discard any data to continue with the installation. This will erase all existing data on the selected drive.
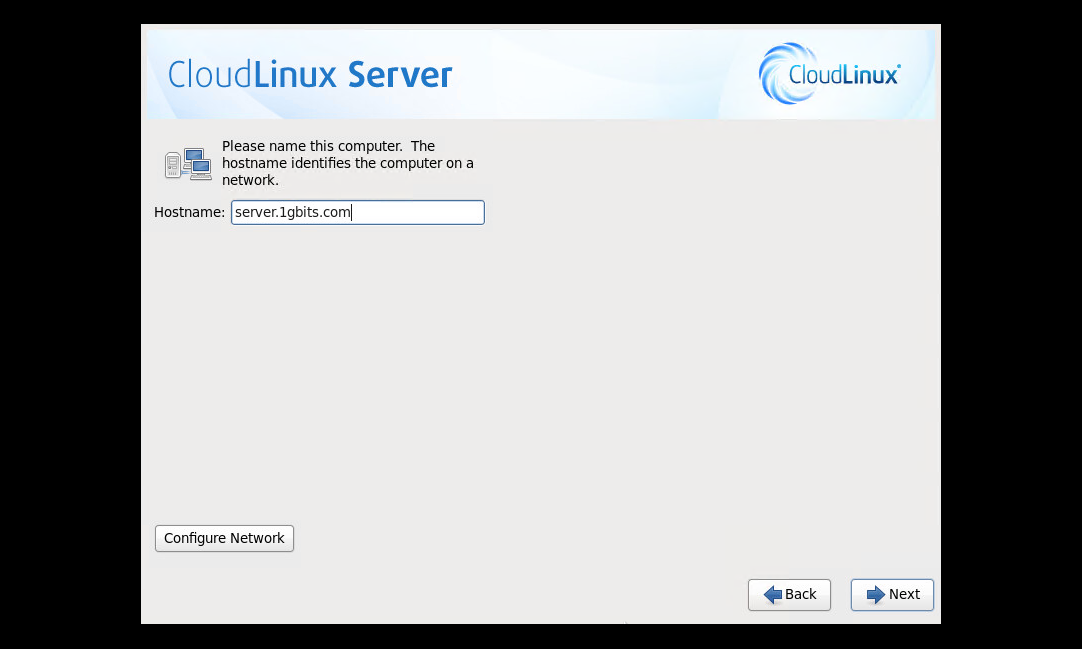
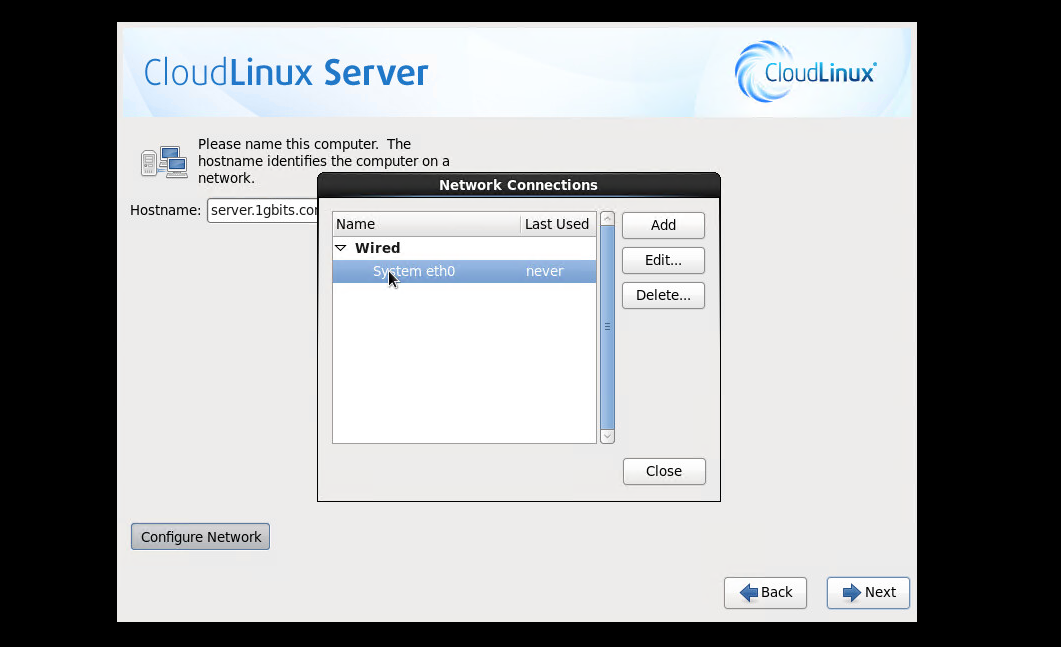
- In this step, you can assign a hostname to the system. This name will identify your server on the network.
- Click on the 'Configure Network' button if you wish to set up network settings during the installation process.
- Alternatively, you can choose to configure the network manually later after the installation is complete.
- If you chose to 'Configure Network', you will encounter this window. You must select the 'eth0' network adapter (or your primary network interface) and then click 'Edit' to configure its settings.
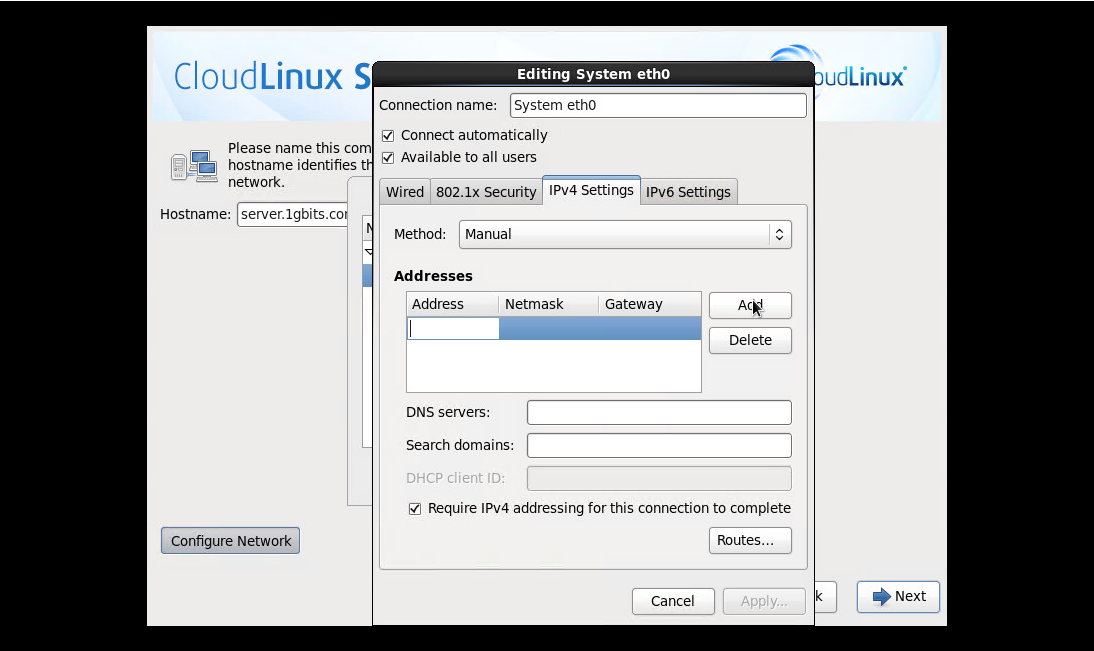
- Perform all the required network settings for your server. Ensure you tick the 'Connect Automatically' box to enable the network interface upon boot. Go to the IPv4 settings tab, select 'Manual' from the 'Method' dropdown menu.
- Click on the 'Add' tab to fill in the Address box with your IP Address, Subnet mask (Netmask), Gateway, and DNS Server details. Double-check these settings to ensure proper network connectivity.
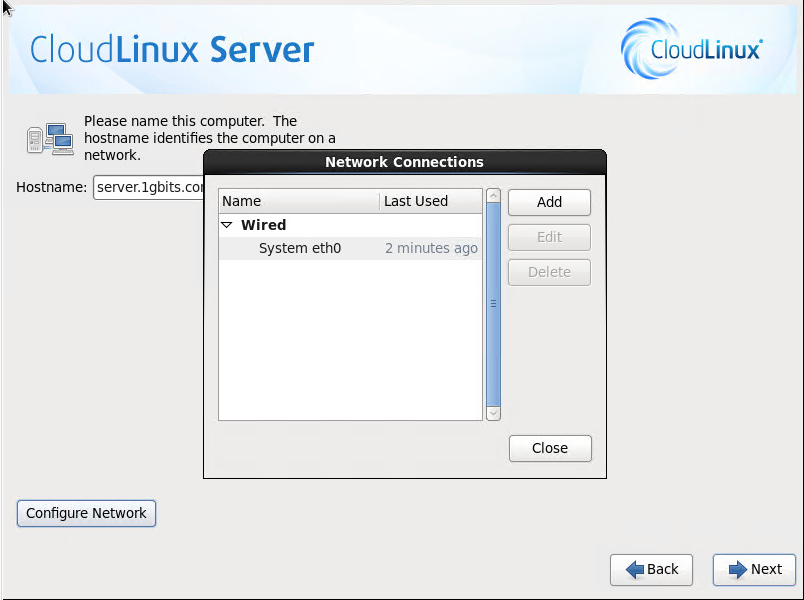
- Once you have completed all network configurations, close the network configuration window to return to the main installation process.
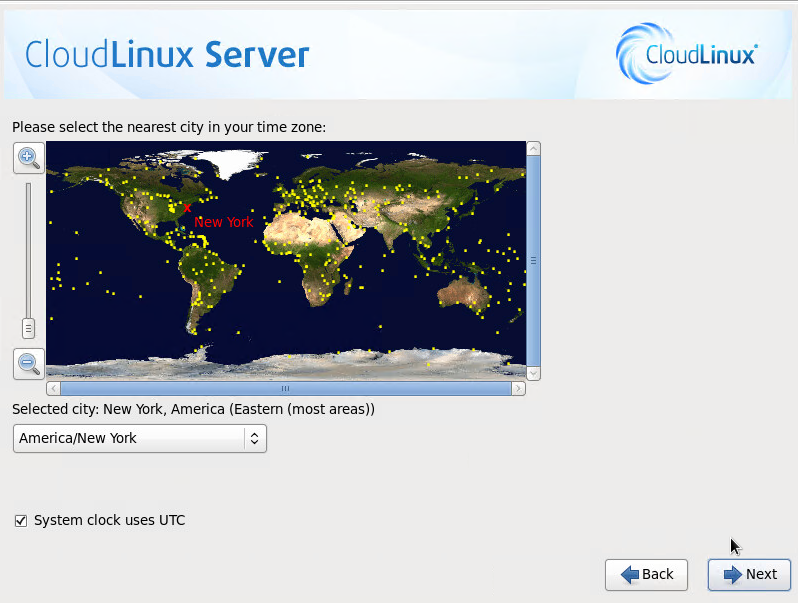
- Select your accurate Time Zone. This is important for system logs and scheduling tasks.
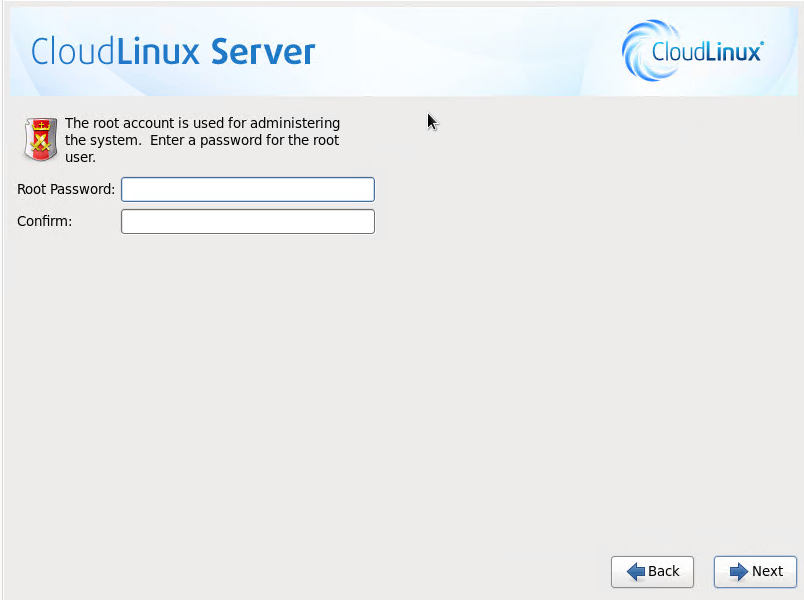
- Set the root password. You will need to enter it two times to confirm. Choose a strong, unique password to secure your server.
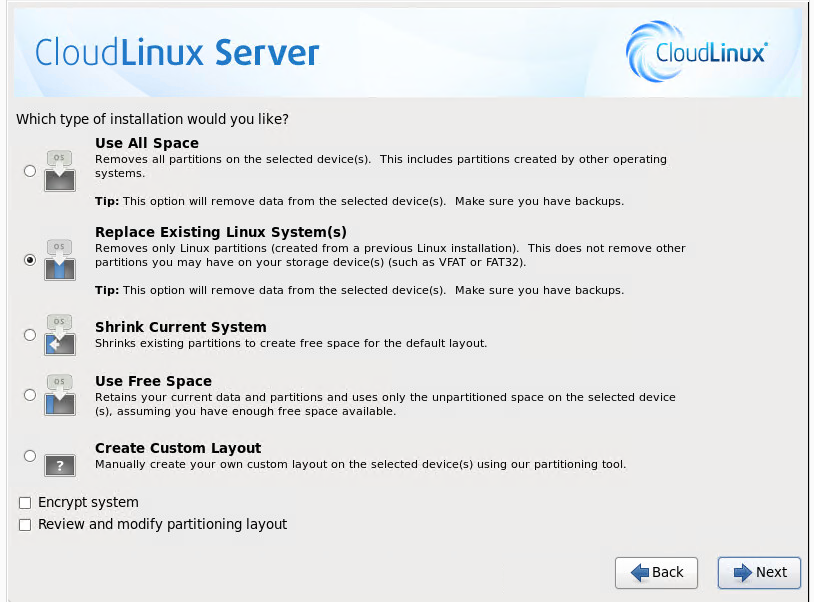
- Select Replace Existing Linux Systems if you want the installer to manage partitioning automatically. If you prefer to manually verify or edit the file system partitions, click on 'Review and Modify partitioning layout' to customize your disk setup.
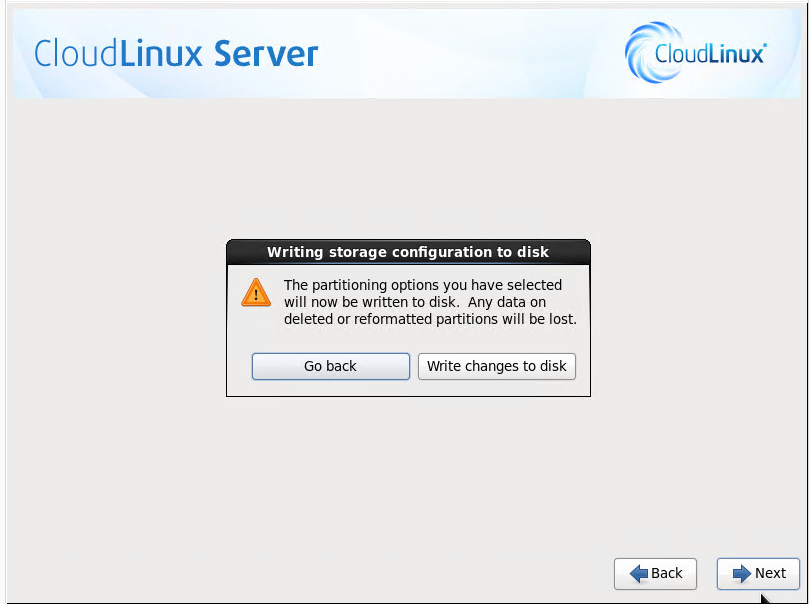
- Now, confirm your partitioning choices by clicking on 'Write changes to disk'. Be aware that this action is irreversible and will format the chosen disk(s).
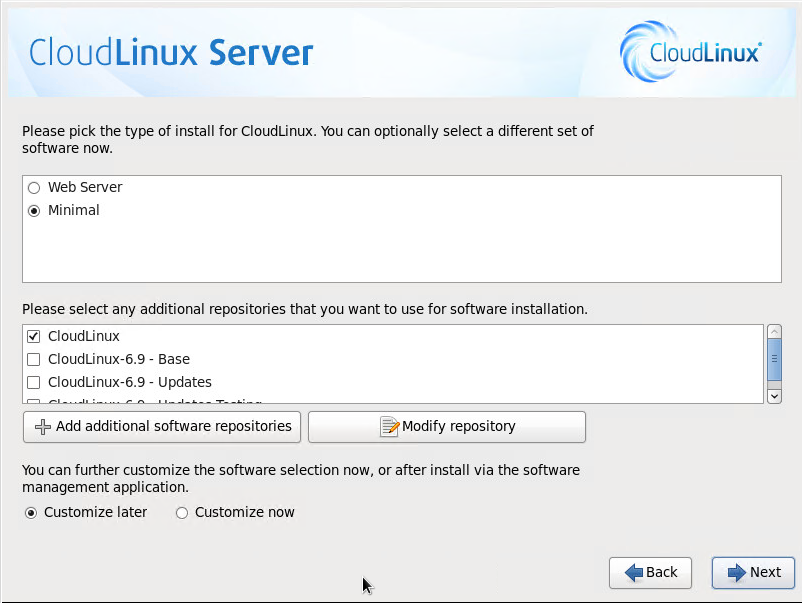
- Select the applications and software packages you want to install with CloudLinux. Choose wisely based on your server's intended use, then click on Next.
- The installation process has now started. This may take several minutes, depending on your system's performance and the number of packages selected.

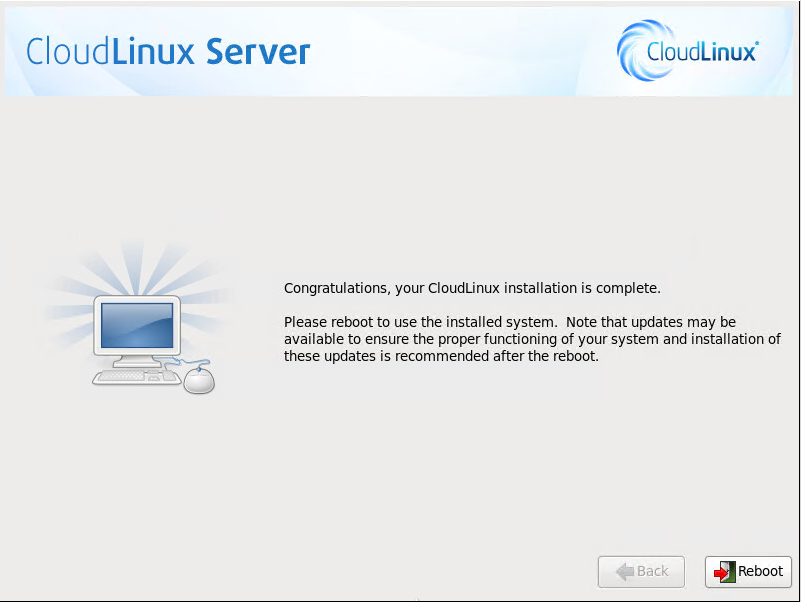
- Installation is now complete! Please remember to remove the installation media (USB, DVD, or ISO from virtual drive) and then reboot the system to boot into your newly installed CloudLinux OS.
- Your CloudLinux system is now restarting.

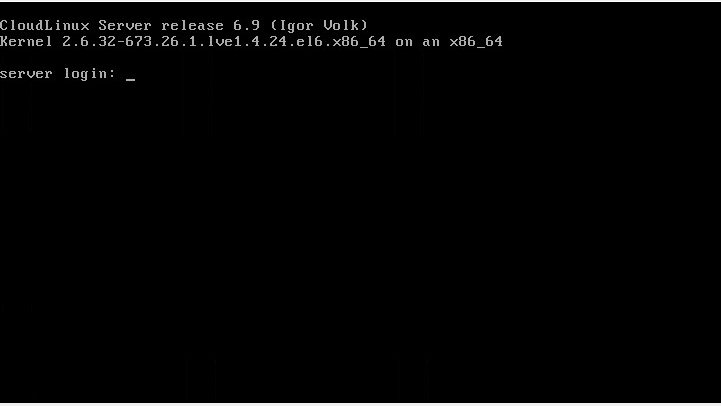
- Finally, you will see the CloudLinux Login Screen, indicating a successful installation. You can now log in with your root credentials and begin configuring your server.
For those considering various hosting environments, understanding the benefits of a cloud server can provide valuable context. Cloud servers offer flexible, scalable infrastructure that complements the resource management capabilities of CloudLinux, especially for growing hosting needs.
If you're exploring the broader landscape of virtual private servers, a comparison of VPS vs. Cloud hosting can help clarify which solution best fits your project requirements. While CloudLinux excels in shared environments, understanding these fundamental differences is crucial for optimal infrastructure planning.
⭐ Tips for a Smooth CloudLinux Installation
To ensure a hassle-free CloudLinux installation, keep the following tips in mind:
- Verify System Requirements: Before starting, confirm your VPS meets the minimum hardware requirements for CloudLinux to avoid performance issues later.
- Stable Internet Connection: A reliable internet connection is crucial for downloading packages and updates during the installation process.
- Backup Your Data: If you are installing on a system with existing data, always perform a full backup beforehand to prevent data loss.
- Document Credentials: Keep a secure record of your root password and network configurations for future access and troubleshooting.
Following these simple steps can help you mitigate common installation problems and get your CloudLinux server running effectively.
Conclusion
Congratulations! You have successfully set up CloudLinux OS on your Linux VPS. With the flexibility and reliability of Cloud VPS solutions, you can ensure that your server performs optimally, providing a seamless and secure experience for all your web hosting needs. CloudLinux's ability to isolate users and manage resources efficiently makes it an excellent choice for shared hosting environments, enhancing both stability and security. If you are facing any problems with the steps mentioned above, feel free to contact us through the comment section below. We will help you solve the issue.
For a more comprehensive guide and additional details on managing your Linux server, be sure to check our full article on how to install CloudLinux Server. This will provide you with even more insights for a seamless setup experience. Additionally, if you're looking for more robust solutions, exploring buy VPS hosting options can give you access to diverse plans tailored to your specific demands, ensuring you find the perfect match for your infrastructure.
For those who want to practice server management on a routine basis, consider purchasing Linux VPS hosting to explore its features and enhance your server management skills. This provides a stable and isolated environment to experiment and learn without affecting live production systems.
People also read:

Leave A Comment