
Arch Linux is a well-known Linux distribution that is both lightweight and flexible. With constant updates, many VPS providers and customers are looking to use Arch Linux. While installation may not be easy for everyone, this guide walks you through the complete process from USB creation to bootloader setup. Arch is light — it'll run on hardware that other distros choke on, but "runs" and "pleasant to use" aren't the same thing. If you are looking for a reliable environment to run Arch or any other Linux distribution in the cloud, Linux VPS hosting is a great option for performance and customization.
📋 Arch Linux System Requirements
| Component | Minimum | Recommended |
| Architecture | x86_64 only | x86_64 (no 32-bit support since 2017) |
| RAM | 512 MB | 2 GB+ (4 GB with a desktop environment) |
| Disk | 2 GB | 20 GB+ |
| Internet | Required | Wired connection during install |
That internet requirement isn't optional. The ISO ships a live environment, not packages — pacstrap pulls everything from mirrors. For more information on the differences between Linux distributions, refer to our comparisons: Debian vs Arch, Arch Linux vs Kali Linux, SUSE Linux, and Debian. If you're considering a security-focused distro instead, a Kali Linux VPS is worth a look.
🔍 Before You Start
Back up first. Partitioning wipes data, and there's no undo button once mkfs runs. Then check your firmware mode. Boot the live ISO and run ls /sys/firmware/efi/efivars — if the directory exists, you booted in UEFI mode and you'll use GPT partitioning. If it errors out, you're on BIOS/legacy with MBR. This one check decides your partition layout and your bootloader commands, so don't skip it.
Beginners: disable Secure Boot in your firmware settings before installing. Signed shim setups are doable later, but they're a distraction on day one. Dual-booting Windows? Disable Fast Startup too, or Windows will leave the disk in a locked hibernated state.
📥 Download and Verify the Arch Linux ISO
Download the latest ISO from the official Arch Linux download page. Then verify it — this takes 30 seconds and catches corrupted or tampered downloads:
sha256sum archlinux-x86_64.iso
gpg --keyserver-options auto-key-retrieve --verify archlinux-x86_64.iso.sig
The checksum proves the file downloaded intact. The PGP signature proves it came from the Arch developers. Different guarantees, both worth having.
💾 Create a Bootable Arch Linux USB
On Windows, use Rufus (DD mode) or balenaEtcher. On Linux:
sudo dd if=archlinux-x86_64.iso of=/dev/sdX bs=4M status=progress oflag=syncDouble-check /dev/sdX with lsblk first. One-letter typo can nuke an external backup drive. Most newer computers use UEFI boot mode — GPT partition table for UEFI, MBR for older BIOS/Legacy.
💻 Boot the Live Environment and Get Online
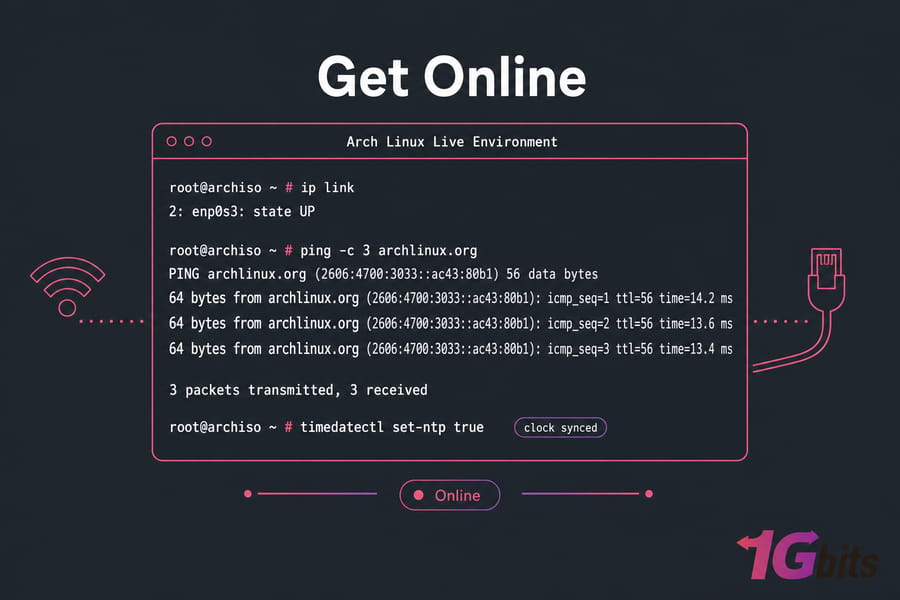
Boot from the USB. You land at a root prompt. Test connectivity immediately:
ip link
ping -c 3 archlinux.org
Ethernet usually just works. For Wi-Fi, use iwctl:
iwctl
station wlan0 scan
station wlan0 get-networks
station wlan0 connect YOUR_SSID
Then sync the clock with timedatectl set-ntp true.
💽 Disk Partitioning
Warning: everything below destroys data on the target disk. Use cfdisk /dev/sda if you'd rather have a menu than fdisk.
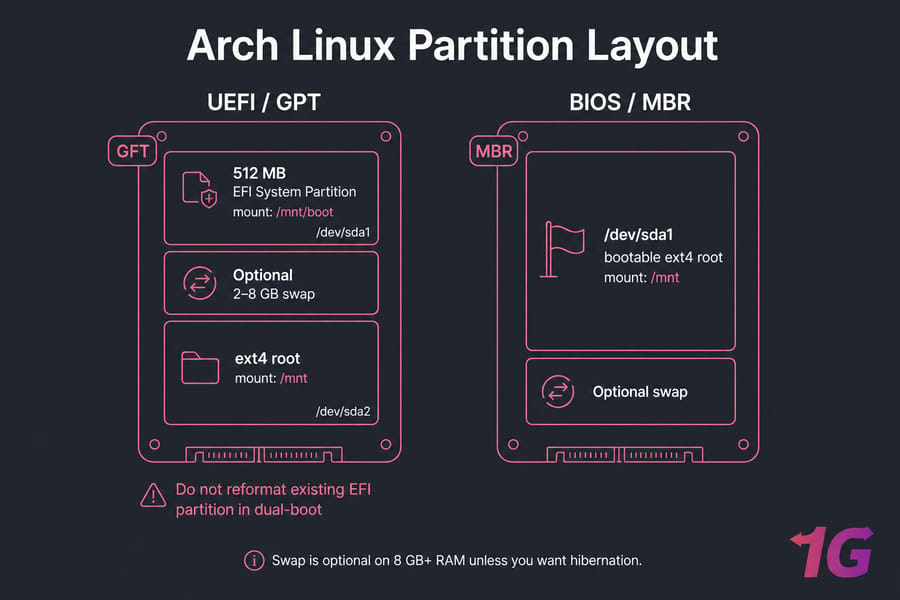
UEFI/GPT Layout
/dev/sda1— 512 MB, EFI System Partition/dev/sda2— remaining space, Linux filesystem (root)- Optional: 2–8 GB swap partition
BIOS/MBR Layout
/dev/sda1— root, marked bootable- Optional swap partition
Dual-booting? Do not reformat the existing EFI partition — mount it as-is. Windows lives there too. Filesystem choice: ext4 is the boring, reliable default. btrfs gives you subvolumes and snapshots, useful for rollbacks — but adds complexity. Swap is optional on machines with 8 GB+ RAM unless you want hibernation.
📂 Format and Mount Partitions
mkfs.ext4 /dev/sda2
mkfs.fat -F32 /dev/sda1        # UEFI only
mkswap /dev/sda3 && swapon /dev/sda3

mount /dev/sda2 /mnt
mount --mkdir /dev/sda1 /mnt/boot   # UEFI only
Mount root first, always. Mounting /mnt/boot before /mnt exists is one of the most common beginner mistakes, and it fails quietly in ways you won't notice until GRUB breaks.
📦 Base System Installation
reflector --latest 10 --sort rate --save /etc/pacman.d/mirrorlist
pacstrap -K /mnt base linux linux-firmware sudo nano networkmanager intel-ucode
Swap intel-ucode for amd-ucode on AMD CPUs. Microcode packages ship processor bug fixes that load at boot — install one, it's free stability. pacstrap is just Arch's bootstrapper: it installs packages into /mnt instead of your running system.
⚙️ Initial System Configuration
genfstab -U /mnt >> /mnt/etc/fstab
arch-chroot /mnt

ln -sf /usr/share/zoneinfo/America/New_York /etc/localtime
hwclock --systohc

# uncomment en_US.UTF-8 UTF-8 in /etc/locale.gen
locale-gen
echo "LANG=en_US.UTF-8" > /etc/locale.conf
echo "KEYMAP=us" > /etc/vconsole.conf
echo "archbox" > /etc/hostname

mkinitcpio -P
Add a matching /etc/hosts entry: 127.0.1.1 archbox.localdomain archbox. For networking, install and enable NetworkManager or systemd-networkd with systemctl enable.
👤 Create Users and Enable sudo
passwd
useradd -m -G wheel -s /bin/bash yourname
passwd yourname
EDITOR=nano visudo
In visudo, uncomment %wheel ALL=(ALL:ALL) ALL. Save, exit. Now your user can escalate when needed. Running everything as root is how people accidentally delete their own home directory — don't be that person.
💿 Bootloader Configuration
# UEFI
pacman -S grub efibootmgr
grub-install --target=x86_64-efi --efi-directory=/boot --bootloader-id=GRUB
grub-mkconfig -o /boot/grub/grub.cfg

# BIOS
pacman -S grub
grub-install --target=i386-pc /dev/sda
grub-mkconfig -o /boot/grub/grub.cfg
GRUB or systemd-boot? GRUB handles both firmware modes and dual-boot detection via os-prober (enable it in /etc/default/grub first). systemd-boot is simpler and faster but UEFI-only. For a first install, take GRUB. For systemd-boot: bootctl install.
🔄 Reboot Into Your New System
exit
umount -R /mnt
reboot
Pull the USB during reboot. Log in as your user, then bring networking up:
sudo systemctl enable --now NetworkManager
nmtui
🌐 Network Configuration
Ethernet Connection
Usually, after installation, you just need to connect the network cable and enable the network management service. DHCP automatic configuration is usually the default. If you need a static IP address, edit the networkd or Netctl configuration file as desired.
Wireless Connection (Wi-Fi)
Once installed, you can use NetworkManager or packages like wpa_supplicant to automatically connect to wireless on your new system.
🚀 What to Do After Installing Arch Linux
- Update:
sudo pacman -Syu. Do this weekly — Arch is rolling release. - Desktop environment: GNOME (
pacman -S gnome gdm), KDE Plasma (plasma sddm), or XFCE (xfce4 lightdm lightdm-gtk-greeter). Enable the display manager withsystemctl enable gdm. See what else is out there in our Fedora guide for comparison. If you're new to desktop Linux entirely, start with What is Ubuntu. - Firewall:
pacman -S ufw && ufw enable, or nftables if you prefer. - Tools: git, openssh, base-devel, firefox, and your editor of choice. Here's how to install Python and pip on Linux when you're ready to build things.
- Drivers: Install firmware or driver packages (e.g.
intel-ucodeorxf86-video-*depending on your hardware) for better performance. - Gamers: check the best Linux distros for gaming before assuming Arch is the answer.
- Keep a reference handy: a Linux command cheat sheet saves a lot of tab-switching.
⚠️ Troubleshooting Common Install Problems
- Won't boot after install: usually a mismatched boot mode (installed in BIOS, booting in UEFI) or an unmounted EFI partition during
grub-install. Re-chroot from the live ISO and redo it. - GRUB errors:
efibootmgrmissing, or wrong--efi-directorypath. - No Wi-Fi after reboot: you forgot to enable NetworkManager inside chroot.
- Windows missing from GRUB menu: install
os-prober, uncommentGRUB_DISABLE_OS_PROBER=false, regenerate the config. - Secure Boot blocks boot: disable it in firmware.
- Partitions fail to mount: confirm the disk controller mode in BIOS/UEFI.
fdisk -lshould present the disks. - Accidentally formatted the wrong disk? Stop using it immediately and see how to recover deleted files in Linux.
When in doubt, the official Arch Wiki installation guide is the canonical source — it's updated faster than any blog post, mine included.
🖥️ Running Arch on a VPS
A manual Arch install on a VPS needs console or IPMI/KVM access, since you're partitioning before networking exists. Standard Arch has no cloud-init, and interface names differ from desktop hardware (ens3 instead of enp0s3, typically). I'd run Arch on a VPS for dev and testing where fresh packages matter — for production, a rolling release means you own every update. Solid Linux VPS hosting with real console access makes the difference between a 20-minute install and a support ticket. Prefer an enterprise-oriented alternative? Check out Rocky Linux VPS for a stable RHEL-compatible option.
🏁 Conclusion and Next Steps
By following this Arch Linux installation guide, you will have a minimal and stable Arch Linux system. Now you can install more packages and customize the system according to your needs. As a next step, you can add a graphical interface, user applications, and desired services.
If you're planning to install Arch Linux, you need a reliable server environment which can make the process smoother and faster. We offer instant setup in under 5 minutes for our Linux VPS, NVMe and SSD storage, and free daily backups, all with transparent pricing and no hidden fees. 👉 View Linux VPS

Leave A Comment