
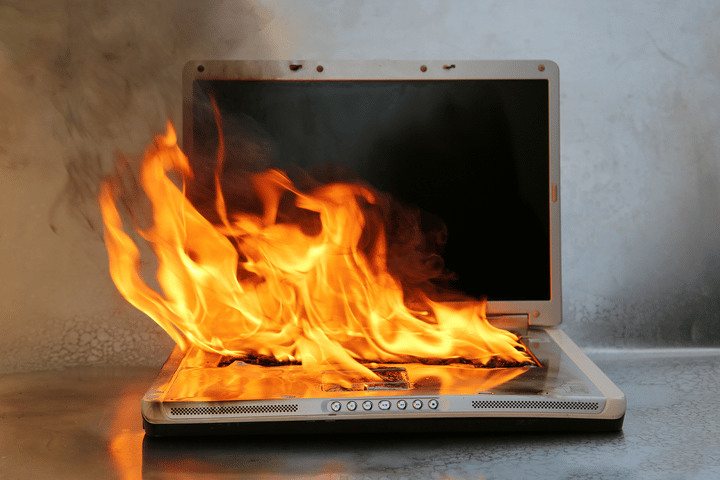
Are you a summer person? I thought so too. But your PC is not a big fan of the heat. It's always a good habit to check CPU temperature once in a while, especially if you regularly strain your system. In this article, we will go through why overheating happens, how to monitor CPU temperature on Windows and Linux and a bonus section with tips and tricks on keeping the core temperatures down.
The CPU temperature usually depends on your system's applications, programs, and software. If your device's compatibility is not excellent, it can cause the system to overheat.
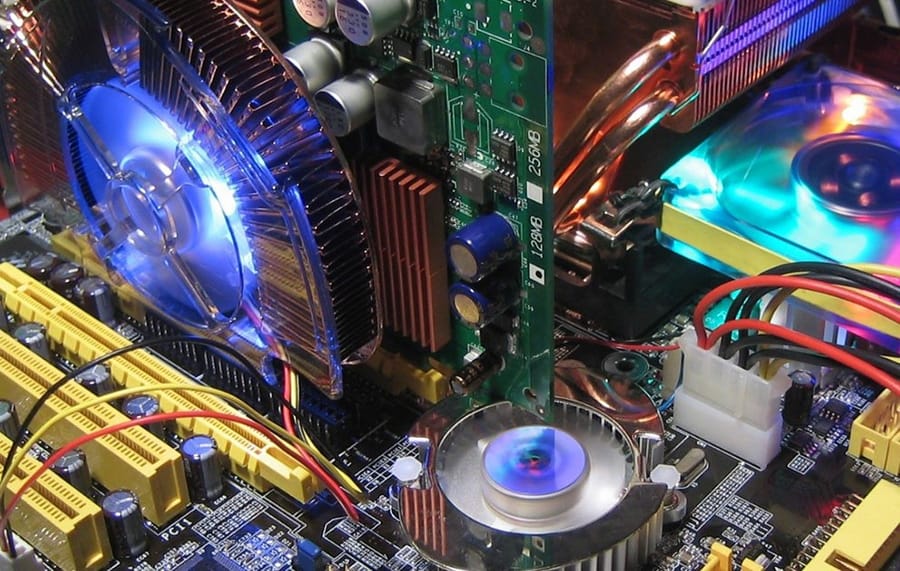
The computing processing unit (CPU) performs millions of tasks in a short period which can cause the processor to heat up. This is normal when the system is under pressure, but it's a sign to have a look if it happens frequently.
System overheating creates performance-related severe problems for the user while working on the laptop/computer.
Reasons for overheating of Computer/Laptop
There can be multiple reasons your system is overheating, and if not dealt with at the time, it can cause permanent damage to your PC. It is highly recommended to check the temperature at least once a few months to be on the safe side.
Here are some of the most common reasons for increased CPU temperatures:
Size of the Computer/Laptop
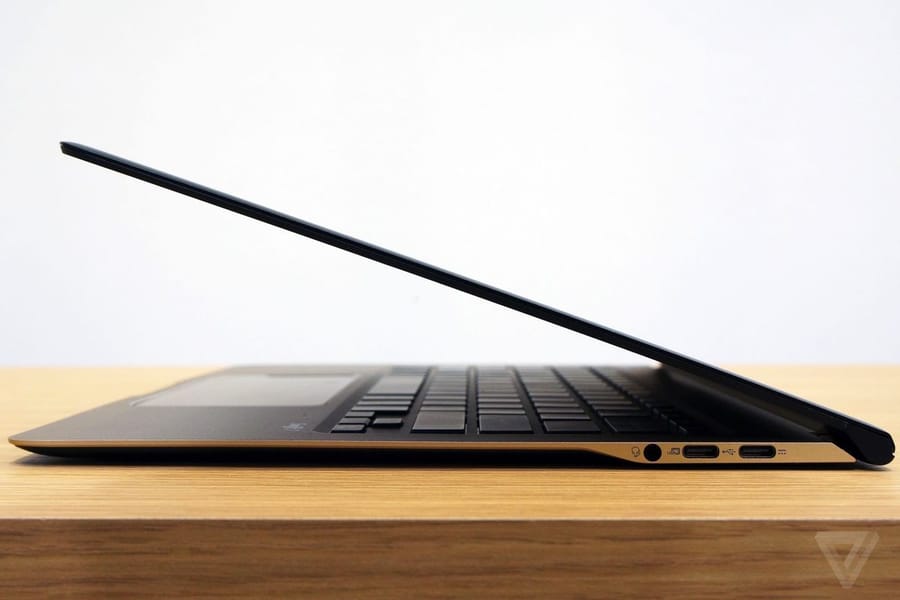
If you have a thinner/lighter system, you might face the overheating issue because some manufacturers remove cooling fans to reduce the system's size. Hence, owners of these computers/laptops require extra cooling accessories to cool down their system.
These types of laptops are not made to manage high loads of work, so when under pressure, it's likely that they will overheat.
Overclocking
Overclocking is a command-line issue that increases the temperature of your system. Overclocking occurs when a user modifies the system's processor to get more performance. It can cause overheating of the system due to the force working of the system for performance.
The increase in performance comes with a significant temperature rise. Daily monitoring of your CPU temperatures should be a must for overclockers.
PS: For a comparison between the new Intel server CPUs, have a look here.
Old System

If you have an older system, then you might face overheating issues. Overheating in older systems occurs due to the fan's dust that resists the fan's required working to cool down a system. It also results from running heavy software on the system because it may not be compatible with these software types.
It's hot outside

If your environment is hot in general, it can have an effect on your system. Don't have direct sunlight on your system. Try to keep the surrounding environment as cool as possible and always keep an eye out for the internal temperatures. This is one of the main reasons why data centres maintain a cool temperature to keep their server CPUs from overheating.
How to know if your CPU is too hot?
Your system can get heated depending on how much load it's handling. However, we have done the research and tests to show the ranges of temperatures CPUs go through.
In general usage, temperature between 40 degrees Celsius and 65 degrees Celsius is considered to be safe. This is a stage when resource usage is in low demand.
The CPU temperature can go up to 80 - 85 degrees Celsius at high resource usage. This can happen during extended gaming sessions or when rendering videos. While this temperature is fairly normal for a few minutes, it is not good for an extended period of time.
Anything above that temperature can harm the components of the system, starting from the CPU to the surrounding components.
If you experience high temperatures on a frequent basis, you should check for the problem. If temperatures reach above 90 degrees Celsius repeatedly, the lifespan of the processor will start to reduce.
CPU Temperature Monitor in Windows
There are generally two ways to get this done. You can use the inbuilt BIOS or use temperature monitoring software. We will cover both these options below.
Check out the BIOS/UEFI
Using the relevant keys, you can check your system's temperature by accessing the BIOS during the startup. Depending on the manufacturer, the keys can change. Here's a list of keys that you can use to access the BIOS during the boot-up. (If it doesn't work for you, do a simple Google search, and you will find it)
- Acer: F2 or DEL
- ASUS: F2 for all PCs, F2 or DEL for motherboards
- Dell: F2 or F12
- HP: ESC or F10
- Lenovo: F2 or Fn + F2
- Lenovo (Desktops): F1
- Lenovo (ThinkPads): Enter + F1.
- MSI: DEL for motherboards and PCs
- Microsoft Surface Tablets: Press and hold the volume up button.
- Origin PC: F2
- Samsung: F2
- Sony: F1, F2, or F3
- Toshiba: F2
To access the BIOS to check the system temperature from Windows 10, follow the steps below.
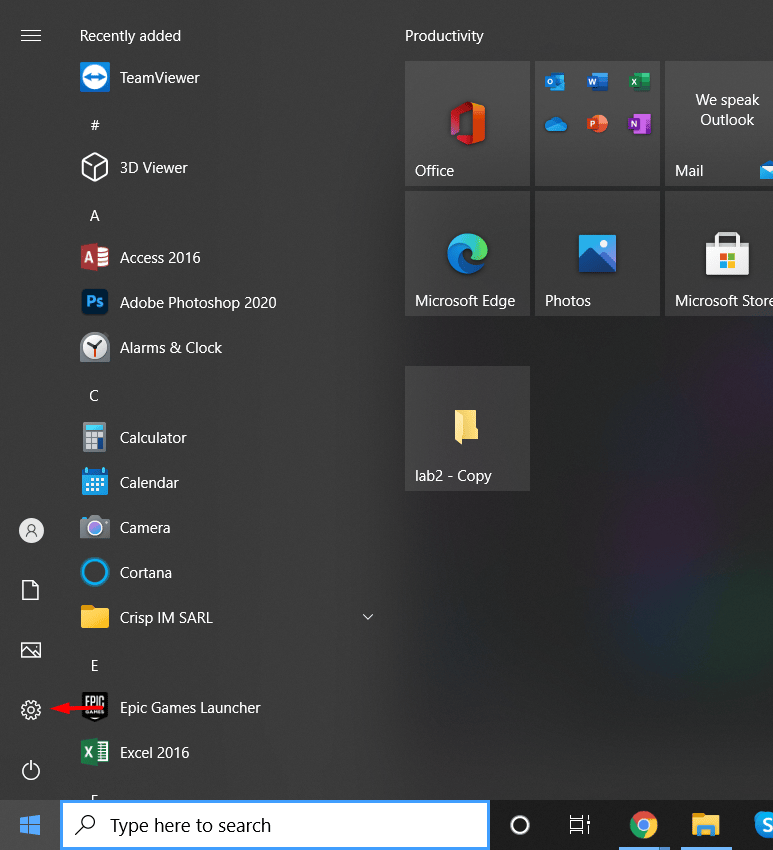
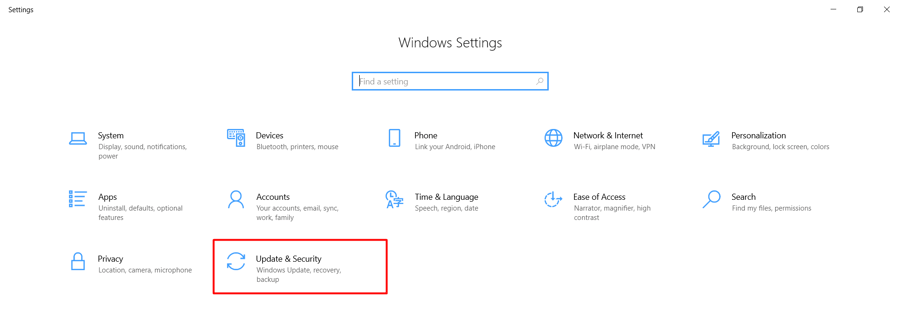
Step 1: Go to Settings from the Start Menu or use the Windows and I keys as a shortcut. (Settings option is represented as Gear icon)
Step 2: In Settings, click on the Update & Security option
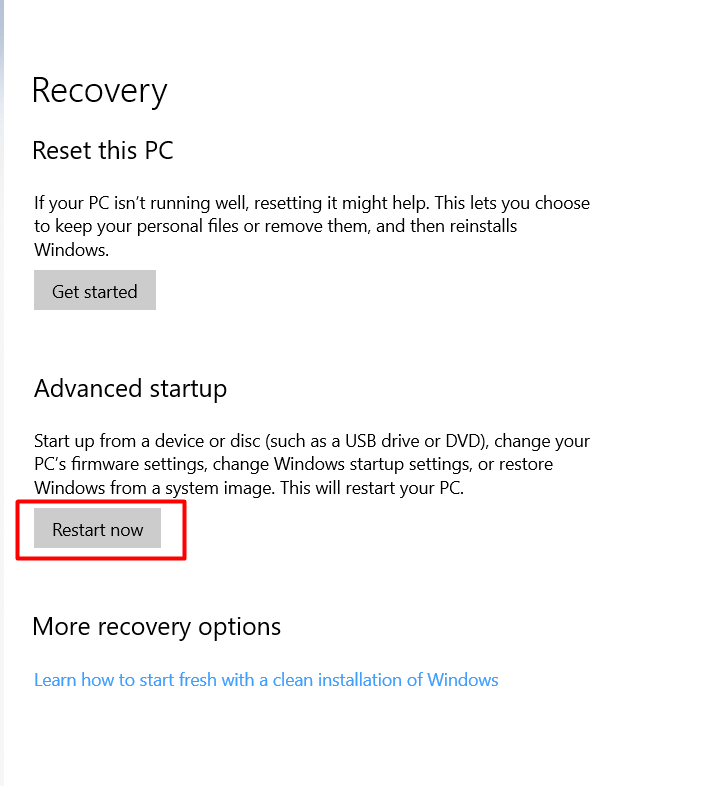
Step 3: Click on recovery from the left side panel

Step 4: In the Recovery option, select Restart now below the Advanced startup option.
Step 5: Choose 'Troubleshoot' on the reboot screen.
Step 6: Select Advanced options.
Step 7: Click on the UEFI Firmware settings and restart to confirm the selection.
Step 8: Finally, the system will redirect you to the main menu of the BIOS. Find the computer/laptop's CPU temperature.
Using Open Hardware Monitor software to check CPU temp
Note: There are many PC temperature check software on the internet. We will use the Open Hardware Monitor as it is free software and shows all the information needed for this tutorial. For an alternative, you can use Core temp software.
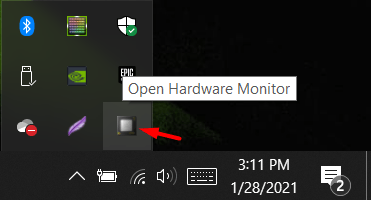
Step 1: Download Open Hardware Monitor and install it on your system.
Step 2: Open the software by clicking on the icon seen on the toolbar. (It will automatically open once the installation is complete)
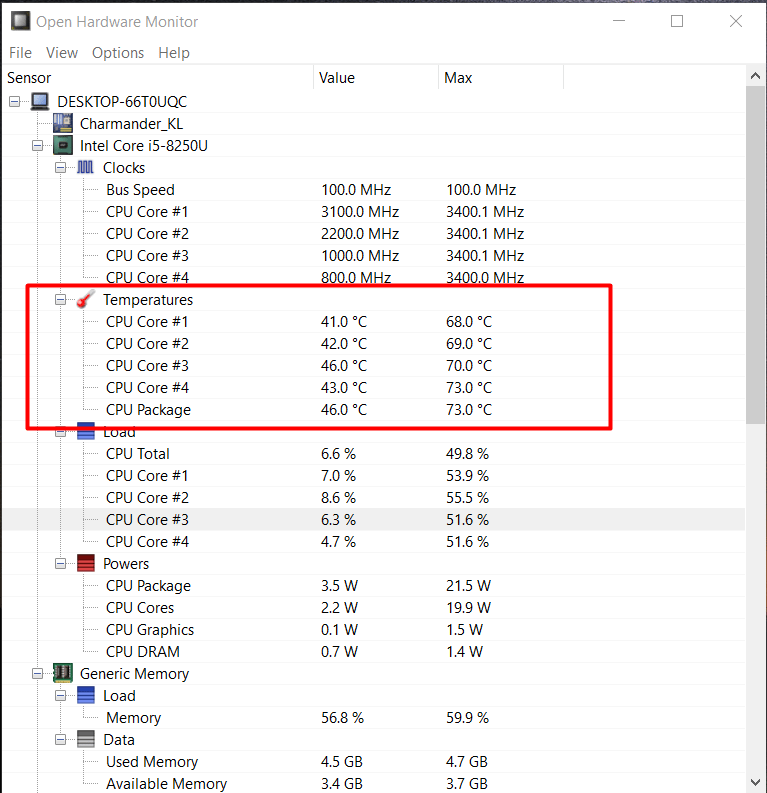
Step 3: Check the temperature statistics.
Don't be alarmed by all the information that you can see here. What's essential is the temperatures you see next to the CPU cores. You can see the current temperature under the "Value" section and the maximum temperature recorded on your processor.
How to Check CPU Temperature in Linux [Linux CPU temperature]
There is no argument that Windows is the most used operating system due to its impressive GUI. However, due to its efficient features, Linux is also one of the most preferred operating systems by developers and programming geeks. In some cases, users face overheating issues in their system, so there are different ways to check CPU temperature in Linux, and these ways are:
(For example, we have used Ubuntu Linux because it is a widely used Linux environment among developers).
- First, install the sensors in your system to check CPU temperature, so open the terminal in the Linux, then execute the below command:
$ sudo apt-get install lm-sensors
- After executing this command, your system starts to download and install the sensors if it won't detect any sensor files already on the system. As you can see, we have used the Sudo command, which stands for Super Do command. It works to execute a command line by accessing all of the required permission from the system. To learn more, check out our list of Linux commands.
- Once the system installs the sensors, it is required to detect the hardware monitoring chips using the following command. It will provide all needed information on CPU sensors and hardware monitoring chips.
sudo sensors-detect
- Execute the following command to check the temperature and all of the other required information regarding your system temperature:
Sensors
- To display the temperature-related details in real-time, use the following command in the terminal:
watch -n 2 sensors
How to Check CPU Temperature in Ubuntu Linux by Psensor
If you want to use Psensor in the Linux system to check CPU temperature, it is essential to configure the lm-sensors before installing the Psensor.
Lm-sensors is a command utility that is used for hardware monitoring in Linux. If you want to measure the hard disk temperature, use the hddtemp in the terminal.
- First, open your Linux terminal and type the following command to install the lm-sensors and hddtemp in your system.
sudo apt install lm-sensors hddtemp
- After executing the above command, use the detection command to select the hardware sensors.
sudo sensors-detect
- Use the below command in the terminal to ensure the working of the sensors
Sensors
- After successfully executing the above command, you will see all temperature-related information in your terminal.
acpitz-virtual-0
Adapter: Virtual device
temp1: +42.0°C (crit = +97.0°C)
coretemp-isa-0000
Adapter: ISA adapter
Physical id 0: +42.0°C (high = +100.0°C, crit = +100.0°C)
Core 0: +42.0°C (high = +100.0°C, crit = +100.0°C)
Core 1: +41.0°C (high = +100.0°C, crit = +100.0°C)
Now, run the below command to install Psensor:
sudo apt install psensor
Once you install the Psensor, run the application, and configure it according to the system's requirements.
View Hard Disk Temperature
Linux offers unique features of SMART built-in health-check tools for hard disks. This tool provides various options like reporting technology, self-monitoring, complete analysis, etc.
The SMART tool shows all the required details of your hard disk so that you can protect yourself from losing the data. This shows all components, including the hard disk's temperature, and you can check all details of the disk to find any potential issues.
How to Check Temperature in Ubuntu Linux Using i7z
i7z is a command used to print CPU information and created explicitly for Intel core processors such as i3,i5,i7, etc. This is the best CPU temp monitor for Linux systems.
First, execute the following command in the Linux terminal to install on Ubuntu:
sudo apt install i7z
How to Check Temperature of NVMe SSD
Execute the following command in the terminal to monitor the temperature of the Nvme SSD
sudo apt install nvme-cli
Once you execute the above command, your system will start to install nvme-cli. Use the following command to get a complete list of NVMe devices.
sudo nvme list
How to Keep Your CPU Temperature Down
Now that we have gone through all the ways to monitor and check CPU temperatures, how can we keep them on safe levels? There are a few ways to keep your system cool and prevent it from internal or external damage.
1. Clean Your Computer/Laptop

It is good to keep your computer clean from both inside and outside. There are a few ways to quickly clean the computer, so you can use a dust rag or a compressed air duster to clean it without any damage. You can also use a vacuum cleaner but be extremely careful and gentle while using it on your computer's components.
2. Replacing the Thermal Paste
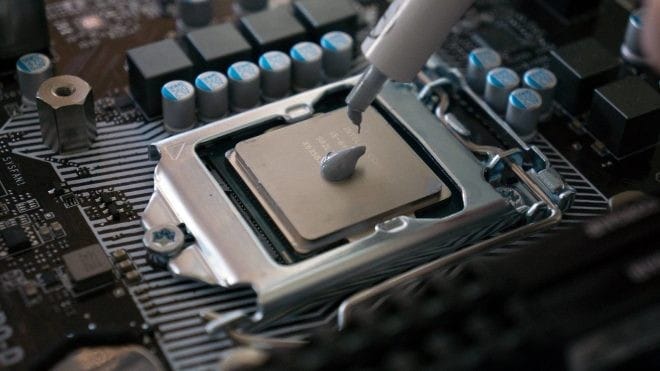
The original thermal paste is suitable for a couple of years but if it's dry, consider changing it. Many users have noticed that overheating can be eliminated by replacing the old thermal paste layer with the new one. It helps a system stay cool as it prevents the transfer of heat from one component to another.
3. Buy a New CPU Cooler
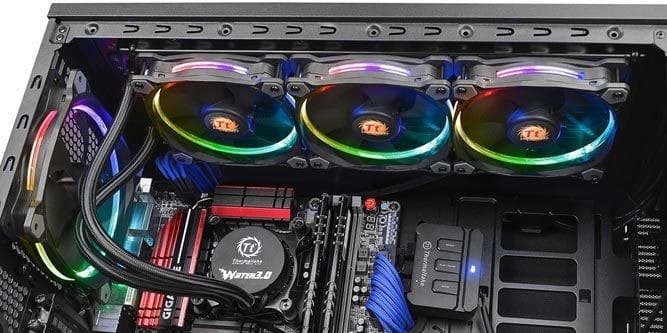
In case you are facing a significant issue of overheating and not cooling down your system, you can purchase another CPU cooler or fan. It is easy to install the cooling system, and now there are liquid cooling systems with fans that can quickly eliminate the overheating issue. Consider this option only if you are 100% sure there is no other option.
4. Keep Your System Safe from Malware
Malware can be a file or software created to harm a computer. Malware can take confidential information from your system and transfer it to the malware owner. Hence, using antivirus software is essential to keep your system safe from this malware.
This malware runs in the system's background and is very resource extensive. It may cause overheating, so it is good to use antivirus to eliminate them from your system.
5. Purchase a Laptop Stand

A laptop stand offers an appropriate airflow space for your laptop to stay cooler while processing heavy applications. A laptop stand elevates your laptop to make space for airflow to keep it from suffocation. This stand also offers an excellent angle to work on it without having any issues. You can check laptop temperature before and after using the stand to see the difference.
Conclusion
We have included all of the required details to check CPU temperature in both Windows and Linux systems. A recap: high CPU temperature or overheating can cause multiple issues in the system. Overheating can damage the computer/laptop internally and externally; hence, it is always good to check the CPU temperature to prevent your system from unwanted overheating.
Windows has a relatively more straightforward process to check your system's health and temperature due to the presence of a GUI. Whereas in Linux, users are required to execute the appropriate commands to check the temperature.
If you have any queries let us know in the comments, and we will try to answer them as soon as possible. Don't let your system overheat; if your friends have heated up computers, share this article with them.
People also read:

Leave A Comment