
What is InterWorx? The InterWorx Hosting Control Panel is a web and Linux server management system. This platform provides tools for server admins to command their servers and for end-users to oversee the operations of their websites.
The panel has two operating modes:
- NodeWorx
- SiteWorx
NodeWorx is the system administrator mode for managing server-wide behaviour and SiteWorx accounts. SiteWorx is the website owner mode used primarily by hosting end-users to manage their web hosting accounts and associated features.
InterWorx Control Panel runs on various systems and hardware including Virtual Private Server (VPS) systems supported on OpenVZ, Virtuozzo, Xen and VMware. It also supports CloudLinux platforms.
If you're unfamiliar with VMware or want to learn how it works, check out our article on What is VMware and How VMware Works. This guide will provide valuable insights into VMware's virtualization technology and how it can enhance your hosting infrastructure.
Advantages of using InterWorx:
- Provides the best performance with Apache 2.4.10 installed with 5.5.44-MariaDB and PHP 5.4.16 with primary installation
- Provides SPAM filtering and Virus filtering interfaces which can be managed from the Panel
- Provides SNI support
- Provides high-Availability Load Balancing At A Fraction Of The Price
In this article, we will be going through the installation of the InterWorx control panel on a CentOS 7 server, an RPM-compatible Linux distribution.
Prerequisites
- A memory of at least 256 MB (512 MB recommended)
- Minimum of 512 GB of Disk space (1 GB recommended)
- Access to a Linux server
- A clean installation of CentOS 7
- A valid and active InterWork license key
- Basic understanding of Linux commands
How to install InterWorx on CentOS 7
The first step is to have access to your server. Login to your server with the user account and download the InterWorx installation script from the official website:
If you're looking for a lightweight web server alternative, check out our guide on How to Install Lighttpd on CentOS 7, which offers an efficient solution for handling web traffic on your server.
sh <((curl -sL interworx.com/inst.sh))
The above command will prompt you to proceed further with the installation process. You can run the below command not to be prompted after each configuration step, but we recommend going with the first option:
sh <((curl -sL interworx.com/inst.sh)) -l
When you run the initial installation script, you will receive the following prompt to verify the IS settings. Once done, press Enter.
=-=-=-=-= Installing InterWorx-CP =-=-=-=-=-
This script will install InterWorx-CP on your system.
Please make sure that you have backed up any critical
data!
This script may be run multiple times without any
problems. This is helpful if you find an error
during installation, you can safely ctrl-c out of
this script, fix the error and re-start the script.
Details of this installation will be logged in iworx-install.log
TARGET : CentOS Linux release 7.0.1406 (Core)
PLATFORM : GNU/Linux
PROCESSOR : x86_64
RPM TARGET: rhe7x
RPM DISTRO: cos7x
RPM DIR : /usr/src/redhat/RPMS
SRPM DIR : /usr/src/redhat/SRPMS
SRPM HOST : updates.interworx.com
IWORX REPO: release
Once you proceed further from this point, the installer will remove some packages that are not needed for the InterWorx control panel. After proceeding with this prompt, it will complete the installation, and you will get a message directing you to the control panel access.
-=-=-=-=-= Installation Complete! Next Step: License Activation! =-=-=-=-=-
To activate your license, go to
http://your-ip:2080/nodeworx/ or
https://your-ip:2443/nodeworx/
Also, check out http://www.interworx.com for news, updates, and support!
-=-=-=-=-= THANK YOU FOR USING INTERWORX! =-=-=-=-=-
At this stage, you have a choice to activate the license via the CLI or through the web browser by logging into the control panel. We will cover both activation methods here!
Activating InterWorx with the Command Line Interface
Login to your server as the root user and enter the command below:
/home/interworx/bin/goiworx.pex
You will be prompted to provide the license key of InterWorx, which will look something similar to this “INTERWORX_XXXXXXXXXX”. Enter the license key, and your activation process will be concluded.
Activate InterWorx from the Control Panel
When activating using the GUI, it comes with a bit more steps than the previous one but is quite easy to follow. First login to the control panel using the following URL:
http://your-ip:2080/nodeworx/
or
https://your-ip:2443/nodeworx/
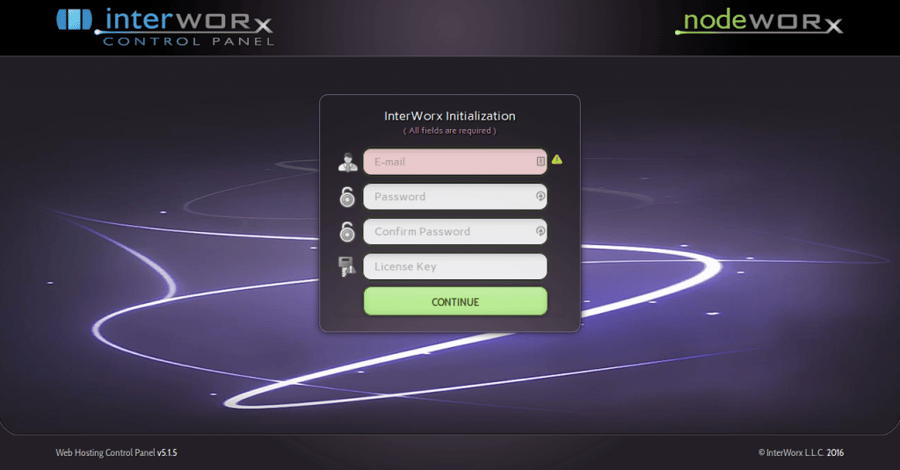
Fill in the form with the requested information and click on Continue.
Once the license is activated, it will automatically configure the settings for the panel. Wait until the progress bar completes the setup.
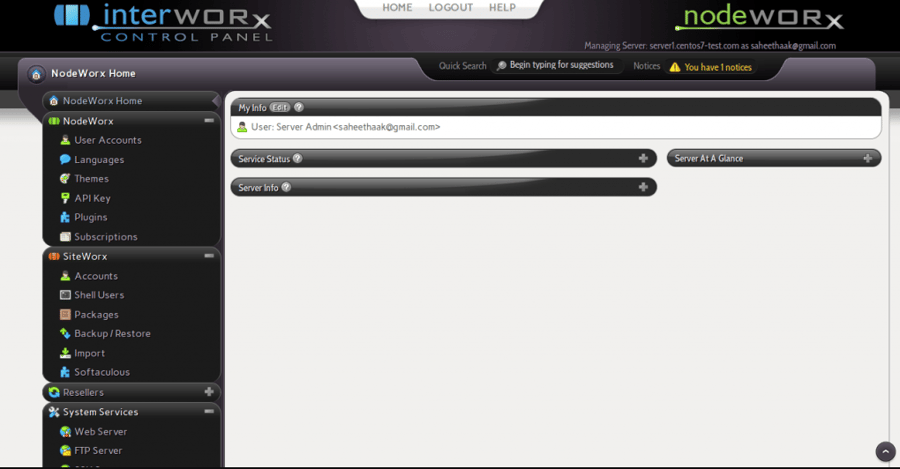
You will be prompted with the license agreement, where you can agree and proceed to set the DNS to complete the control panel setup. Once the settings are done, you will have the Server Manager Panel (NodeWorx) and the Website Manager Panel (SiteWorx).
You can manage your server from Nodeworx and manage your domain using Siteworx.
If you're looking to extend remote access capabilities, you might also want to check out our guide on How to Install XRDP on CentOS, which explains how to set up remote desktop access on your CentOS server.
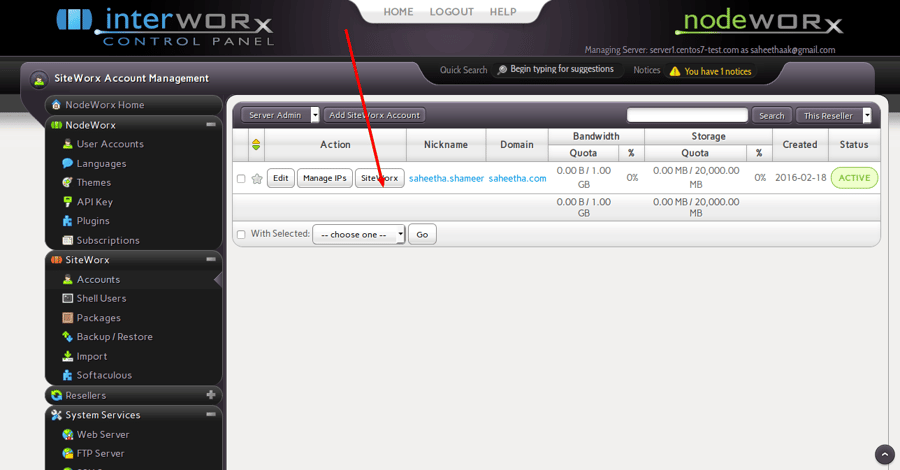
Click the Siteworx icon next to the domain to access its Siteworx panel.
Conclusions
That’s the end of this tutorial, and we hope that you were able to install InterWorx on your Linux VPS successfully. InterWorx is a very light control panel, yet quite powerful and can be installed within a few minutes. By utilizing the web interface, you will control your CentOS server and manage the accounts efficiently.
With its intuitive design and robust features, InterWorx allows you to streamline your server management tasks, making it an ideal choice for both beginners and experienced users. Whether you’re setting up a new site or managing multiple accounts, this control panel has you covered.
We would love to hear your feedback, so don’t forget to leave a comment in the comment section below.
If you're looking to optimize PHP performance on your CentOS server, you might also want to check out our guide on How to Install XCache on CentOS, a helpful solution for improving caching and speeding up your website.
People also read:
Leave A Comment