
This tutorial will follow the steps to install Plesk on Windows, a commercial web hosting platform. Originally released under the U.S. company Plesk Inc. and designed in Novosibirsk, Russia, Plesk was acquired by SWSoft in July 2003. SWSoft renamed itself under the Parallels name (a brand acquired by SWSoft) in 2008.
In 2015 Parallels rebranded the service provider business unit to Odin. In December 2015, the Odin brand was acquired by Ingram Micro, rendering Plesk a separate business entity. In this tutorial, we will go through the installation process of Plesk on your Windows Server.
There are multiple ways to do this task, but we recommend following the method mentioned here. It is easy to follow and installs the Plesk control panel in its best condition.
For those looking to enhance their experience with Windows-based virtual private servers, consider exploring our posts on Windows 11 VPS and Windows 10 VPS for optimal performance and support.
Prerequisites
Before we get started, you will need the following.
- A freshly installed Windows Server version
- Access to the Windows VPS via RDP protocol
- A Plesk license
- At least 2 GB of RAM
Install Plesk on Windows Server
Plesk offers a one-click installation feature that is fast and hassle-free. The Plesk control panel will be installed with the default configurations. Installing Plesk is as easy as installing a normal application.
- First login to the Windows VPS via RDP
- Download the Plesk installer from here. This will download the most stable Plesk version available. At the time of writing this article, it was Plesk 17.
- Launch the Windows command prompt. Change the working directory to the one where you saved the installer binary, then run the following command:
plesk-installer.exe --select-product-id=panel --select-release-latest --installation-type=recommended
The installation will start automatically, and the whole process will be from 30 mins to an hour. It will download the latest stable version of Plesk and all the needed components during the installation process. It will also add all the patches and updates, ensuring the security and performance are at a maximum.
Once the installation is finished, you can always add more of the Plesk components that you will need from the dashboard.
Additionally, ensure that the .NET Framework is installed, as it may be required for certain Plesk extensions and features. For detailed instructions on this process, refer to our guide on how to install the .NET Framework on Windows.
Plesk post-install configurations
When the installation has finished, you need to make some minor configurations. First, access the web interface of Plesk:
https://YOUR.SERVER.IP.ADDRESS/
You will be greeted with a login page. When logging in for the first time, you should provide the username as administrator and the server’s administrator password.
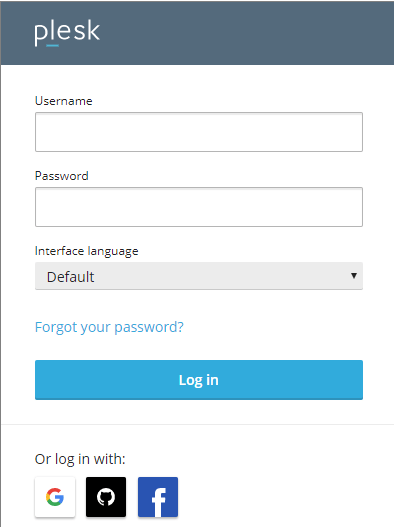
- Now provide your Plesk administrator email and password in the corresponding fields. The next time you log in to Plesk, you can use this password, and the username will be admin.
The next step is the licensing:
- If you have already purchased a Plesk license, paste the activation code you received in the “Proceed with a paid license” field. If not, you can buy the license from the Plesk Online Store. You will then receive an email with your activation code.
- You don’t have to buy the license up-front because they provide a 14-day trial period. To do so, choose the “Proceed with a full-featured trial license” option.
The last stage is to confirm the End-User License Agreement. Once that is done, click Enter Plesk.

Once brief initializing is finished, Plesk will be completely ready to work.
Wrapping up
You have completed the installation and are now ready to fully utilize Plesk's power to manage your web hosting environment efficiently. This article covered the step-by-step process to install Plesk on Windows Server via RDP, making it easier for you to set up websites, manage databases, and handle emails. Additionally, we walked through the initial configurations of the Plesk control panel to get the web interface up and running smoothly. If you're looking for more flexibility in managing your hosting services, consider using a VPS with Plesk to optimize performance and scalability for your projects.
For those interested in a more tailored hosting experience, you might consider exploring Windows dedicated hosting options, which can offer enhanced performance and control for your Plesk installation.
If you encounter any difficulties during the process, please contact us via the comments below.
For those looking to enhance their Windows server experience further, consider exploring our guide on the best Windows VPS options to find the perfect solution for your needs.
People also read:
Leave A Comment