
Throughout this tutorial, we will follow the steps to install docker on Ubuntu. In the last few years, Docker has gained popularity in creating containers for application deployment. Docker is an open-source technology that uses containers to contain and run different and individual microservices.
It helps a lot for the DevOps team to manage their delivery pipeline with great automation. Many organizations that have implemented the DevOps approach are using Docker technology. Docker is very familiar with virtual machines, but docker containers ensure the portability that depends on the host operating system.
With the help of Docker, you can easily bridge the gap between the developers and the IT operation team. It helps the team make small changes in the ongoing application at any development phase without impacting the whole system. With Docker, there is transparent communication among team members.
To run an image, you will need a virtual machine, but with Docker, you do not have to worry about the requirements that make it a perfect fit for VPS projects. Docker is available in two versions- Docker CE (Community Edition) and Docker EE (Enterprise Edition); you can choose Docker CE for small enterprise projects.
You can easily install your favourite Docker version for any Linux distribution. Below is the documentation on how you can install Docker on Ubuntu 18.04. The guide will also work for Ubuntu 16.04 and 20.04. For those new to the operating system, it’s beneficial to understand the basics of Ubuntu before diving into Docker. Check out our guide on What is Ubuntu to learn more about its features and advantages.
Prerequisites for Docker
Below are the prerequisites for installing Docker on the Ubuntu OS.
- An Ubuntu 16.04, 18.04 or 20.04 64-bit operating system.
- Create a user account for using Docker with Sudo privileges.
- You should have a command line/terminal (CTRL-ALT-T or Applications menu > Accessories > Terminal) for running Docker installing and setup commands.
- You will require Docker repositories (optional).
Follow the Below-Mentioned Steps to Install Docker on Linux Ubuntu.
To further enhance your understanding of Docker, be sure to check out our guide on basic Docker commands for a comprehensive overview of essential commands you’ll need to get started.
How to Install Docker on Ubuntu
Check for the latest version if you have a Docker installation package in the official Ubuntu repository. Before starting, you must ensure that the latest version is installed from the official Docker repository. A new package source and GPG key are added to ensure validated download. After that, we can install the packages. Below are the steps and commands.
For those looking to familiarize themselves with essential commands that can enhance their Ubuntu experience, check out our guide on basic Ubuntu commands.
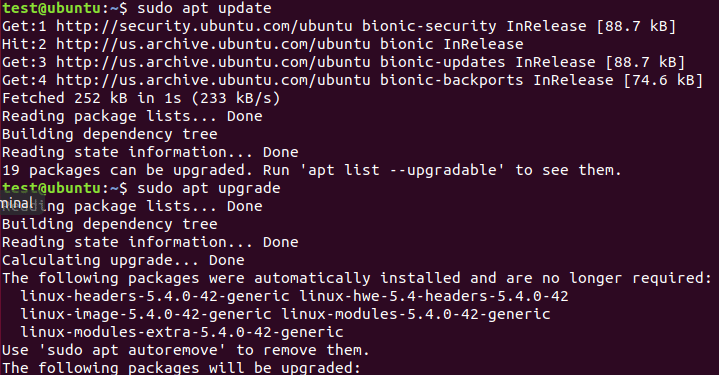
Step1- Updating an Existing List of Packages
We need to ensure that the system and packages are updated to make the system reliable for Docker installation using the below commands.
sudo apt update
sudo apt upgrade
Step 2- Installing a Few Prerequisite Packages
Before installing Docker, we need to install the required packages using the below single command.
sudo apt install apt-transport-https ca-certificates curl software-properties-common
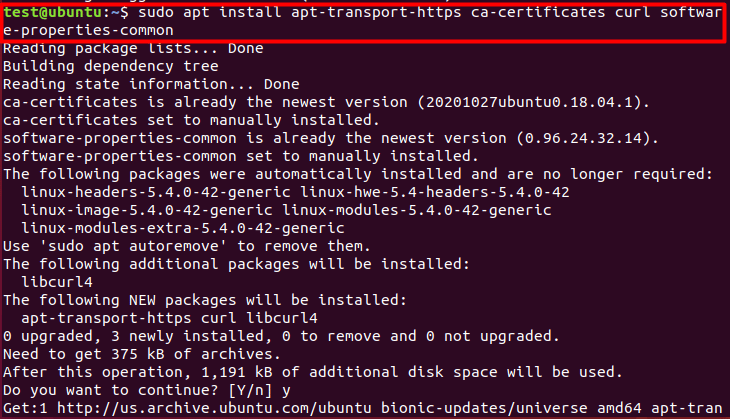
Where:
- apt-transport-HTTPS – this part of the above command will ensure that the package manager will transfer the files and data over HTTPS
- ca-certificates – will allow the web browser and your machine to check for security certificates
- curl – transfers data
- software-properties-common – it will add scripts to manage the software
Step 3- Adding the GPG Key
You can add the GPG key for the Docker repository using the below command. (If the command doesn’t work, try removing the ‘-‘ at the end)
curl -fsSL https://download.docker.com/linux/ubuntu/gpg | sudo apt-key add –

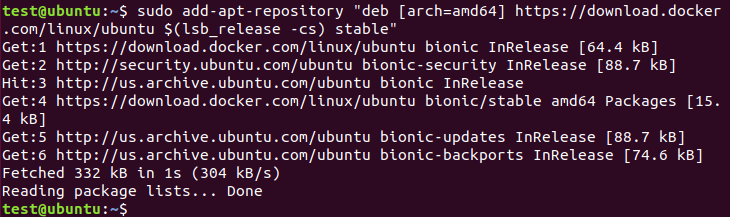
Step 4- Adding the Docker Repository to APT Sources
Adding the repository to apt sources will ease the installation process and ensure we use the official method to install Docker using the below command. This command will download the docker Ubuntu image (Docker download) from the official website and run the installation.
sudo add-apt-repository "deb [arch=amd64] https://download.docker.com/linux/ubuntu $(lsb_release -cs) stable"
Step 5- Package Database Update
Update the package from the above newly added repository packages
sudo apt update
Step 6- Making Sure the Installation of the Official Docker Repo
apt-cache policy docker-ce
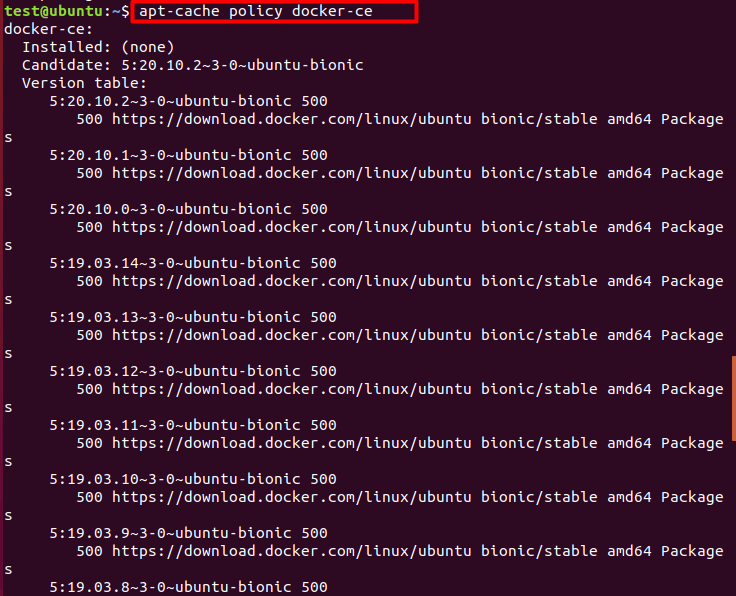
After running the above command, you will get the output, but you may get a different Docker version. Here note down the version you want to install because you will need it in the next section.
We recommend the latest version of docker be installed. You can find that in the Candidate section.
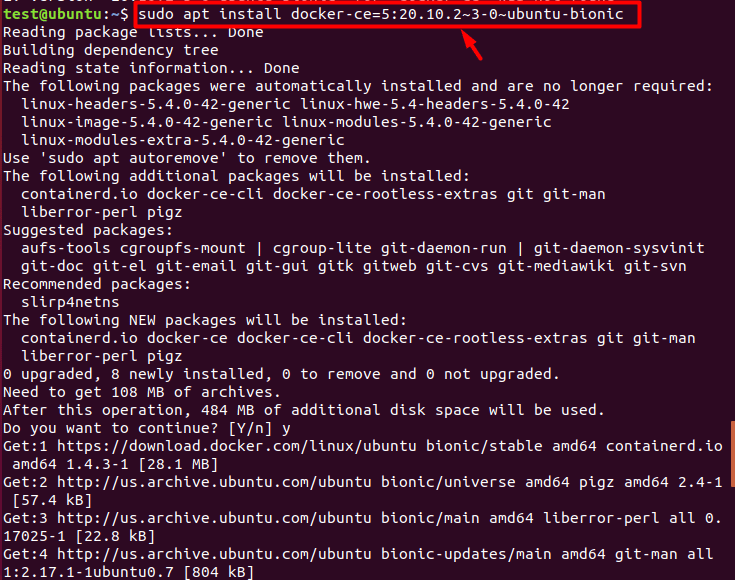
Step 7- Install Docker
sudo apt install docker-ce=<VERSION>
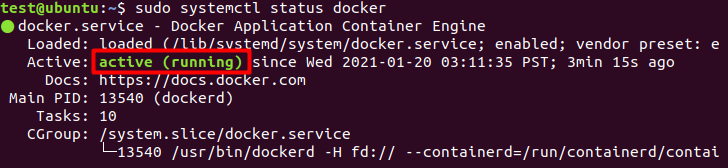
Step 8- Check for Docker Running Status
sudo systemctl status docker
Step 9- Starting Docker
You can use the below commands to run the Docker.
sudo systemctl start docker
sudo systemctl enable Docker
Step 10- Verify the Installed Docker Version.
Verify for the installed Docker version by using the below command.
docker --version

How to Execute Docker Commands Without sudo Access (optional)?
You can run the Docker command using the root user or the Docker group user. The group user is automatically created during the installation process. If you run the Docker command without mentioning the sudo or the group user, you will get the output below.
docker container run hello-world

See 'docker run --help'
To avoid the above error, you must add your working user to the Docker group with the below command's help.
sudo usermod -aG docker ${USER}
To enable the changes, you can log out and log in to the server or use the below command.
su - ${USER}
Once you run the above command, you will be asked to provide your user's password. The below command will confirm if your user is added to the docker group or not.
id -nG
Output-
sammy sudo docker
If you want to add another user to the docker group, you must mention the username explicitly using the below command.
sudo usermod -aG docker username
Using the Docker Commands
With the Docker commands' help, you can pass options and commands followed by arguments using the below Docker syntax.
Syntax-
docker [option] [command] [arguments]
Docker's available subcommands-
Below is the list of Docker Linux subcommands-
Docker attach- this command will allow you to attach local standard input, output, and generated error streams to a running container within a Docker.
Docker build- this command will allow you to create an image from the available Dockerfile.
Docker commit- this command will create a new image from a change within a container.
Docker cp- it will allow you to copy files/folders between the local filesystem and container.
Docker create- this command will create a new container.
Docker diff- this command will inspect any changes done to files or directories within a container's filesystem
Docker events- it will provide you with real-time events from the server.
Docker exec- it will help in running a command to run a container
Docker export- it will allow you to export a container's file system in the tar archive.
Docker history- it will display the images' history.
Docker images- it will list all the available pictures.
Docker import- it will allow you to import the tarball's content to create a filesystem image.
Docker info- it will display the complete system's information.
Docker inspect- it will provide you with a Docker Object's low-level information.
Docker kill- it will allow you to kill containers.
Docker load - this will allow you to load an image from a tar archive.
Docker login- This command can log in to a Docker registry.
Docker logout- it will log you out from a Docker registry.
Docker logs- it will fetch the container's logs.
Docker pause- it will pause all processes within provided containers.
Docker port- it will list all the port mappings for the container.
Docker ps- this command will list all the available containers
Docker pull - this will help you pull an image from a registry.
Docker push - it will allow you to push an image to a registry.
Docker rename- you can rename a provided container.
Docker restart- it will restart containers.
Docker rm- it will remove containers
Docker rmi- it will remove images.
Docker run- it will run commands within a new container.
Docker save- it will save images to a tar archive.
Docker search- this command will search the image in Docker Hub
Docker start- it will start stopped containers.
Docker stats- it will Display the usage statistics of container(s) resources.
Docker stop- it will stop running containers.
To view specific subcommands.
docker docker-subcommand --help
To view system-wide Docker's information.
docker info
Starting the Docker on Ubuntu 18.04 (16.04 or 20.04)
After the Docker installation, check if the test image works using the below command.
sudo docker run hello-world
You can use the below command to search for the available downloaded images.
sudo docker search [search_query]
sudo docker search ubuntu
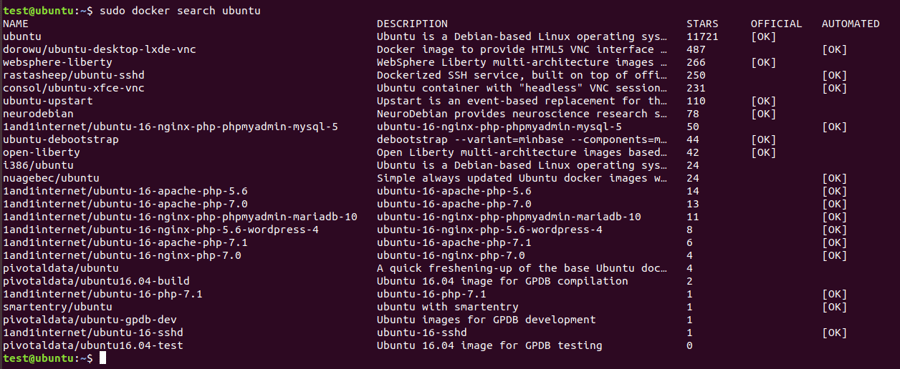
The above command will search for the Docker Hub and return a list of all images whose names match the search string.
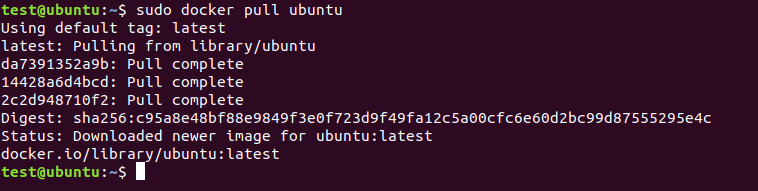
To pull the particular image to your machine, run the below command.
sudo docker pull ubuntu
You can check the list of all downloaded images to your computer using the below command.
sudo docker images
Conclusion
By using the above article, you can successfully install Docker on an Ubuntu VPS server and get started hassle-free. This will allow developers to understand how the application will run outside the test environment, which is crucial for ensuring consistency and reliability. Additionally, it will ease the work of system administrators by simplifying system changes and reducing the need to manually search for libraries. You can follow the step-by-step instructions provided to get your Docker application up and running on your Ubuntu VPS server, server for Docker, or RDP server for Ubuntu.
If you're looking for a reliable hosting solution, consider opting for Docker VPS hosting. Docker VPS hosting provides a scalable and flexible environment, making it easier for developers to test, deploy, and manage containerized applications. By using a specialized server for Docker, you ensure that your infrastructure is optimized for container workloads, allowing you to leverage Docker’s full capabilities without the need for manual setup or configuration.
By integrating Docker into your Ubuntu setup, you can simplify many tasks by automating the development and deployment process within your CD/CI pipeline. This automation can lead to more efficient workflows, reduce the potential for human error, and speed up the time to production. Whether you're working on a small project or managing a large-scale infrastructure, Docker on Ubuntu can significantly enhance your operational efficiency, especially when combined with Docker VPS hosting for optimal performance and scalability.
Do you have any further tips or precautions to share while installing Docker on an Ubuntu VPS server, an RDP server for Ubuntu, or a server for Docker? Let us know in the comments. Your insights could help others navigate potential challenges or optimize their Docker setup. Additionally, if you're planning to use MySQL with Docker, consider checking out our guide on how to install MySQL on Ubuntu for a seamless database setup.
People also read:
- Best Docker Tutorial Sources
- How To Install MongoDB on Ubuntu 20.04
- Docker vs Kubernetes
- Docker vs Podman
- How To Install VSFTPD on Ubuntu 18
- How to Configure Graylog on Ubuntu 20
Leave A Comment