It is easy to upgrade Ubuntu 18.04 to 20.04, but it requires a specific procedure. This article elaborates on the complete process of upgrading Ubuntu 18.04 to Ubuntu 20.04. We have also included all the tips and trips necessary to upgrade your system smoothly.
How to Upgrade Ubuntu 18.04 to 20.04
The upgrade process can be executed by the Ubuntu update manager and the command line as well. This upgrade process will begin automatically after three months after the official release. However, before upgrading the system, you have to create a full backup of your files to restore them after upgrading the system. To create a backup:
- You can use the inbuilt backup tool of Ubuntu.
- You can also copy the essential files to other devices such as a USB drive, hard disk, other computer networks, etc.
- Apart from it, you can also use third-party software to make backups of the data using CloneZilla for it.
If you want to make sure that everything works well on your system, you can download the image file of Ubuntu 20.04 LTS ISO and copy it into the USB drive through a live media creation tool UNetbootin. Also, ensure that your hard disk must have sufficient free space of almost 25 GB.
Note: Upgrading Ubuntu is time-consuming, so don't cancel the procedure because it can create software issues in the system. Make sure that your system is correctly connected to the battery charger.
How to Upgrade Ubuntu 18.04 to 20.04 Using Graphical Guided Wizard
We have already mentioned that the Ubuntu system will start to provide Ubuntu after three months of releasing the new update. In case you want to do it before three months of release, you can use the below commands in the terminal (update Ubuntu command line) to launch your graphical guided wizard.
sudo do-release-upgrade -h
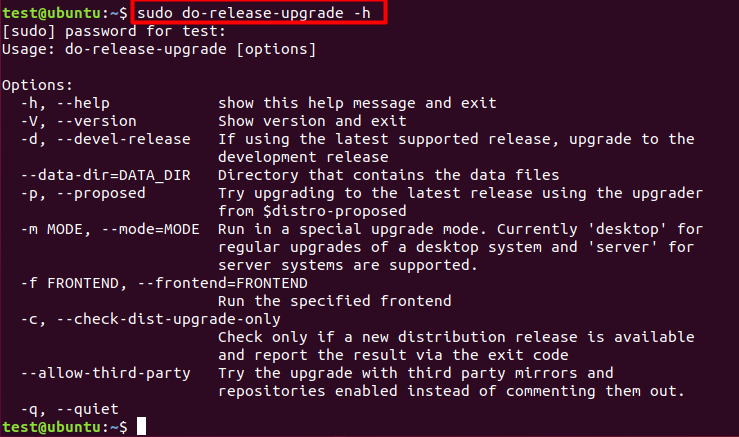
We have used specific commands in the above command lines to instruct the system regarding certain information. If you need full administrative access during the upgrade process, check out our guide on how to switch to the root user in Ubuntu for detailed instructions.
-h is used for checking the available options in the do-release-update tool.
-d is executed for upgrading the system to 20.04 as the full form of this command is "development."
-f will be executed for launching a graphical guided wizard.
Therefore, to start the upgrade to Ubuntu 20.04 LTS using a GUI tool, execute the below command to start the upgrade process with a Gtk3-based GUI.
sudo do-release-upgrade -d -f DistUpgradeViewGtk3
How to update Ubuntu 18.04 to 20.04 using a Command-line
Upgrading a system using the command line is a straightforward procedure but requires a step-by-step process.
First, open the Linux terminal and execute the Ubuntu update command:
~$ sudo apt update
~$ sudo apt upgrade -y
The above apt command will install all of the required Ubuntu update packages.
After installing updates and kernel, reboot your system to make changes successful. Use the below command for rebooting the system:
~$ sudo reboot
Once the system reboots, it recommends removing all unused kernels to free the boot partitions. So you can run the below command for it:
~$ sudo apt --purge autoremove
Next, execute the below command for installing the "update-manager-core. "
~$ sudo apt install update-manager-core -y
It is needed to upgrade the system, and it is preinstalled in most systems.
Run the following command to view the location of the new 20.04 LTS version.
~$ sudo do-release-upgrade
If you get the message "There is no development version of an LTS available," then use the above command to pass a parameter "-d" to see the latest LTS version.
Run the below command for starting the upgrade procedure
~$ sudo do-release-upgrade -d
In the upgrade procedure, the system will ask you multiple times to type y for updating package repositories, but in some cases, type enter to confirm the Ubuntu upgrade kernel process.
After the successful upgrading of the system, you will get the below message on your screen:
installing snap gtk-common-themes
installing snap snap-store
removing snap gnome-calculator
removing snap gnome-characters
removing snap gnome-logs
Searching for obsolete software
Reading state information... Done
Remove obsolete packages?
43 packages are going to be removed.
Continue [yN] Details [d]
System upgrade is complete.
Restart required
To complete the upgrade, a system restart is required. If you select 'y' the system will restart.
Continue [yN] y
The above message confirms that the upgrade process is completed, so press Y to restart your system. After restarting the system, open the terminal, then execute the following command to verify the Ubuntu version:
~$ cat /etc/lsb-release
This command will provide complete information regarding the Ubuntu version of your system. If the above command does not work, you can check here on how to find the Linux version.
How to Upgrade Ubuntu 18.04 to 20.04 Using GUI
- First, search the Updater in the search dash and open it. If there are any updates available, click Install Now to download them.
- Restart your system after successfully installing the update
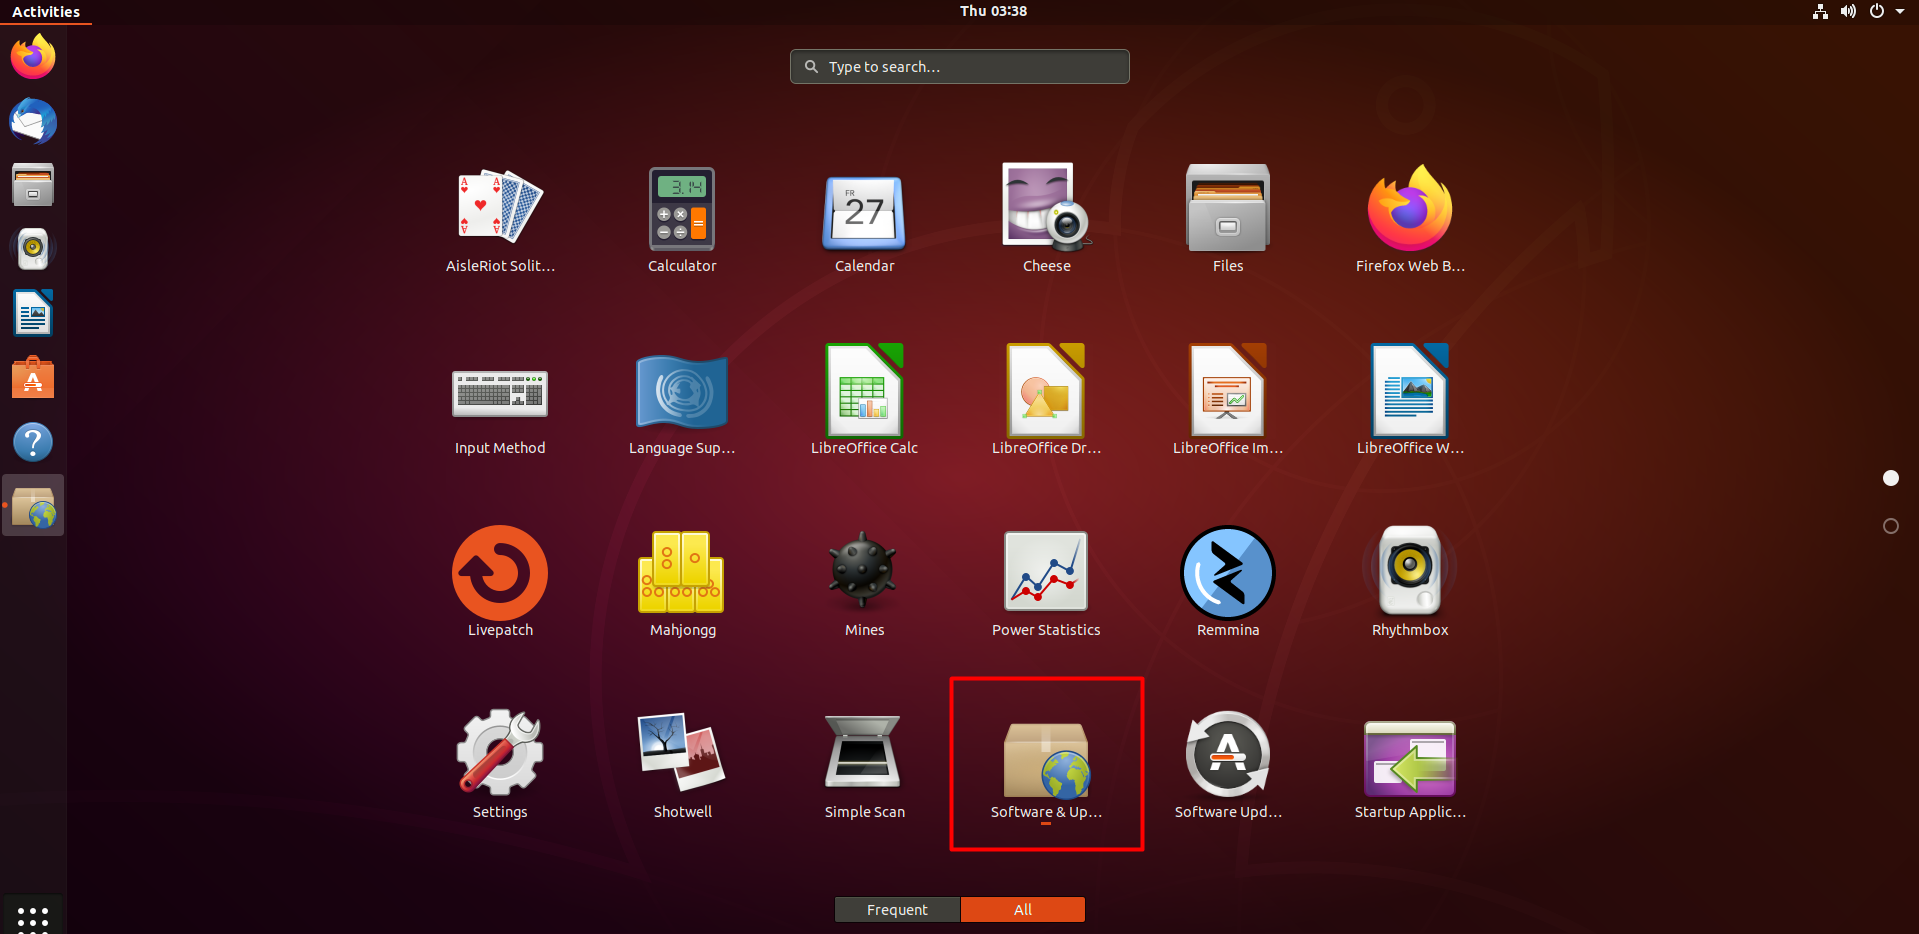
- After restarting the system, search Software & Updates in the search dash and open it.
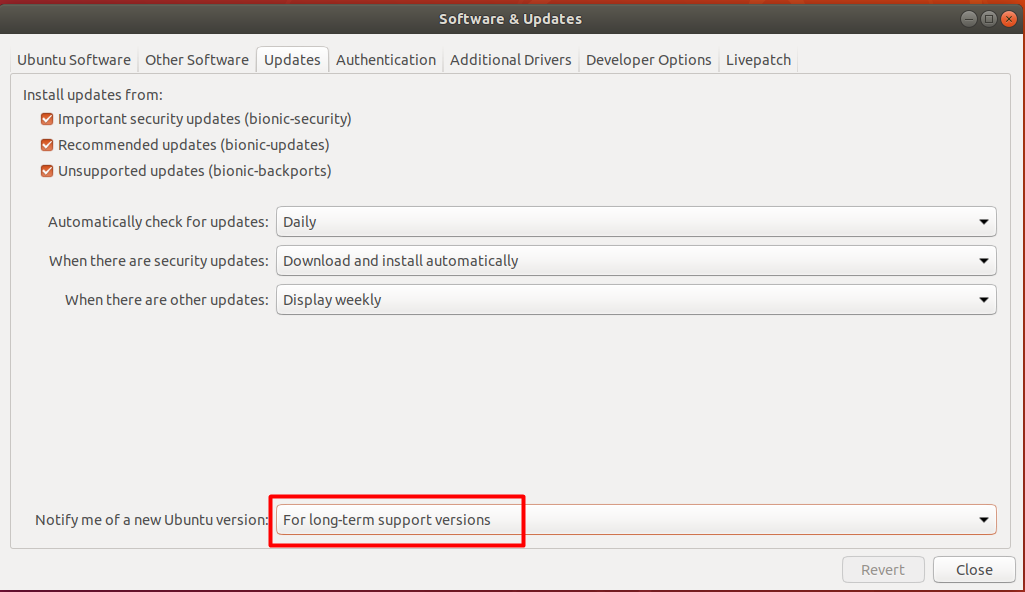
- In the Updates Tab, set the For long-term support versions through the drop-down menu of Notify me of a new Ubuntu version.
- In case no updates are appearing on the screen, press the Alt and F2 keys and enter this command as
update-manager -c -d
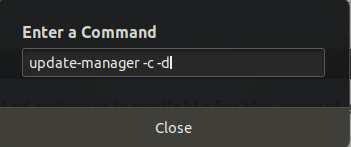
- Now execute the command by pressing the Enter button, and you will see an option that says Ubuntu 20.04 LTS is available for upgrade.
- Next, click on the upgrade to begin the upgrade process, and this will ask you to provide the user's credentials.
- Once you provide the user's credentials, follow all the on-screen instructions to complete the upgrade procedure.
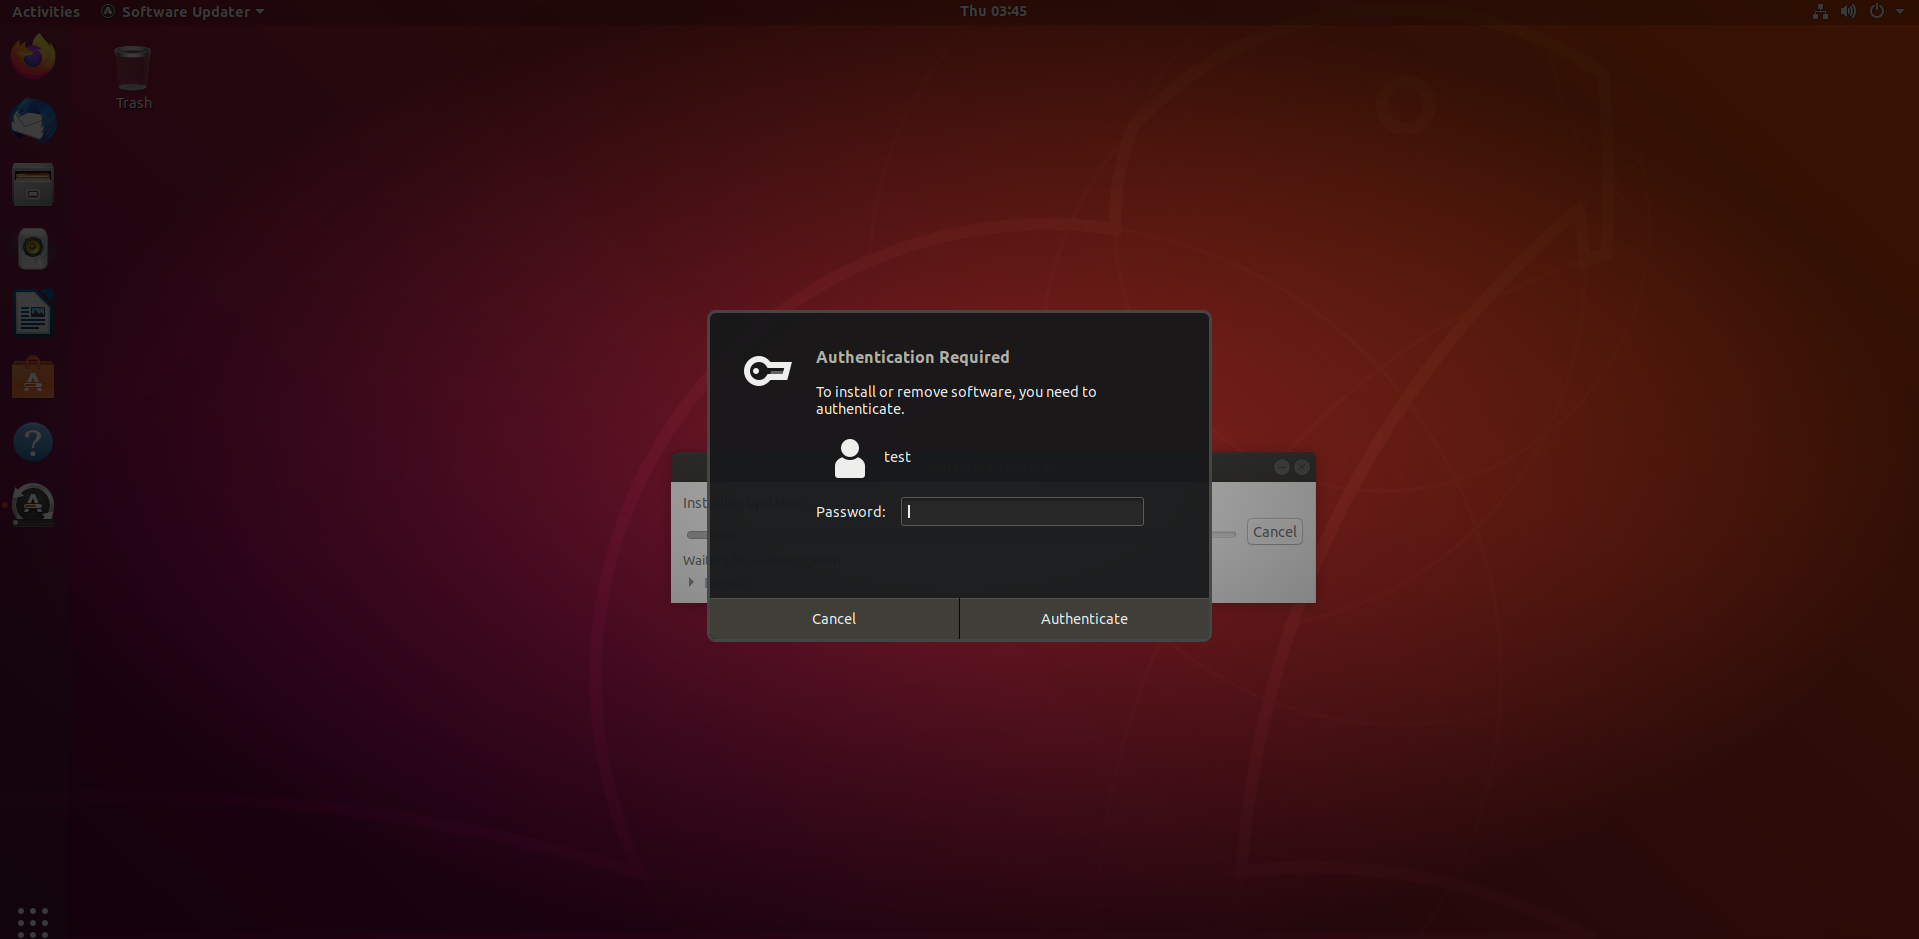
- Click on Restart Now after completing the procedure.

- After restarting the system, log in and verify the Ubuntu version.
- Now, open the Settings and then the about section; in the about section, you will see the Ubuntu version as Ubuntu 20.04 LTS.
If you're looking to enhance your Ubuntu server with a graphical user interface (GUI), check out our detailed guide on how to install a desktop (GUI) on an Ubuntu server. This can simplify server management for users who prefer a visual interface.
Conclusion
This article is created for coding geeks to upgrade their system and use the latest features from Ubuntu. We have included all of the required details to upgrade Ubuntu 18.04 to Ubuntu 20.04 without having any trouble. This article covers multiple ways to easily upgrade a system but remember that these procedures must be done step by step to avoid errors.
As explained and warned earlier, never stop the upgrade process in the middle of completion because it can cause severe software damage to your system. The procedure will take some time to complete, so ensure that your system is connected to a power source to prevent any unexpected shutdowns during the upgrade process. This is particularly important whether you're working on a Ubuntu VPS or configuring an Ubuntu RDP server, as an interrupted upgrade can lead to critical issues that might require complex recovery steps.
We have provided complete information, but if you have any queries, let us know in the comment section, and we will try our best to give you a solution as soon as possible.
People also read:


