
If you are looking for a step-by-step guide to installing Remote Desktop in Ubuntu, you have landed at the right place. We will go through the installation process of remote desktop client xrdp on Ubuntu 20.04.
XRDP is an open-source remote desktop protocol application that allows remote sessions of Linux Server through Windows remote desktop connection. It is capable of accepting remote connections from rdesktop, freerdp and other remote desktop clients. Before we get started:
Prerequisites
- A root user account or a user account with root privileges
- A Ubuntu 20.04 machine or server (can be switched with Ubuntu 18.04)
- Basic understanding of Linux commands
To begin with, the Xrdp server is an open-source tool of RDP (remote desktop protocol). It assists you in controlling a Remote Desktop graphically. RDP helps you to access any desktop remotely from any location.
It comes with ample advantages. Take a look:
- Easy Collaboration
- Remotely access important data
- Screen sharing
- Troubleshoot from any location
- Define access rights to several files
Let us begin the process of installation and configuration of the Xrdp server on Ubuntu 20.
Configure Xrdp Server
Firstly, you have to enable a desktop environment. Therefore, we install X11 which is known to be a lightweight and stable desktop environment. Additionally, there is a variety of desktop environments for the Ubuntu repositories. In this tutorial, we have picked Xfce.
Xfce is a fast, stable and extremely lightweight desktop environment. It is known as an incredible choice to opt for in a remote server. Enter the below-mentioned commands to install Xfce. You must remember that you should have access as a user with Sudo privileges to perform this step.
sudo apt install xfce4 xfce4-goodies xorg dbus-x11 x11-xserver-utils
PS: don't forget to press y and confirm the installation when prompted.
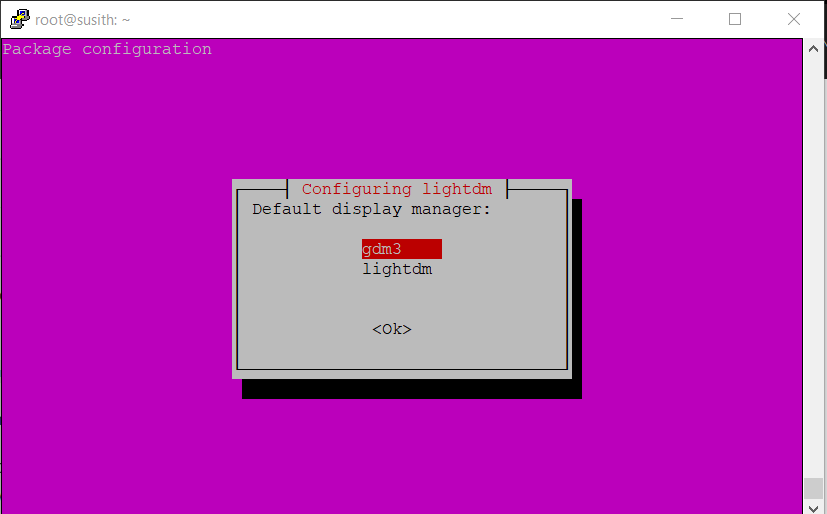
Xfce packages will now be downloaded and installed on your systems. During the installation process, you will be prompted to choose the default display manager. You can pick either choice, but for this tutorial, we will be choosing gdm3.
The next step is to install the Xrdp package that can be found already in Ubuntu Repositories. Run the below-mentioned command:
sudo apt install xrdp
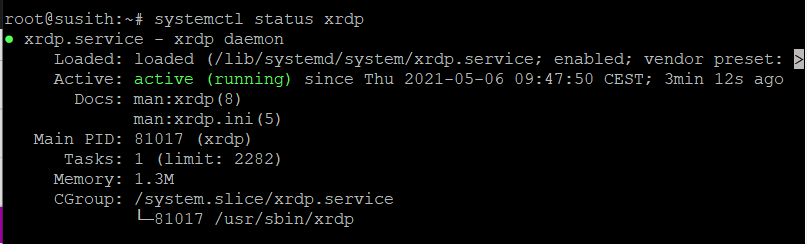
As soon as installation concludes, the Xrdp service initiates by itself. For further verification, simply type the below-mentioned command and check:
sudo systemctl status xrdp
This is the output you see on your screen:
Moreover Xrdp will have access to the /etc/ssl/private/ssl-cert-snakeoil.key file. Only the users Who belong to the SSL-cert Group can read the content of this file. If you wish to add the Xrdp user to this group use the below-stated command:
sudo adduser xrdp ssl-cert
After you execute this command, your process of installing Xrdp concludes. Bravo!
Configuration of Xrdp
In this section, we will go through the main configuration files that can be used to manipulate xrdp. The /etc/xrdp directory stores the Xrdp config file. To build an Xrdp connection, you don’t have to change anything in the configuration files. Now, the default X window sector is XFCE, in our case.
The configuration file is Xrdp.ini. When we talk about this file, it helps you in setting up the global configuration settings. For instance, security creating login sessions and listing addresses can be done through this file.
You have to remember that whenever you make some changes in the config file, you have to restart the Xrdp service. The command to follow in order to restart is stated below:
sudo systemctl restart xrdp
To launch the X session, Xrdp uses startwm.sh file. You can simply edit this file if you wish to use some other X Window desktop using the nano command. These are the main configuration files that you can make changes to. Now let's head over to the firewall configurations.
configure the firewall
Xrdp is set on port number 3389. From a particular IP address, if you wish to permit access to the Xrdp server, type the stated command:
sudo ufw allow from 192.168.1.0/24 to any port 3389
Instead of the mentioned IP address (192.168.1.0), enter your server IP address. This was specifically for a particular address. Now, if you want to access it from anywhere else, follow this command:
sudo ufw allow 3389
There is a problem when you access the Xrdp from other addresses, that is, Security. To enhance the security, you can set up Xrdp that creates an SSH tunnel. An SSH tunnel helps to forward the traffic from the local machine (port 3389) to the server securely.
Moreover, you can also install OpenVPN which helps to build a connection with the Xrdp server via a private network. Now, the final step is to connect with the Xrdp server. Let’s begin! As you have successfully set up the Xrdp server, now open the Xrdp client and follow these steps.
Connection with the Xrdp server
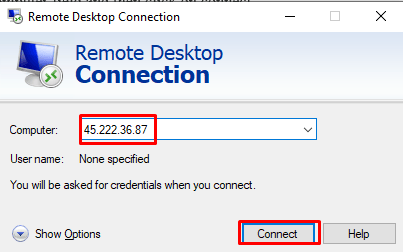
If you are working on a Windows PC:
- Click on start and type "remote desktop connection."
- Select the application
- Enter the Linux server IP address
- Click Connect
During the connection, you will be prompted with a warning. Disregard this message and continue.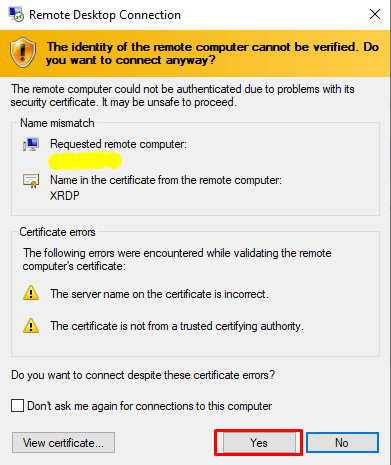
Now select the Xvnc session and enter the username and password. You can use the root user account or any other user account on the system.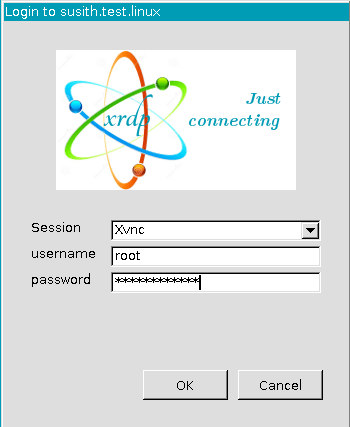
After the login is successful, the default Xfce desktop is visible. Bravo! Your local machine is now ready to interact with Ubuntu RDP.
Conclusion
The Xrdp server assists you in controlling your Ubuntu server from a local desktop via a graphical interface. This can be particularly useful if you need to manage your server remotely or perform tasks that are easier through a graphical user interface rather than the command line. We hope that this tutorial helps you in the successful installation of XRDP on Ubuntu 20.
If you're looking for a more seamless setup and don't want to go through the installation process yourself, you can always buy rdp admin access and an RDP server for Ubuntu. This option provides you with pre-configured access and support, ensuring that you have everything set up efficiently and correctly.
Let us know in the comments below if you encountered any errors or issues during the installation. We are here to help and will get back to you with the solution to ensure your remote desktop experience is smooth and hassle-free.
People also read:

Leave A Comment