")
There is no limit on distance when communicating over the internet. Many companies, as well as many individuals, use VoIP (Voice over IP) which helps in reducing costs for short and long-distance communication. By using the existing data network, you can reduce the costs even further.
You can use a LAN network or supported VoIP protocols if you do not want to spend on additional VoIP infrastructure. This is where TeamSpeak comes to play. You can use TeamSpeak in all possible fields to carry out conversations for a fraction of the price. If you are looking for professional performance and low latency, consider our game dedicated server solutions.
🎧 What is a TeamSpeak Application?
There are several VoIP applications, but in this tutorial, we will be discussing the TeamSpeak application. It is extremely popular and easy to set up using minimum resources at your disposal.
Teamspeak works on local networks or through the internet for connecting users easily to communicate with each other. You can create a TeamSpeak server on any platform, like Windows VPS, Linux, macOS, and iOS.
To start the communication, the client has to connect with the TeamSpeak server that provides you with a channel to communicate with your friends. For gamers, managing these connections efficiently is vital, which is why utilizing a game server management panel can greatly simplify the process.
🚀 Team Speak Features
TeamSpeak is a preferred VoIP usage in different fields:
- Gamers commonly use TeamSpeak as it provides unique features to easily communicate in real-time even while playing games without any interference.
- Most companies use TeamSpeak to help them save additional costs as they do not have to pay for infrastructure and expensive over-distance phone calls during their meetings.
- You can also implement the TeamSpeak application in your educational systems to enhance the experience of virtual classes for students over the internet.
The following tutorial will discuss how you can create a TeamSpeak server on various platforms like Ubuntu, macOS, and Windows. TeamSpeak is a lightweight, reliable tool that is readily available to communicate with your friends and colleagues. The article will cover the following topics:
- Creating a TeamSpeak 3 server on Ubuntu 20.04.
- Creating a TeamSpeak3 server on Windows.
- Creating TeamSpeak 3 server on macOS.
⚙️ 1. How to Setup TeamSpeak Server on Ubuntu 20.04
You can set up a TeamSpeak server on a virtual machine with Ubuntu 20.04 using the straightforward steps mentioned below. You can start the process with your SSH access to the Linux VPS. Before moving forward, please check if your system is updated using the below command.
apt-get update && apt-get upgrade
Step 1: New System User is Created
Before starting, you will need a new system user, and you can create a user in Linux with the below command.
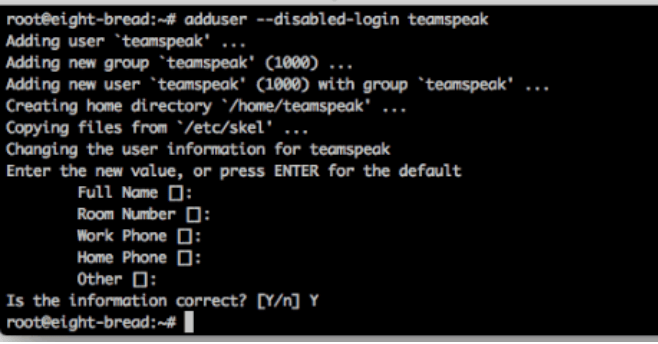
adduser --disabled-login teamspeak
Once you run the command, you will be asked to provide additional details and confirm the provided one. You can leave some field details blank, as shown in the below image.
Run the below-listed Linux command to navigate to the home directory of the above newly created user directory.
cd /home/teamspeak
Step 2: Downloading and Extracting the TeamSpeak 3 Server
You can run the Linux server’s wget command to download the TeamSpeak setup file to the VPS.
wget http://dl.4players.de/ts/releases/3.12.1/teamspeak3-server_linux_amd64-3.12.1.tar.bz2
Then, extract the archive using the below command.
tar xvf teamspeak3-server_linux_amd64-3.12.1.tar.bz2
All the files will get stored in the teamspeak3-server_linux_amd64 directory, which you have to move to /home/teamspeak and then, remove the downloaded archive.
Run the following command to get this done:
cd teamspeak3-server_linux_amd64 && mv * /home/teamspeak && cd .. && rm -rf teamspeak3-server_linux_amd64-3.12.1.tar.bz2
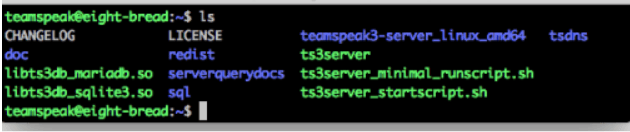
You can run the ls command to check the directory content.
Step 3: Accepting the License Agreement for the TeamSpeak 3 Server
For accepting the license agreement of the TS server, run the below command to create a new empty file called .ts3server_license_accepted as your license agreement.
touch /home/teamspeak/.ts3server_license_accepted
Step 4: Starting your TeamSpeak Server on Boot
The next step is to configure your TeamSpeak 3 server, which can be started on server boot. Create a file (teamspeak.service) file under the /lib/systemd/system directory using the below command.
sudo nano /lib/systemd/system/teamspeak.service
Next, paste the below content into the above service file and save it.
[Unit]
Description=TeamSpeak 3 Server
After=network.target
[Service]
WorkingDirectory=/home/teamspeak/
User=teamspeak
Group=teamspeak
Type=forking
ExecStart=/home/teamspeak/ts3server_startscript.sh start inifile=ts3server.ini
ExecStop=/home/teamspeak/ts3server_startscript.sh stop
PIDFile=/home/teamspeak/ts3server.pid
RestartSec=15
Restart=always
[Install]
WantedBy=multi-user.target
To activate the above script, run the below commands on server boot.
systemctl enable teamspeak.service
systemctl start teamspeak.service
To check if the above services are added successfully, enter the following command:
systemctl | grep teamspeak.service
You will get a result similar to the picture below if the TS3 server is running fine.

Now that you already set the server, the final step is to check the server’s status.
service teamspeak status
Step 5: Retrieve the Privileged Key for the TeamSpeak Server
After the server is up and running, paste the privileged key for the first time while connecting to the server using the below command.
cat /home/teamspeak/logs/ts3server_*
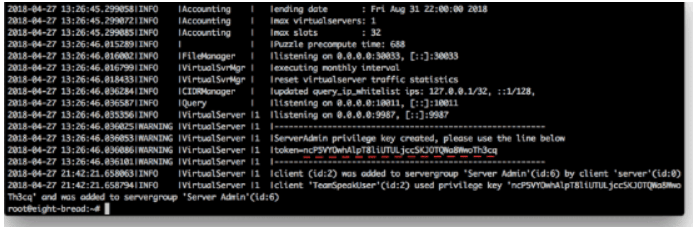
Note: The above picture is blurred out for security reasons. You can find your unique key next to the token. Please save this Privileged key since you will need it to connect.
Step 6: Connect via the TeamSpeak 3 Client
The server is running smoothly so now we need to connect to it. To do that we will need to download the TeamSpeak 3 Client Software using the link. Once the client is installed on your local computer we can connect to the server.
To connect to the server enter the server IP address, server password, and your Nickname (Display name).

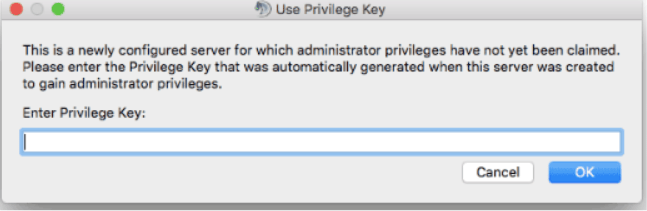
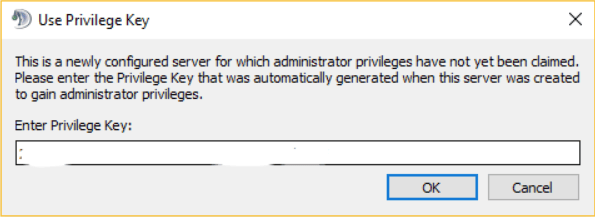
Here you will need to enter the privileged key that you got from the server.
Congratulations, you successfully connected to the TeamSpeak 3 server on Ubuntu 20.04.
💻 2. How to make a TeamSpeak server on Windows.
Setting up TeamSpeak 3 server on Windows is a comparatively smooth process than setting it up on the Ubuntu server. It will take three easy and straightforward steps to get it done.
Step 1: Downloading and Extracting TeamSpeak 3 Server
You can download the TeamSpeak 3 server from the internet and extract the files in the desired location.
Step 2: Running the TeamSpeak Installer
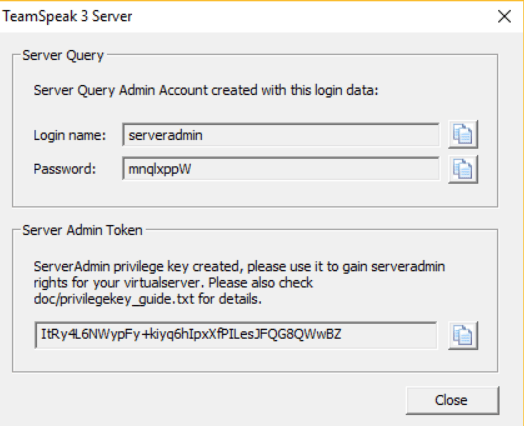
Once you install TeamSpeak server files, then run the ts3server.exe installer. A prompt window will appear on the screen that will ask you to accept TeamSpeak’s license agreement for running the server.
It will also confirm the firewall settings for this software to run. You will get the privileged key and other related essential information after accepting the TeamSpeak server’s license agreement.
Step 3: Connecting to the TeamSpeak 3 Server
Before connecting to the server from your local computer, Install the TeamSpeak Client software.
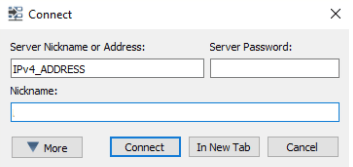
When connecting, use the IPv4 address value of the server, as shown below.
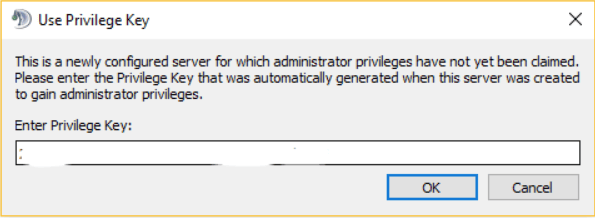
Now, provide the privileged key for the admin rights.
🍎 3. How to Create TeamSpeak Server on macOS.
Step 1: Downloading and Extracting TeamSpeak 3 Server
Download the TeamSpeak 3 server for macOS from the internet and extract the files in the desired location.
Step 2: Accepting a License Agreement for the TeamSpeak
Run the below command from the macOS terminal to accept the license agreement.
set TS3SERVER_LICENSE=accept
Step 3: Starting the Server and Getting the Privileged Key
Go to the extracted folder of the TeamSpeak files using the below command.
cd Downloads/teamspeak3-server_mac
Use the below command to start the server.
/.ts3server
Once the process is completed, you will get the privileged key on your screen, as shown below.

Step 4: Connecting to the TeamSpeak Server.
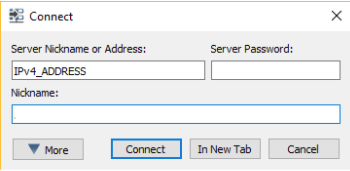
Use the IP address from the system preferences > network section.
Now, provide the privileged key for the admin rights.
Now, you have successfully connected to the TeamSpeak server on macOS.
🏁 Conclusion
In the above article, we have discussed, What is TeamSpeak server is, its features, where we can use this application, and How to set up a TeamSpeak server. It has widespread usage and helps to save a lot of money for long-distance communication without using the standard infrastructure.
You can set up a TeamSpeak server with this easy guide within no time using the right resources available. You will install and run the TeamSpeak 3 server for Ubuntu, Windows, and macOS efficiently. Once you start using the TeamSpeak application, you will learn its long-term benefits by yourself for all your communication purposes. This application is available for free on every platform.
Start setting your own TeamSpeak server using our VPS server. Choosing the right hosting, such as a high-performance game VPS, will ensure your communications remain clear and lag-free during critical moments.
People Are Also Reading:

Leave A Comment