

Linux, with its powerful capabilities and flexibility, offers users the ability to customize various aspects of their system. One such crucial aspect is the Domain Name System (DNS), which plays a pivotal role in translating human-friendly domain names into IP addresses. Changing DNS in Linux means telling your machine which resolver to use when it looks up domain names. If you're looking to enhance your Linux experience by changing DNS settings, you're in the right place. When configuring your network infrastructure, understanding what is a DNS server can provide deeper context into why selecting the optimal nameserver impacts your local resolution speeds.
There's no single command that works everywhere the right method depends on how your system manages networking. This guide covers all the major methods: NetworkManager, systemd-resolved, Netplan, and manual configuration across different distributions. If you're working with CentOS 7, we also have a step-by-step walkthrough on Install DNS (Bind) on CentOS 7.
⚙️ Quick Answer: Change DNS from the Linux Command Line
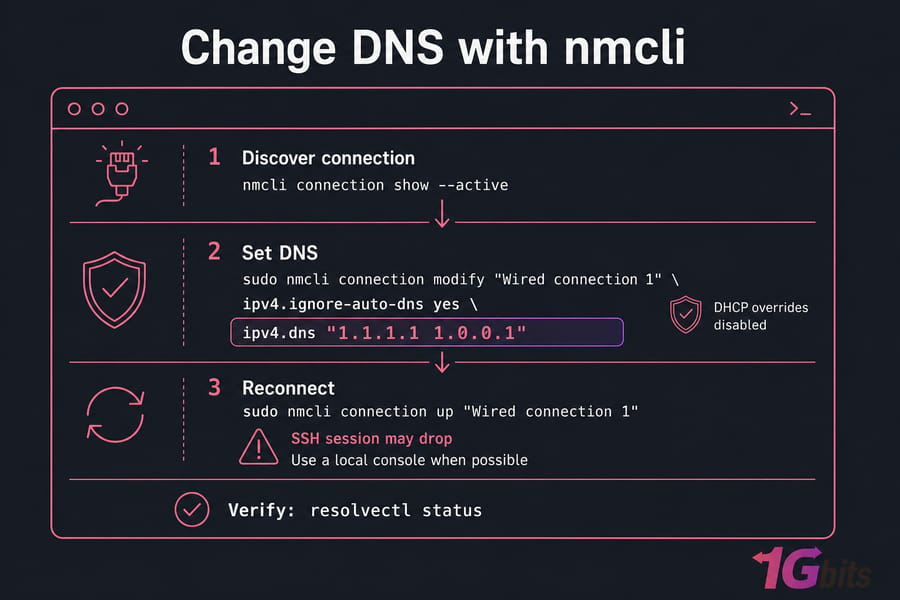
If you're on a modern desktop or server running NetworkManager, this is the fastest reliable route:
First, find your active connection:
nmcli connection show --activeThen set your DNS servers and stop DHCP from overwriting them:
sudo nmcli connection modify "Wired connection 1" \
  ipv4.ignore-auto-dns yes \
  ipv4.dns "1.1.1.1 1.0.0.1"
sudo nmcli connection up "Wired connection 1"
One warning before you run that last line — reactivating a connection can drop your SSH session if you're working remotely. Do it from a local console when you can. Verify with resolvectl status once it's back up.
🔍 Before You Start: Identify How Linux Manages DNS
Here's the thing most guides get wrong — they tell you to edit one file and move on. But your Linux box might be handled by NetworkManager, systemd-resolved, Netplan, ifupdown, or Wicked. Edit the wrong file and your change either vanishes or does nothing.
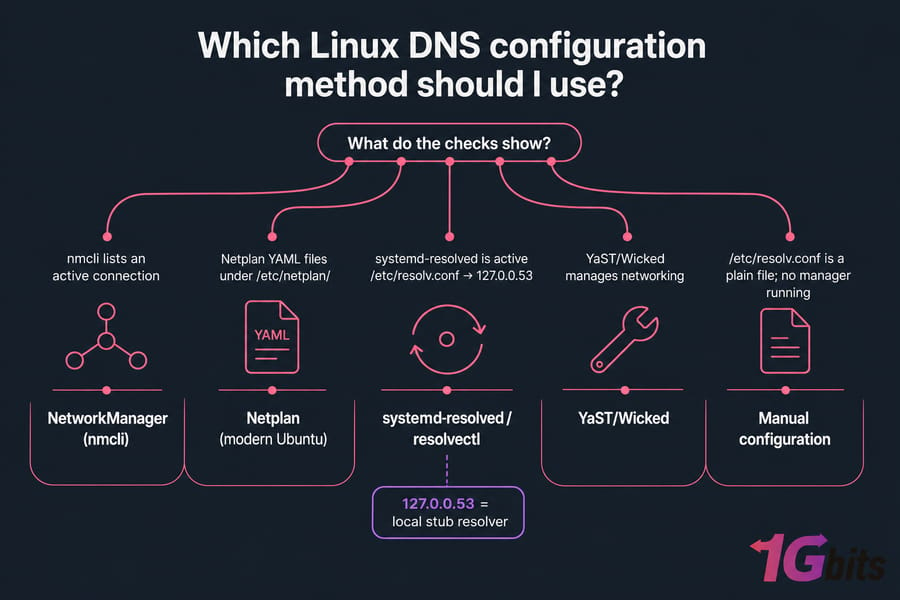
Run these first. They'll tell you exactly what you're dealing with:
readlink -f /etc/resolv.conf
systemctl is-active systemd-resolved
nmcli connection show --active
resolvectl status
ip route
Reading the Output
| What You See | Method to Use |
nmcli lists an active connection |
NetworkManager (nmcli) |
systemd-resolved is active, resolv.conf points to 127.0.0.53 |
systemd-resolved / resolvectl |
Netplan YAML files under /etc/netplan/ |
Netplan (modern Ubuntu) |
| resolv.conf is a plain file, no manager running | Manually managed resolver |
That 127.0.0.53 address confuses everyone. It's the local systemd-resolved stub resolver — not your actual upstream DNS server. Your real DNS lives behind it. Before you touch anything, back up what's there.
⏳ Temporary vs. Persistent DNS Changes
This distinction trips up a lot of people. Some changes die the moment you reboot. Others stick. Know which is which before you commit.
| Method | Persistent? | Best For |
resolvectl dns |
Usually temporary/runtime | Testing a resolver |
nmcli connection modify |
Persistent | Desktop/server with NetworkManager |
| Netplan YAML | Persistent | Modern Ubuntu servers |
/etc/systemd/resolved.conf |
Persistent global/fallback | Systems using systemd-resolved |
Direct /etc/resolv.conf edit |
Often overwritten | Only manually managed systems |
And remember — DHCP or a VPN client can stomp on any of these if you don't lock them down.
💻 Change DNS with NetworkManager and nmcli
This is the method I reach for most. It's persistent, precise, and works across Fedora, RHEL, Ubuntu desktop, Mint, Kali — basically anything running NetworkManager.
Start by listing connections so you get the exact name:
nmcli connection show --activeSet IPv4 DNS and Block DHCP Overrides
sudo nmcli connection modify "Wired connection 1" \
  ipv4.ignore-auto-dns yes \
  ipv4.dns "1.1.1.1 1.0.0.1"
The ipv4.ignore-auto-dns yes part matters. Skip it and your router's DHCP-provided DNS will keep sneaking back in.
Don't Forget IPv6
sudo nmcli connection modify "Wired connection 1" \
  ipv6.ignore-auto-dns yes \
  ipv6.dns "2606:4700:4700::1111 2606:4700:4700::1001"
Apply and Confirm
sudo nmcli connection up "Wired connection 1"
nmcli connection show "Wired connection 1" | grep -E 'ipv4.dns|ipv6.dns'
Rolling Back to DHCP
sudo nmcli connection modify "Wired connection 1" \
  ipv4.ignore-auto-dns no \
  ipv4.dns ""
sudo nmcli connection up "Wired connection 1"
🔧 Change DNS with systemd-resolved
When you just want to test a resolver fast, resolvectl is your friend:
sudo resolvectl dns enp1s0 1.1.1.1 1.0.0.1
resolvectl status enp1s0
Use resolvectl, not the old systemd-resolve command. The legacy one still exists on some distros as a symlink, but current systems expose resolvectl.
For persistent global or fallback settings, edit /etc/systemd/resolved.conf:
[Resolve]
DNS=1.1.1.1 1.0.0.1
FallbackDNS=9.9.9.9
Then restart the service:
sudo systemctl restart systemd-resolvedFlush the cache when things act stale:
sudo resolvectl flush-caches🚀 Change DNS on Ubuntu with Netplan
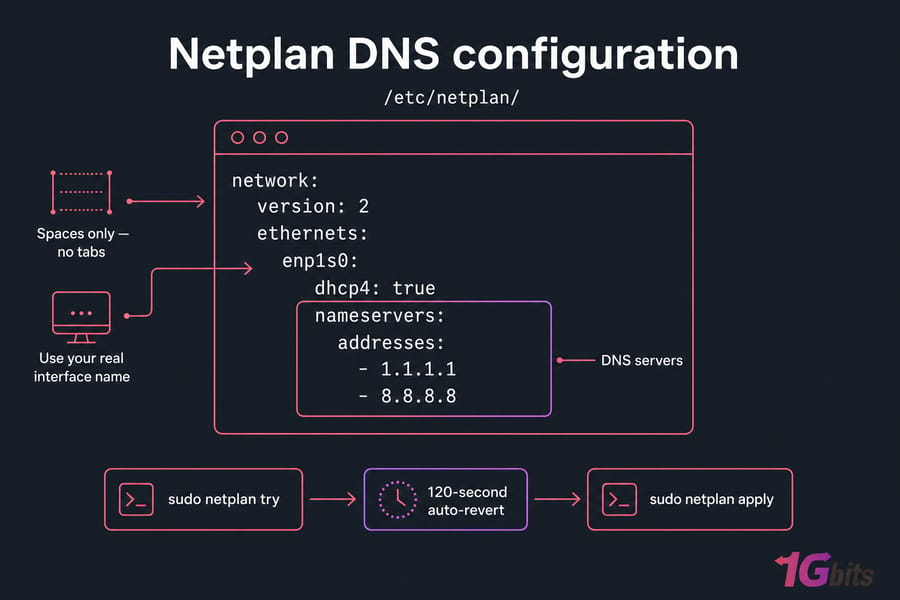
Modern Ubuntu Server uses Netplan by default — not /etc/network/interfaces. Find your YAML file first (usually under /etc/netplan/), then edit it:
network:
  version: 2
  ethernets:
    enp1s0:
      dhcp4: true
      nameservers:
        addresses:
          - 1.1.1.1
          - 8.8.8.8
YAML is picky about indentation — spaces only, no tabs. Test before you commit:
sudo netplan try
sudo netplan apply
netplan try auto-reverts after 120 seconds if you don't confirm — perfect insurance on a remote server.
When establishing secure production apps on this specific OS, utilizing a high-availability Ubuntu VPS Server ensures that modified upstream resolvers remain statically persistent across system reboots. For a detailed guide on installing BIND on Ubuntu, check out How To Install BIND (DNS) on Ubuntu.
📋 Change DNS by Linux Distribution
🐉 Kali Linux
Kali Linux, a popular choice for penetration testing, usually uses the NetworkManager GUI or nmcli. Navigate to the network settings by clicking on the network icon, locate your connection, and update the DNS configuration in the "IPv4 Settings" tab. If you run your security lab inside a dedicated environment, configuring these options on a Kali Linux VPS will ensure persistent custom DNS resolution. If you're using Kali Linux, check out our guide on How to Update Kali Linux to keep your system current.
🦎 SUSE Linux
SUSE Linux, known for its reliability, allows users to configure DNS settings through the Yast Control Center. Launch Yast by entering sudo yast2, navigate to "Network Settings," then the "DNS and Hostname" tab, and input your desired DNS server addresses.
🎩 Red Hat Linux
Red Hat Linux, a stalwart in enterprise Linux, uses NetworkManager. Access it by clicking on the network icon, choose "Edit Connections," select your connection, go to the "IPv4 Settings" tab, and enter your preferred DNS server addresses.
🏹 Arch Linux
Arch Linux, known for its simplicity, uses whatever you chose — don't assume systemd-resolved is enabled. Edit /etc/systemd/resolved.conf, modify DNS settings, and restart the service.
🌿 Linux Mint
Linux Mint, a user-friendly distribution, simplifies the process through its network GUI. Click on the network icon, choose "Network Connections," edit your connection, and update DNS in the "IPv4 Settings" tab.
📄 Should You Edit /etc/resolv.conf Directly?
Short answer: usually no. On systems with NetworkManager, Netplan, or systemd-resolved, that file is a managed symlink. Your edits get overwritten on the next reconnect or reboot. Check whether it's a symlink:
ls -l /etc/resolv.confDirect editing is fine only on a manually managed box with no resolver daemon in play. And please don't make it immutable with chattr +i — that breaks DHCP, VPN clients, and system tooling.
✅ How to Verify the New DNS Server
Setting DNS and confirming resolution actually works are two different things. Test all three layers:
resolvectl status
dig example.com
nslookup example.com
getent hosts example.com
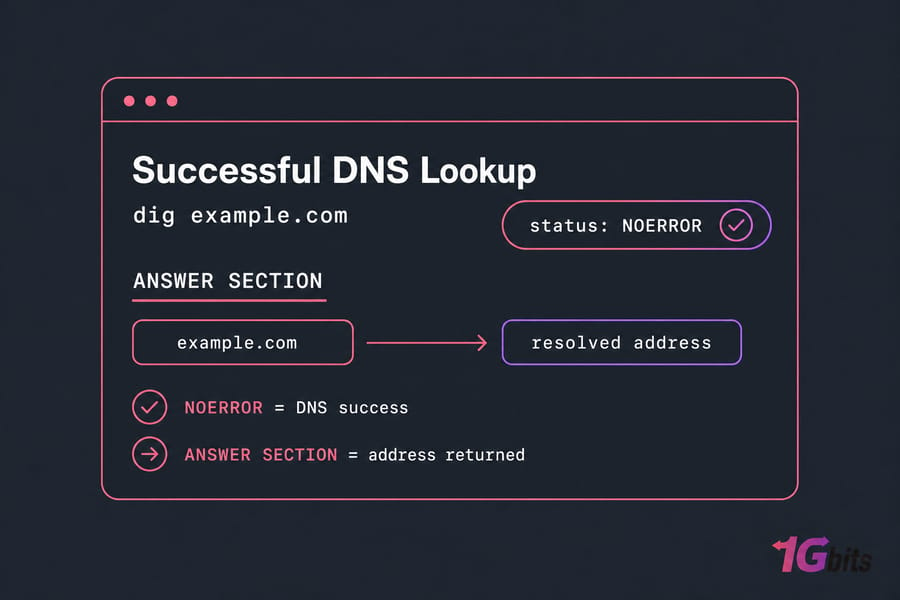
What to look for: resolvectl status should show your intended server. dig should return NOERROR. And getent hosts tests the full system resolver path — if dig works but getent doesn't, your app-facing resolution is broken.
📡 Recommended Public DNS Servers
| Provider | IPv4 Primary | IPv4 Secondary | Why Choose It |
| Cloudflare | 1.1.1.1 | 1.0.0.1 | Privacy focus, low latency |
| Google Public DNS | 8.8.8.8 | 8.8.4.4 | Wide availability, reliable |
| Quad9 | 9.9.9.9 | 149.112.112.112 | Blocks known malware domains |
| AdGuard DNS | 94.140.14.14 | 94.140.15.15 | Ad and tracker filtering |
⚠️ Troubleshooting Linux DNS Changes
| Symptom | Likely Cause | Fix |
| Settings gone after reboot | Runtime-only change | Use a persistent method (nmcli/Netplan/resolved) |
/etc/resolv.conf reverts |
Managed symlink or DHCP | Configure the actual manager, not the file |
| NetworkManager keeps DHCP DNS | Missing ignore-auto-dns | Set ipv4.ignore-auto-dns yes |
resolvectl not found |
systemd-resolved not installed/active | Enable it or use nmcli instead |
| Domains fail, IPs work | Resolver unreachable | Check open ports — port 53 UDP/TCP |
| DNS changes when VPN connects | Split DNS / VPN profile | Inspect VPN-provided DNS |
| IPv4 set but leak persists | IPv6 DNS still automatic | Set or disable IPv6 DNS |
Seeing browser errors instead? Two common ones have their own fixes — DNS_PROBE_FINISHED_NXDOMAIN and ERR_NAME_NOT_RESOLVED.
🔗 Related Concepts People Confuse
- /etc/hosts creates local static hostname mappings. It's a lookup shortcut, not a DNS server.
- The system hostname (via /etc/hostname) names your machine — it has nothing to do with your resolver. Here's how to change the Linux hostname if that's what you actually want.
- Authoritative TTL is set in the DNS zone, not on your client.
- Running BIND means operating your own DNS server — a completely different task.
📊 Comparative Table: DNS Configuration in Different Linux Distributions
| Linux Distribution | Configuration File Path | Edit Command | Restart Network Service Command |
| Ubuntu | /etc/network/interfaces (or Netplan) | sudo nano /etc/network/interfaces | sudo service networking restart |
| Arch Linux | /etc/systemd/resolved.conf | sudo nano /etc/systemd/resolved.conf | sudo systemctl restart systemd-resolved |
| Kali Linux | Handled via graphical settings | N/A | N/A |
| Linux Mint | Handled via graphical settings | N/A | N/A |
❌ Common DNS Configuration Mistakes in Linux
- Overwriting changes via DHCP: Many users manually configure
/etc/resolv.conf, only to find their modifications completely wiped out after a system reboot. Always use system-native configuration engines like Netplan, NetworkManager, or systemd-resolved instead. - Omitting backup nameservers: Relying exclusively on a single DNS IP address creates a single point of failure. Always declare at least two separate nameserver IPs.
- Syntax errors in configuration entries: Misplacing punctuation marks or adding improper spacings inside config documents will prevent local networking services from reading the files correctly.
🏁 Final Words
In conclusion, mastering how to change Linux DNS empowers users to tailor their systems to exact specifications, enhancing both performance and security. Whether you're navigating the user-friendly Ubuntu with Netplan, exploring the flexibility of Arch Linux, or managing enterprise environments with NetworkManager, each distribution provides unique methods. Managing this on a remote box? These methods apply directly when you configure DNS on a Linux VPS. For those looking to expand their Linux skills further, learning how to install packages in Linux is an essential next step. Happy tinkering and exploring the vast landscape of Linux networking!
People also read:

Leave A Comment