
FreeBSD is a UNIX-like operating system that has attracted popularity among people. This operating system is light and makes it a perfect solution for hosting websites/applications. This tutorial will go through the steps to install the FAMP stack on FreeBSD 12.
FAMP stack will turn your FreeBSD server into a web server.
FAMP is an acronym for FreeBSD, Apache, MySQL, and PHP that will be installed on your server. The FAMP stack, akin to a LAMP stack on Linux, is a collection of open-source software typically installed together to enable a FreeBSD server to host dynamic websites and web applications.
Note: In this tutorial, we have used a raw FreeBSD to prevent software interference. We recommend you use a raw OS to have a smoother experience.
Prerequisites
- A server Running a fresh FreeBSD operating system
- Access to the root user account or a user with Sudo privileges
- A basic understanding of FreeBSD commands
The installation process will be completed in 5 different steps. We have divided the process into 5 easy steps so that you will have a better understanding, and it is also the easiest (fastest) way to get it set up on your CentOS server:
- Step 1: Setup the server
- Step 2: Install Apache
- Step 3: Install MySQL
- Step 4: Install PHP
- Step 5: test PHP processing
Step 1: Setup the server
Before we start the FAMP stack installation, we will make some configurations on our server. Firstly, check for the FreeBSD version using the following command and note it down:
freebsd-version
# 12.1-RELEASE
Now we will update the system. To do this, enter the following:
freebsd-update fetch install
pkg update && pkg upgrade -y
Once the system is updated, we will install all the necessary packages needed for FAMP installation.
pkg install -y sudo vim bash curl
Now you can set up the time zone of your server by entering the following command:
sudo tzsetup
Once the setup is finished, we will have our server ready. However, we highly recommend creating a new user when carrying out the installation of FAMP. To create a new user, enter the following:
Adduser
# Username: max# Full name: Max# Uid (Leave empty for default): <Enter># Login group [max]: <Enter># Login group is max. Invite max into other groups? []: wheel# Login class [default]: <Enter># Shell (sh csh tcsh nologin) [sh]: bash# Home directory [/home/max]: <Enter># Home directory permissions (Leave empty for default): <Enter># Use password-based authentication? [yes]: <Enter># Use an empty password? (yes/no) [no]: <Enter># Use a random password? (yes/no) [no]: <Enter># Enter password: your_secure_password# Enter password again: your_secure_password# Lock out the account after creation? [no]: <Enter># OK? (yes/no): yes# Add another user? (yes/no): no# Goodbye!
Don’t forget to add your username instead of max. For this tutorial, we will be using the username max.
Now run the visudo command and uncomment the %wheel ALL=(ALL) ALL line to allow members of the wheel group to execute any command:
visudo
# Uncomment by removing hash (#) sign
# %wheel ALL=(ALL) ALL
Once this is done, switch to the newly created user:
su - johndoe
Step 2: Install Apache
The first step of assembling the FAMP stack is to install the web server, as you already have a running FreeBSD operating system. The easiest way to install Apache is through FreeBSD’s package manager: pkg.
Enter the following command to install Apache on FreeBSD 12:
sudo pkg install -y apache24
Once the installation is completed, you can run the following command to check for the version:
httpd -v
# Server version: Apache/2.4.41 (FreeBSD)
Once the installation is completed, you will need to start Apache by running the following command:
sudo sysrc apache24_enable=yes
sudo service apache24 start
You can double-check if everything is working smoothly by running this command:
sudo service apache24 status
apache24 is running as pid 17775.
If you see an output similar to this, you have successfully installed Apache on your server. You can head over to the next step: Installing MySQL.
Optional: You can verify that Apache was installed and working without errors by visiting your server's public IP address in your web browser. Navigate to http://your_server_IP. If you see the default Apache web page, you have successfully set up the Apache webserver.
Step 3: Installing MySQL
The next step is installing MySQL, the relational management database system, on the server. The MySQL server will organize and provide access to databases where your server can store information. You can easily install this through the pkg repository:
sudo pkg install -y mysql80-client mysql80-server
This command will install the latest version of the MySQL client and server, which is currently 8.x.x.
Once the installation is finished, you can check its version by entering the following command:
mysql --version
# mysql Ver 8.0.17 for FreeBSD12.0 on amd64 (Source distribution)
Now we have MySQL installed, but it won’t start automatically. We will enter the following two commands to start the service.
sudo sysrc mysql_enable=yes
sudo service mysql-server start
To check that MySQL has started, you can run the following command:
sudo service mysql-server status
If you see something similar, you have successfully installed MySQL on your FreeBSD server.
# Output
mysql is running as pid 19171
MySQL comes with a secure installation script that should be run to have the proper configurations. You can run the secure installation script by:
sudo mysql_secure_installation
During the setup, you will be prompted to:
- Change the root password
- Remove anonymous users
- Disallow root logins remotely
- Remove the test database and access to it
- Reload privilege tables
Each step will be explained in detail, and we recommend answering with y to all questions mentioned.
Step 4: Install PHP
PHP is the last part of the FAMP stack. PHP processes the code for showing dynamic content, and once connected with the MySQL database, it will process and be displayed through the Apache webserver.
So let’s go ahead and install PHP:
sudo pkg install -y php74 php74-mysqli mod_php74
Now, copy the PHP configuration file into the right place by using this command:
sudo cp /usr/local/etc/php.ini-production /usr/local/etc/php.ini
Everything is in place. Go ahead and enter the following commands to enable the PHP service to run on FreeBSD:
sudo sysrc php_fpm_enable=yes
sudo service php-fpm start
Enter the service status command to check if PHP is running on your server.
sudo service php-fpm status
If you see an output similar to this one, you have completed the installation:
# Output
php_fpm is running as pid 23005.
Step 5: test the PHP processing
Before using PHP, you should make some configurations to make it work with Apache. Run the following vim command:
sudo vim /usr/local/etc/apache24/modules.d/001_mod-php.conf
Now add the following text into the text editor:
<IfModule dir_module>
  DirectoryIndex index.php index.html
  <FilesMatch "\.php$">
    SetHandler application/x-httpd-php
  </FilesMatch>
  <FilesMatch "\.phps$">
    SetHandler application/x-httpd-php-source
  </FilesMatch>
</IfModule>
Save the file and exit the VI text editor.
Now check Apache's configurations:
sudo apachectl configtest
Because you've made configuration changes in Apache, you have to reload the service for those to be applied. Otherwise, Apache will still work with the earlier configuration:
sudo apachectl restart
We have successfully installed the FAMP stack on FreeBSD with all the needed configurations. However, we will run one more test to see if all the parts of the FAMP stack are working properly. To do this, we will create a basic PHP script and check how it works.
sudo vim /usr/local/www/apache24/data/info.php
Once you enter the text editor, copy and paste the following:
<?php
phpinfo ();
?>
Save and exit the text editor.
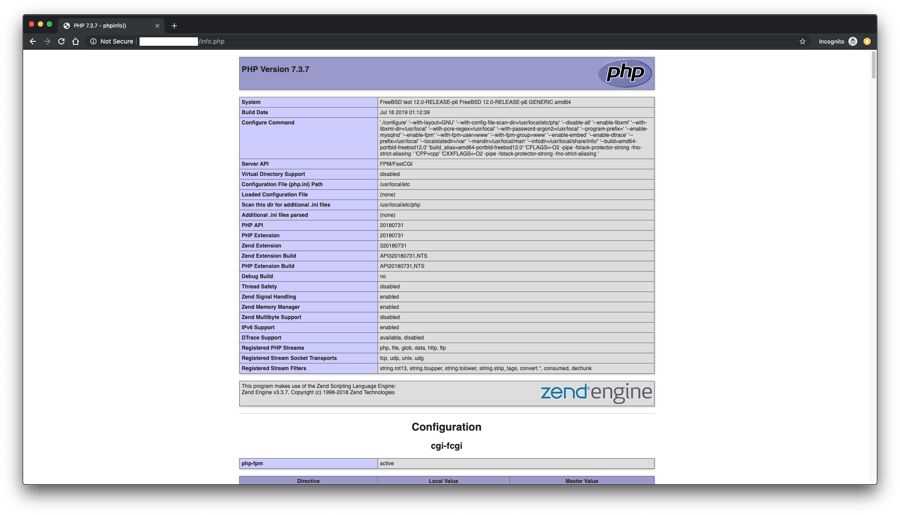
Now head over to your web browser, and enter the following URL. You will see the following image if everything is set up correctly.
http://server_ip_address/info.php
After FAMP stack installation and setup, you should remove the info.php file to avoid disclosing the information about the server to the public. To do that, enter the following:
sudo rm /usr/local/www/apache24/data/info.php
Conclusion
Congratulations on successfully installing the FAMP stack on your FreeBSD server running FreeBSD 12! We hope you had a smooth installation process by following the guidelines provided above. Now that everything is set up, you're ready to explore all the possibilities and features that the FAMP stack offers on your FreeBSD server.
If you encounter any issues or need further assistance, feel free to reach out to us in the comment section below! We're here to help.
People also read:
Leave A Comment