
In this tutorial, we will go through the process of adding CAPTCHA protection to a WordPress website using the Google Captcha plugin (reCAPTCHA WordPress). It’s very common to have the CAPTCHA added to log-in and registration forms on a website.
The main reason for adding these features is that the WordPress login and user registration pages are a prime target for hackers, spammers and brute force attackers. The attackers usually try to access the website’s admin area to distribute malware, disrupt the whole website, or even collect a hefty ransom.
Due to the abovementioned threats, most websites have implemented CPTCHAs on their sites. If you encountered a situation where you had to solve a simple math problem, enter a set of letters, or “prove you’re human, " you’ve come across a CAPTCHA.
What is CAPTCHA?
A CAPTCHA or Completely Automated Public Turing test to tell Computers and Humans Apart does exactly what its full name implies. It offers a test designed to distinguish the difference between humans and bots (or other computer programs).
It is a simple test that is easy for humans to pass but almost impossible for automated scripts to get through. CAPTCHA has evolved throughout time, and now it has evolved to have hidden CAPTCHAs that can determine the difference between the user and bots just by the user’s actions.
Initial CAPTCHAs looked something like this (check the picture below). It comprised an image displaying random letters and numbers in a distorted style where the user had to enter what they saw.
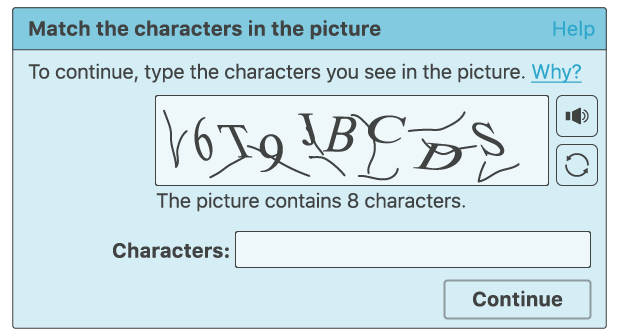
CAPTCHAs have been used all across the internet for some time, and the above-shown style has been the most common. While humans can make sense of this image, automated scripts or bots have a hard time figuring this out.
But with the developments in programming, the bots started getting better at understanding this type of image and tackling that; the pictures became more complex. This made it hard for humans to get through CAPTCHA (It happened to me also).
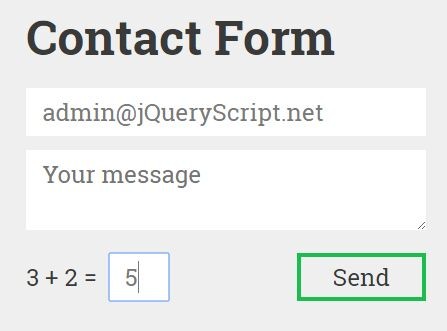
While this type can be seen today, there are much simpler CAPTCHAs. The simpler ones included basic math problems for the user to solve.
Another type of CAPTCHA is to pick out specific images that meet certain criteria.

All these types of CAPTCHAs can be seen all over the internet today. However, a new, much easier CAPTCHA developed and implemented by Google is known as reCAPTCHA. Here you need to check a box, and you will be approved entry to the site.
reCAPTCHA uses artificial intelligence, which monitors your mouse’s movement to determine if you’re a human or an automated script. This is easy for the user and provides much higher security for the website.

Pros and Cons of using the reCAPTCHA
Advantages:
- Provides an extra layer of security
- Stops malicious bots from creating spam
- Stops attackers from accessing personal information
Disadvantages:
- It might come across as “annoying” to users
- Not all CAPTCHAs are foolproof.
- Negatively impact the user experience.
What is Google reCPATCHA?
In 2014, Google released its No CAPTCHA reCAPTCHA, a successor to the distorted word and image tests it had used since 2007. The new system requires users to select a checkbox next to the words “I’m not a robot” to confirm their legitimacy:

This is far easier and faster than traditional CAPTCHAs and accessible to many users. What’s more, Google has continued to improve this technology. In 2018, it also released what’s been termed an “invisible CAPTCHA “, which can detect bots without requiring any deliberate action on the part of users.
This tutorial will add the reCAPTCHA plugin to your WordPress site. Implementing Google reCAPTCHA v2 or v3 should help to make your site more enjoyable and accessible for users.
How to add reCAPTCHA protection to your WordPress site
Step 1: Log in to WordPress as the administrator.
Step 2: On the left-hand menu, scroll down to Plugins and click on Add new
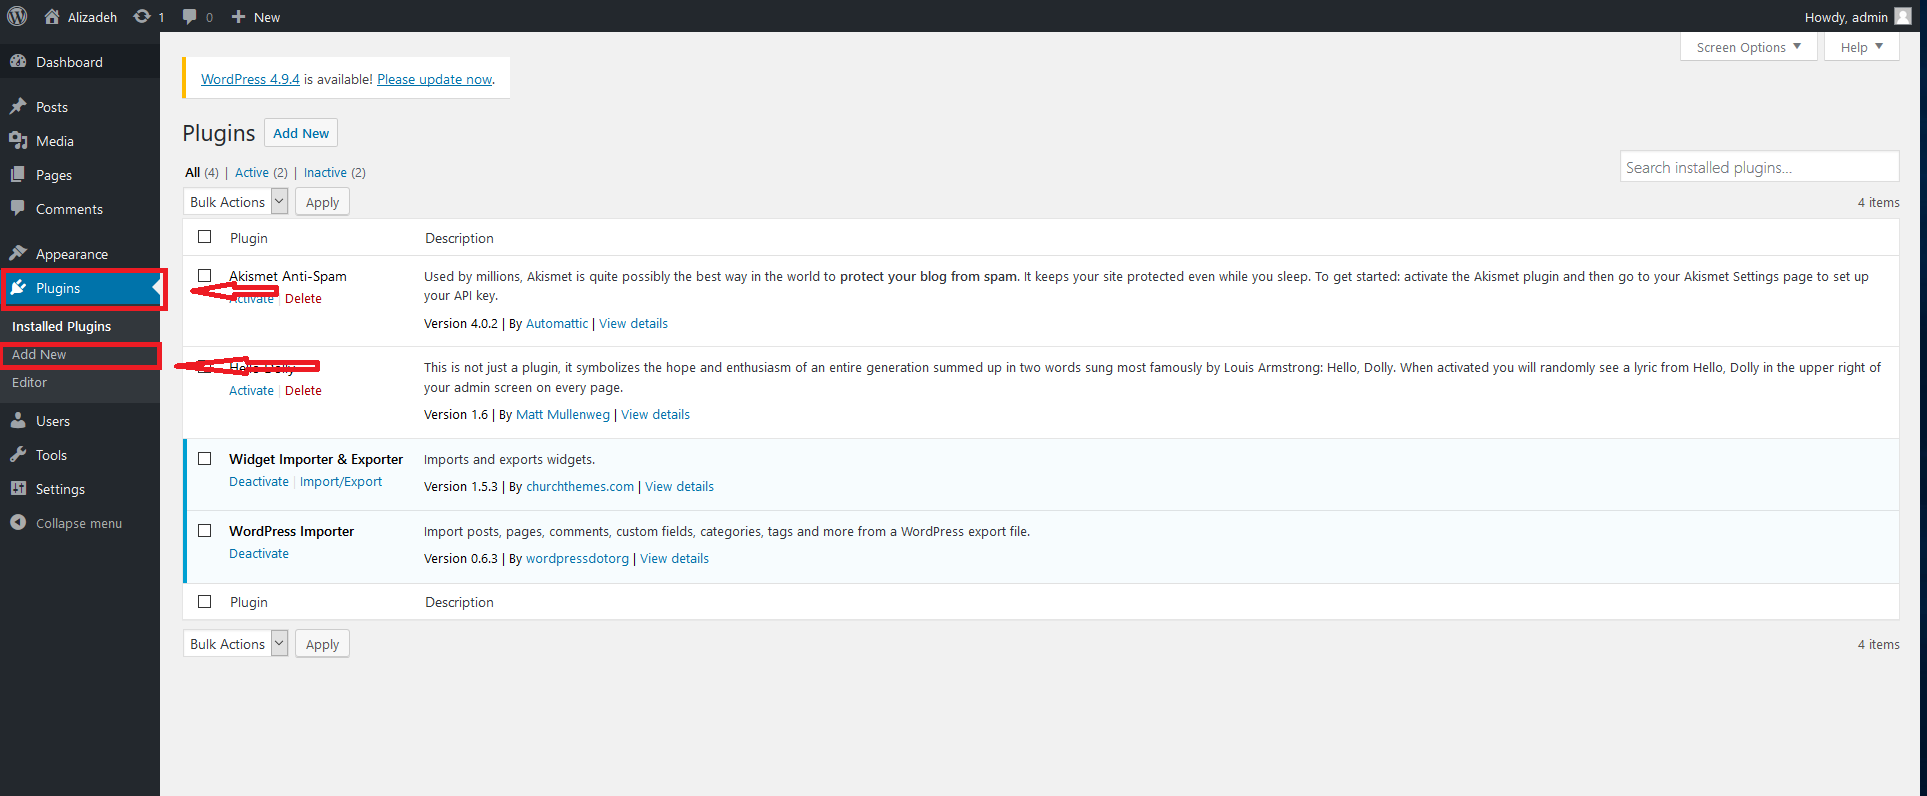
Step 3: In the search box, type in “google captcha”
Step 4: Press Enter.

Step 5: Find the Google Captcha (reCAPTCHA) plugin and click on Install Now.

Step 6: Once the plugin is installed successfully, head over to the menu on the left-hand side. Scroll down to Plugins and select Installed Plugins.
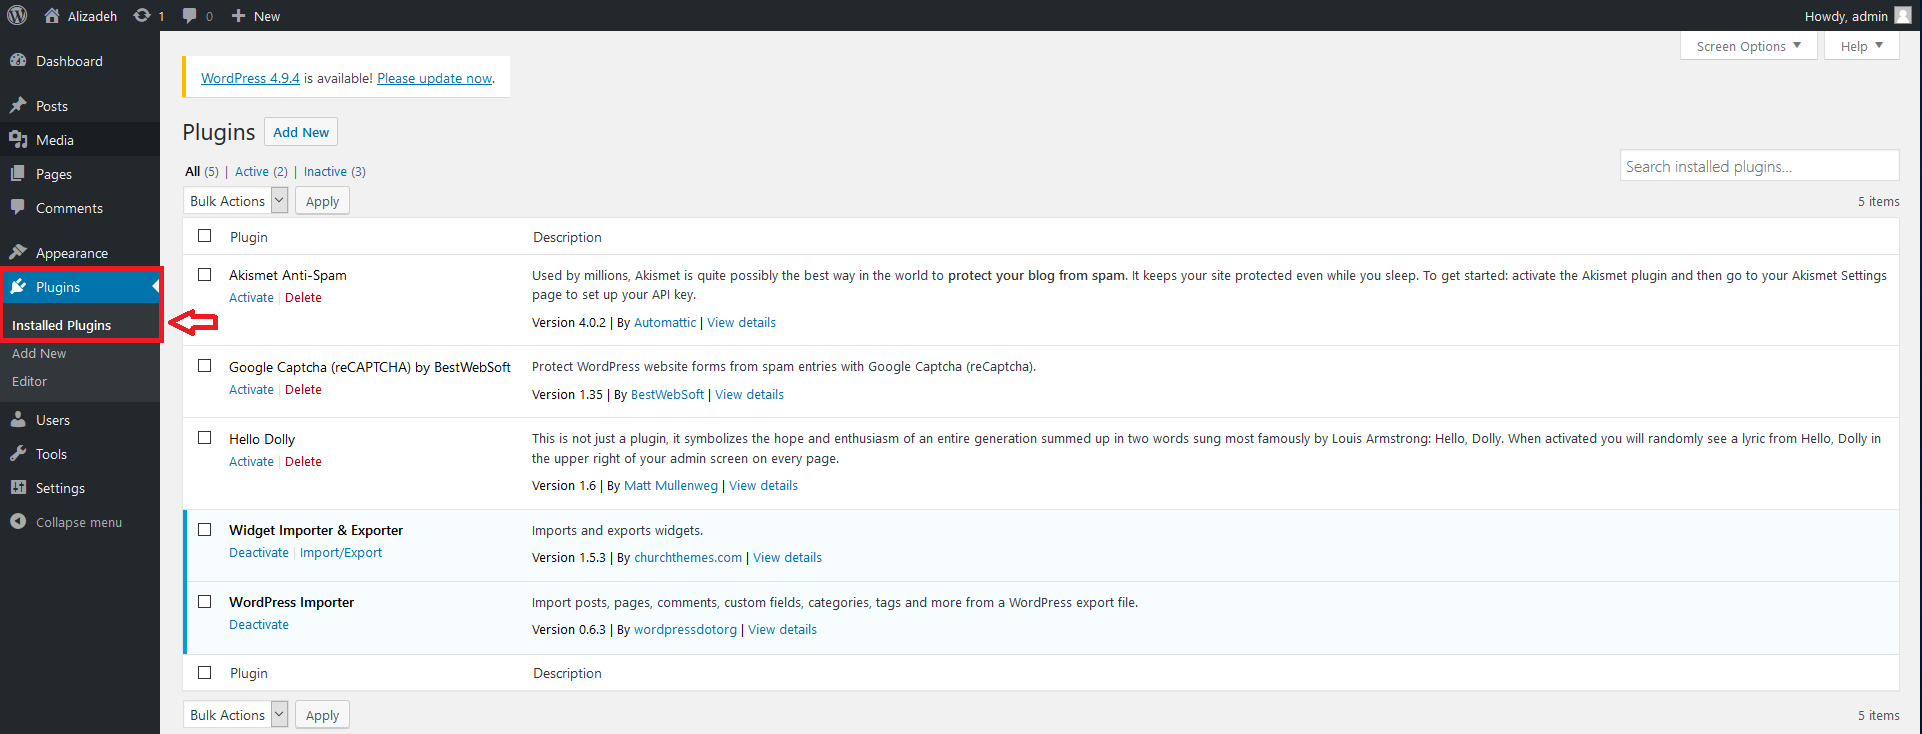
Step 7: Find the Google Captcha (reCAPTCHA) plugin, and click Activate.

Step 8: Click on Settings, as shown in the picture below.

Step 9: To use Google-captcha, you must create a public and private key. To get these keys click on Get the API Keys.
Step 10: Now, you will be redirected to Google. On the appeared page, enter an optional name on the first text box and then enter your domain name in the second text box.
Step 11: After receiving your keys from Google, type the site key into the Site Key text box and the secret key into the Secret Key text box.
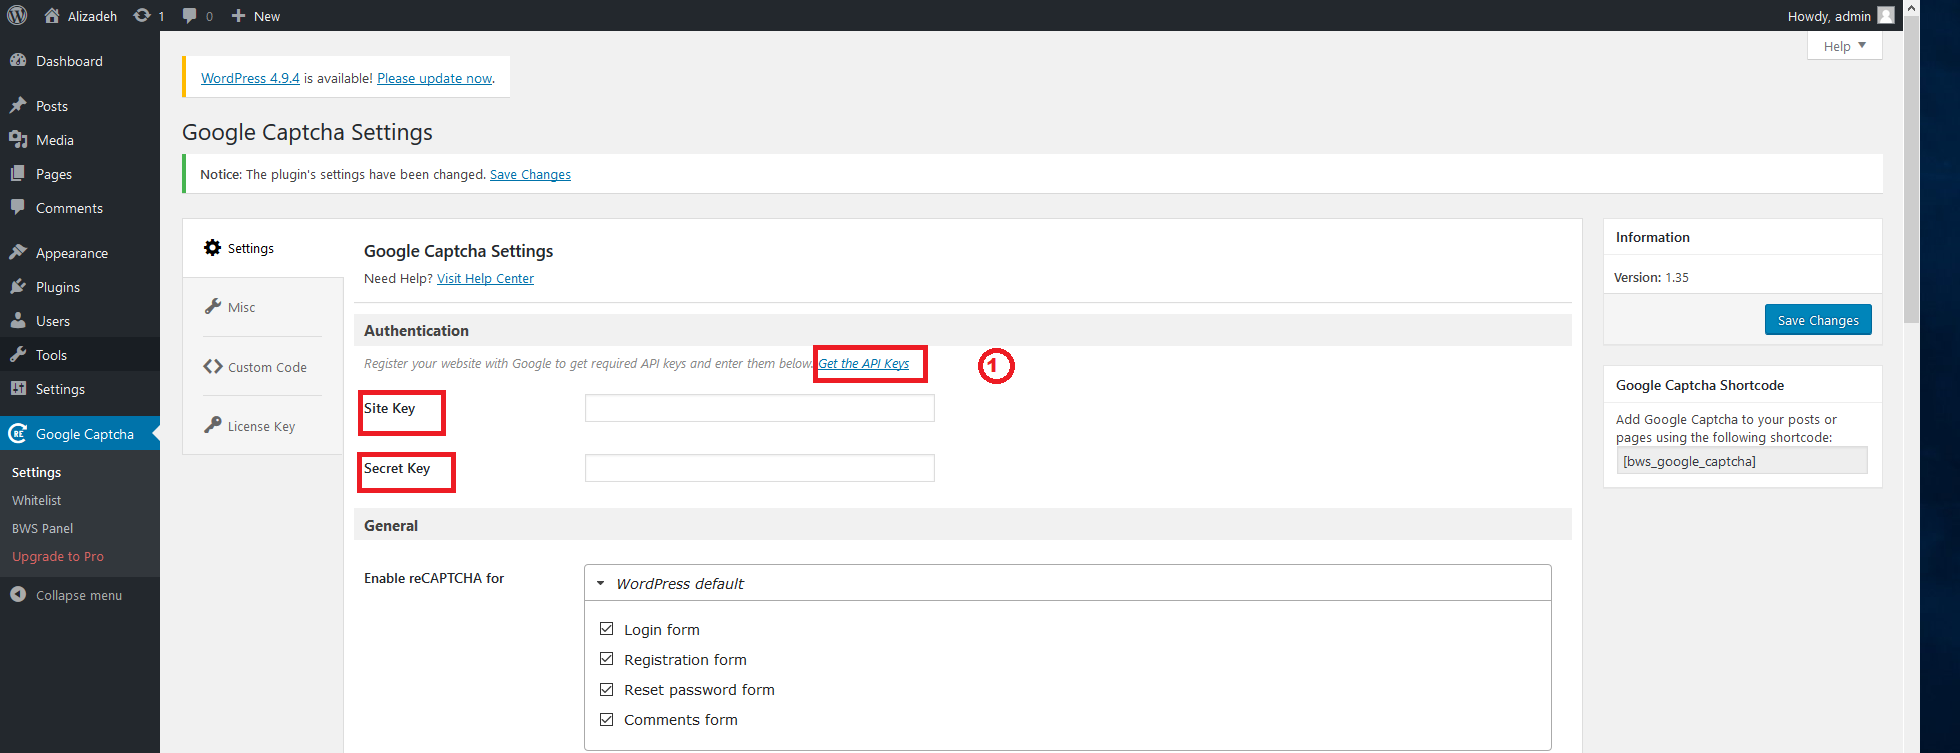
Step 12: Under Options, select the settings you want and click Save Changes.
Step 13: CAPTCHAs are now activated on your site. To test this, go to your WordPress site’s login page WordPress displays a CAPTCHA on the login page.
Summary
We hope this tutorial helped you set up the reCAPTCHA WordPress website. As a user, the CAPTCHAs can be annoying (especially when implemented poorly), but the benefits outweigh the inconvenience.
To make the most of your CAPTCHAs, you’ll want to use them sparingly on sensitive pages like registration and login forms. If you can leverage the advantages of CAPTCHAs without negatively impacting your site’s user experience, you’ll add a valuable layer of security.
People also read:


