
When working with Git, the ability to switch branches is fundamental to managing your project's workflow effectively. The git switch command is a versatile tool that allows you to navigate between branches, create new branches, and manage changes in your repository. If you haven't set up Git yet, follow our guide on how to install and upgrade Git. Ubuntu users can also follow our step-by-step guide on how to install Git on Ubuntu before working with git switch. In this comprehensive guide, we'll explore various use cases for git switch, including how to switch to a different branch, create new branches, and manage changes across branches. For more advanced workflows, see our list of best Git commands for developers.
In this comprehensive guide, we'll explore various use cases for git switch, including how to switch to a different branch, create new branches, and manage changes across branches. For more advanced workflows, see our list of best Git commands for developers.
The most basic use of the git switch branchcommand is to switch from your current branch to another existing branch. For example, to switch to the main branch, you would use the following command:
git switch branch main
This command updates your working directory to reflect the state of the main branch, including any changes that are unique to that branch. If you're new to Git, start with our guide on basic Git commands.
You can also use the git switch branch command to create a new branch and switch to it in one step. For example, to create a new branch called feature-branch and switch to it, you would use the following command:
git switch branch branch -c feature-branch
This command creates a new branch called feature-branch based on your current branch and switches to it.
To switch to a branch that exists on a remote repository, you can use the git switch branch branch to main with the --track option. For example, to switch to a branch called remote-branch that exists on the origin remote repository, you would use the following command:
git switch branch branch --track origin/remote-branch
This command creates a new local branch called remote-branch that tracks the origin/remote-branch branch. For collaboration workflows, learn more about what is GitHub and how remote repositories work.
Forcing Branch Switch
In some cases, you may need to forcefully switch branches, discarding any changes in your working directory that are not committed. You can use the --force or -f option with the git switch branch remote command to force the switch. For example, to force switch to the main branch, you would use the following command:
git switch branch branch -f main
It's worth noting that the git switch branch command is the preferred way to switch branches since Git version 2.23, while the git checkout command is considered deprecated for this purpose. The git switch branch branch command is more intuitive and safer, as it prevents accidental checkout of a new branch if there are uncommitted changes in the working directory.
If you have changes in your working directory that you want to bring to another branch, you can use the git switch branch command with the --recurse-submodules option. This option allows you to switch branches while keeping your current changes in the working directory. For example, to switch to the main branch and bring your current changes with you, you would use the following command:
git switch branch branch --recurse-submodules main
In this guide, we've explored various use cases for git switch, from switching to existing branches to creating new ones and managing changes across branches. By mastering this command, you can streamline your workflow and work more effectively with Git. For complete control over your development environment, check out how to set up a private Git server on VPS.
How to Git switch Branche?

Switching branches in Git is a crucial skill that allows you to work on different features, fixes, or experiments within the same repository. Git provides several commands to switch branches, with git switch branch branch branch being one of the most straightforward and commonly used. Let's explore how to switch branches using git switch branch branch and some of its key features.To get familiar with basic Git commands, go to Basic GIT Commands article.
1. Switching to an Existing Branch
To switch to an existing branch named feature-branch, you can use the following command:
git switch branch branch feature-branch
This command will switch your working directory to the feature-branch, allowing you to continue your work on that branch.
2. Creating and Switching to a New Branch
If you want to create a new branch and switch to it in a single command, you can use the -c or --force-create option:
git switch branch branch -c new-branch
This command will create a new branch called new-branch and switch your working directory to it.
3. Switching to a Branch with Uncommitted Changes
If you have uncommitted changes in your working directory and you want to switch to another branch, you can use the --keep option:
git switch branch branch --keep another-branch
This will switch to another-branch while keeping your uncommitted changes in the working directory.
4. Switching to a Branch and Bringing Changes Along
To switch to a branch and carry your changes with you, you can use the --create option:
git switch branch branch --create existing-branch
This command will create a new branch called existing-branch based on your current branch and switch to it, preserving your changes.
5. Switching to a Branch and Discarding Changes
If you have changes in your working directory that you want to discard before switching branches, you can use the -m or --discard-changes option:
git switch branch branch -m feature-branch
This command will discard your changes and switch to the feature-branch.
6. Switching to a Branch and Updating Files
To switch to a branch and update the files in your working directory to match the state of the new branch, you can use the -c or --force-create option:
git switch branch branch -c existing-branch
This will switch to existing-branch and update your files to match the state of that branch.
Switching branches in Git is a fundamental operation that allows you to work on multiple features or fixes simultaneously. The git switch branch branch command, along with its various options, provides a simple and effective way to switch between branches and manage your workflow efficiently. By mastering these commands, you can navigate your Git repository with ease and collaborate effectively with your team.
How To Switch to Main Branch in Git?
Switching to the main branch in Git is a common task when you want to work on your project's main development branch. The main branch often represents the latest stable version of your project. In this guide, we'll explore how to switch to the main branch in Git using the git switch branch command.
Basic Branch Switching
To switch to the main branch in Git, you can use the git switch branch command followed by the branch name. For example, to switch to the main branch, you would use the following command:
git switch branch main
This command will update your working directory to match the state of the main branch. Any changes you make after switching will be based on the main branch's latest commit.
Creating and Switching to a New Branch
If you want to create a new branch based on the main branch and switch to it in one step, you can use the -c or --create option with git switch branch. For example, to create a new branch named new-feature based on the main branch and switch to it, you would use the following command:
git switch branch branch -c new-feature
This command will create the new-feature branch based on the main branch and switch to it, allowing you to start working on your new feature.
If you want to switch to a branch that exists on a remote repository, you can use the --track option with git switch branch. For example, to switch to a branch named remote-branch that exists on the origin remote repository, you would use the following command:
git switch branch branch --track origin/remote-branch
This command will create a new local branch named remote-branch that tracks the origin/remote-branch branch and switch to it.
Handling Changes When Switching Branches
When switching branches, Git will try to preserve your changes whenever possible. If you have uncommitted changes in your working directory that conflict with the branch you're switching to, Git will prevent the switch and provide instructions on how to handle the changes.
To switch branches and bring your current changes with you, you can use the --recurse-submodules option with git switch branch . This option allows you to switch branches while keeping your current changes in the working directory.
Switching to the main branch in Git is a straightforward process that allows you to work on your project's main development branch. By using the git switch branch command, you can switch branches with ease and continue working on your project's latest features and improvements.
How Do I Switch to Another Branch in Git?
Switching branches in Git is a fundamental operation that allows you to move between different branches in your repository. Whether you're working on a new feature, fixing a bug, or just exploring different versions of your code, knowing how to switch branches is crucial. In this guide, we'll cover everything you need to know about switching branches in Git, using the git switch branch command.
To switch to another branch in Git, you can use the git switch branch command followed by the name of the branch you want to switch to. For example, to switch to a branch named feature-branch, you would use the following command:
git switch branch feature-branch
If the branch does not exist locally but exists on the remote repository, you can create a new local branch that tracks the remote branch by using the -c flag:
git switch branch -c new-branch-name origin/remote-branch-name
This command creates a new local branch called new-branch-name that tracks the remote-branch-name on the remote repository named origin.
If you want to switch to the previous branch you were on, you can use the - symbol as the branch name:
git switch branch -
This command is equivalent to git switch branch @{-1} and switches you back to the branch you were on before the current one.
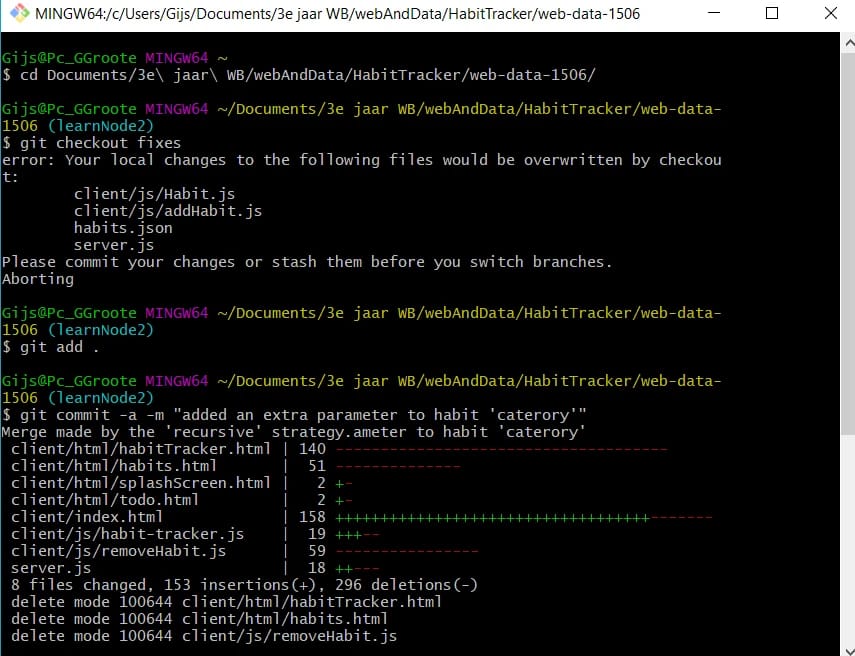
If you have uncommitted changes in your current branch and you want to switch to another branch, Git will prevent you from doing so to avoid losing your changes. You can either commit your changes or stash them using git stash before switching branches.
It's also worth noting that thegit switch branch without losing changes command was introduced in Git version 2.23. If you're using an older version of Git, you can use the git checkout command to switch branches and git create branch:
git checkout feature-branch
However, it's recommended to use the git switch branch command for switching branches, git list branches, as it provides a clearer and more concise syntax.
In summary, the git switch branch command is used to switch between branches in Git. You can use it to switch to an existing branch, create a new branch from a remote branch, or switch back to the previous branch you were on. It's a versatile and essential command for managing your Git branches effectively.
How Do I Switch to a Remote Branch in Git?
Switching to a remote branch in Git allows you to work on code that exists on a remote repository, such as GitHub or GitLab. This is useful when you need to collaborate with others or when you want to work on a feature branch that someone else has created. In this guide, we'll explore how to switch to a remote branch using the git switch branch command, along with some best practices and tips.
To switch to a remote branch in Git, you first need to fetch the latest changes from the remote repository. This ensures that your local repository is up to date with the remote repository. You can do this by running the following command:
git fetch
Once you have fetched the latest changes, you can switch to the remote branch using the git switch branch command. If the remote branch is named feature-branch, you would use the following command:
git switch feature-branch
This command switches you to the feature-branch on your local repository, which is tracking the remote branch of the same name. If the branch doesn't exist locally, Git will create a new local branch that tracks the remote branch.
If the remote branch has a different name from the local branch you want to create, you can specify the remote branch explicitly. For example, to switch to a remote branch named new-feature:
git switch branch -c new-feature origin/new-feature
This command creates a new local branch named new-feature that tracks the origin/new-feature branch on the remote repository.
It's important to note that when you switch to a remote branch, Git sets up tracking so that you can easily push and pull changes to and from the remote branch. This allows you to collaborate with others effectively and keep your local and remote repositories in sync.
If you want to switch back to the main branch (usually master or main), you can use the same git switch branch command:
git switch branch main
This command switches you back to the main branch, where you can continue working on your project.
In summary, switching to a remote branch in Git involves fetching the latest changes from the remote repository and then using the git switch branch command to switch to the desired branch. It's a straightforward process that allows you to work on code collaboratively and keep your local and remote repositories in sync.
Checkout New Branch from Specific Commit
Switching branches in Git is a fundamental part of the version control process, allowing you to work on different features or fixes concurrently. Let's explore several scenarios involving the git switch command, comparing it with the older git checkout command, and understanding how it handles various situations.
Creating a New Branch from a Specific Commit
To create a new branch from a specific commit, you can use the git switch command with the -c flag followed by the branch name and the commit hash:
git switch -c new-branch-name commit-hash
This command creates a new branch named new-branch-name starting from the specified commit.
git switch vs. git checkout
In Git 2.23 and later, git switch is preferred over git checkout for switching branches. The git switch command is more intuitive and is specifically designed for this purpose, making it easier to understand and use.
Switching Branches and Pulling Changes
To switch to a branch and pull the latest changes from the remote repository, you can use the following commands:
git switch branch-name git pull
This will switch you to the branch-name branch and pull the latest changes from the remote repository.
Switching Branches with Current Changes
If you have uncommitted changes in your current branch and you want to switch to another branch, you can either commit your changes or stash them before switching. To stash your changes and switch branches, use the following commands:
git stash git switch branch-name
Switching Branches and Bringing Changes
To switch branches and bring your changes with you, you can use the --merge flag with the git switch command:
git switch --merge branch-name
This will switch you to the branch-name branch and merge your changes from the current branch.
Switching Branches with Command Line
Switching branches using the command line is simple with the git switch command. Just specify the name of the branch you want to switch to:
git switch branch-name
TortoiseGit Switch Branch
In tortoise git switch branch, switching branches is done through the "Switch/Checkout" option. Right-click on the branch you want to switch to in the Branches menu and select "Switch/Checkout."
Switching Branches and Ignoring Changes
If you want to git switch branch command line and ignore any changes you've made in the current branch, you can use the --discard-changes flag:
git switch --discard-changes branch-name
This will switch you to the branch-name branch and discard any uncommitted changes.
Switching Branches and Updating Files
When you switch branches, Git updates the files in your working directory to reflect the state of the branch you're switching to. Any changes that are not in the target branch will be removed from your working directory.
Switching Branches After Commit
After you commit changes to your current branch, you can switch to another branch using the git switch branch and bring changes command:
git switch branch-name
Switching Branches and Creating a New One
If the branch you want to switch to does not exist yet, you can create it and switch to it in one step using the -c flag:
git switch -c new-branch-name
Switching Branches and Checking Out
When you switch branches in Git, you are effectively checking out the branch you're switching to. This updates your working directory and index to match the state of the new branch.
Switching Branches and Getting Latest Changes
To switch to a branch and get the latest changes from the remote repository, you can use the --recurse-submodules flag with the git switch branch already exists command:
git switch --recurse-submodules branch-name
Switching Branches and Merging
When you switch branches in Git, you can merge changes from the branch you're switching from into the branch you're switching to using the --merge flag:
git switch --merge branch-name
This will switch you to the git switch branch with current changes branch and merge any changes from the current branch.
In conclusion, the git switch command provides a powerful and intuitive way to switch branches in Git, allowing you to easily manage your codebase and collaborate with others. Whether you're creating a new branch, updating files, or merging changes, git switch is a versatile tool that can help you work more efficiently.
How to create a new branch in Git
Creating a new branch in Git allows you to work on a new feature or fix without affecting the main codebase. It's a common practice in software development to isolate changes until they're ready to be merged. Let's explore how you can create a new branch in Git and start working in it.
Creating a New Branch
To create a new branch in Git, you can use the git switch branch and pullcommand followed by the name of the new branch. For example, to create a new branch named new-feature, you would use the following command:
git branch new-feature
This command creates a new branch called new-feature that is based on the commit you currently have checked out. However, the new branch is not active yet. To switch to the new branch and start working on it, you can use the git switch command:
git switch new-feature
Creating a New Branch from a Specific Commit
If you want to create a new branch from a specific commit, you can specify the commit hash when creating the branch. For example, to create a new branch named bug-fix starting from a specific commit with hash abc123, you would use the following command:
git branch bug-fix abc123
This command creates a new branch called bug-fix starting from the commit with hash abc123.
git switch vs. git checkout
In Git 2.23 and later, the git switch command is preferred over git switch branch and checkout for creating and switching branches. The git switch branch and create command is more intuitive and is specifically designed for this purpose.
Creating a New Branch and Switching to It
To create a new branch and switch to it in a single command, you can use the -c flag with the git switch branch after commit command. For example, to create a new branch named experimental and switch to it, you would use the following command:
git switch -c experimental
Creating a New Branch with TortoiseGit
If you prefer using a graphical interface, you can use TortoiseGit to create a new branch. Right-click on the commit or branch where you want to create the new branch, select "TortoiseGit" > "Branch," enter the name of the new branch, and click "OK."
Best Practices for Branching
When creating a new branch, it's a good practice to give it a descriptive name that reflects the purpose of the branch (e.g., feature/add-login, bugfix/fix-crash). This makes it easier for you and your team to understand the purpose of the branch.
Creating a new branch in Git is a simple and essential operation that allows you to work on new features or fixes without affecting the main codebase. By using the git switch branch and ignore changesand git switch branch and update files commands, you can create and switch to a new branch in just a few steps. Whether you're working on a new feature or fixing a bug, branching is a powerful tool that can help you manage your codebase effectively.
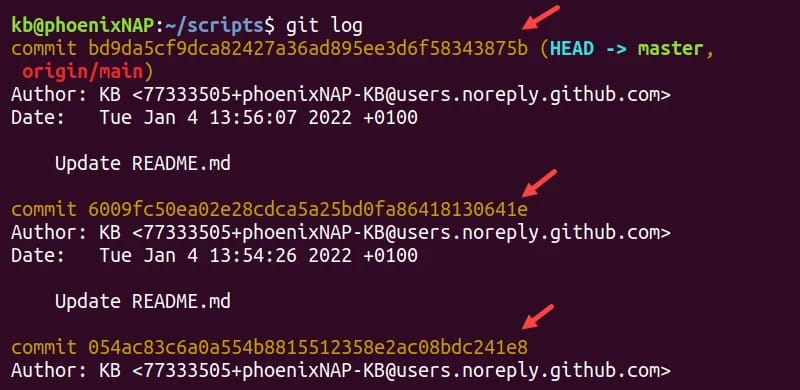
How to find a commit SHA
In Git, each commit is identified by a unique hash called the commit SHA (Secure Hash Algorithm). This hash is a 40-character string that uniquely identifies the commit within the repository. Finding the commit SHA of a specific commit can be useful for various tasks, such as reverting changes, inspecting commit history, or creating branch references. Let's explore how you can find the commit SHA in Git.
Using git log
The most common way to find the commit SHA is by using the git log command. When you run git log, Git displays a list of commits in reverse chronological order, along with their SHA hashes. You can use this command to find the SHA of the commit you're interested in. Here's an example:
git log
This will display a list of commits along with their SHA hashes. You can scroll through the list to find the commit you're looking for.
Using git show
Another way to find the commit SHA is by using the git show command. This command displays detailed information about a specific commit, including its SHA hash. You can specify the commit you're interested in by providing its reference (e.g., branch name, tag name, or commit SHA). Here's an example:
git show commit-SHA
Replace commit-SHA with the actual SHA hash of the commit you want to inspect. Git will display detailed information about that commit, including its SHA hash.
Using git reflog
If you're looking for the SHA of a commit that is no longer referenced by any branch or tag, you can use the git reflog command. This command displays a log of all the actions that have updated the commit history, including commits that are no longer referenced. Here's an example:
git reflog
This will display a list of actions that have updated the commit history. You can look through the list to find the commit you're interested in and note its SHA hash.
Using Git GUI Tools
Many Git GUI tools, such as GitKraken, Sourcetree, and GitHub Desktop, provide graphical interfaces for browsing commit history and viewing commit details. These tools typically display commit SHA hashes along with other commit information, making it easy to find the SHA of a specific commit.
Finding the commit SHA in Git is a straightforward process that can be done using various commands and tools. Whether you're using the command line or a graphical interface, Git provides several options for finding the SHA of a specific commit. By using the git log, git show, git reflog, or Git GUI tools, you can quickly locate the commit SHA you need for your Git operations.
How git switch branch and merge?
Branching and merging are essential concepts in Git that allow you to work on multiple features or versions of your code simultaneously and then combine them back together. The git switch branch and merge commands are used to switch between branches and merge changes, respectively. Let's explore how you can use these commands to manage branches and merge changes in Git.
Switching Branches with git switch
To switch to a different branch in Git, you can use the git switch command followed by the name of the branch you want to switch to. For example, to switch to a branch named feature-branch, you would use the following command:
git switch feature-branch
This command switches your working directory to the feature-branch, allowing you to start working on that branch.
Merging Changes with git merge
Once you have made changes on a branch and want to incorporate those changes into another branch, you can use the git switch branch and get latest command. For example, if you want to merge changes from feature-branch into main, you would switch to the main branch and then use the following command:
git switch main git merge feature-branch
This command merges the changes from feature-branch into main, combining the commit history of both branches.
Resolving Merge Conflicts
In some cases, Git may not be able to automatically merge changes from two branches, resulting in a merge conflict. Merge conflicts occur when changes in one branch conflict with changes in another branch, and Git is unable to determine which changes to keep. When this happens, Git will pause the merge process and ask you to resolve the conflict manually.
To resolve a merge conflict, you can use a text editor to edit the conflicting files and resolve the differences. Once you have resolved the conflicts, you can add the resolved files to the staging area using git add and then complete the merge using git merge --continue.
Using git switch and git merge Together
You can use git switch and git merge together to switch to a branch and merge its changes into the current branch in a single command. For example, to switch to feature-branch and merge its changes into main, you can use the following command:
git switch -c main feature-branch
This command creates the main branch if it does not exist and then merges the changes from feature-branch into main.
Best Practices for Branching and Merging
When working with branches and merging changes, it's important to follow some best practices:
-
Keep Branches Short-Lived: Create branches for specific features or fixes, and merge them back into the main branch once the work is complete.
-
Merge Frequently: Merge changes from the main branch into your feature branches frequently to keep them up to date with the latest changes.
-
Review Changes: Before merging branches, review the changes to ensure they are correct and do not introduce any issues.
-
Use Branch Naming Conventions: Use descriptive branch names that reflect the purpose of the branch, such as feature/add-login or bugfix/fix-crash.
By following these best practices, you can effectively manage branches and merge changes in Git, allowing you to work collaboratively and maintain a clean and organized codebase.
What if Switching Branches in Git is Not Working?
Switching branches in Git is a common operation that allows developers to work on different parts of a project or experiment with new features without affecting the main codebase. The git switch command is used to switch between branches in Git, making it easy to move between different branches and manage your code effectively. Let's explore how you can use git switch to switch branches in Git.
Understanding Branches in Git
Before we dive into how to switch branches, let's first understand what branches are in Git. A branch in Git is simply a lightweight movable pointer to a commit. When you create a new branch, Git creates a new pointer that points to the current commit. This allows you to make changes on the new branch without affecting the original branch.
Using git switch to Switch Branches
To switch to a different branch in Git, you can use the git switch command followed by the name of the branch you want to switch to. For example, if you have a branch named feature-branch and you want to switch to it, you would use the following command:
git switch feature-branch
This command will switch your working directory to the feature-branch, allowing you to start working on that branch. Any changes you make will now be made on the feature-branch.
Creating a New Branch and Switching to It
You can also use git switch to create a new branch and switch to it in a single command. For example, if you want to create a new branch named new-feature and switch to it, you would use the following command:
git switch -c new-feature
This command creates a new branch called new-feature based on the current branch and switches to it.
Best Practices for Branch Switching
When switching branches in Git, it's important to follow some best practices to ensure smooth development workflow:
-
Commit or Stash Changes: Before switching branches, make sure to commit your changes or stash them to avoid losing any work.
-
Update Remote Branches: If you're switching to a branch that exists on a remote repository, make sure to fetch the latest changes from the remote repository before switching.
-
Merge or Rebase: After you're done working on a branch and want to incorporate your changes into another branch, use git merge or git rebase to merge or rebase your changes onto the target branch.
-
Delete Unused Branches: Once you're done with a feature branch and have merged its changes into the main branch, delete the feature branch to keep your repository clean.
Switching branches in Git using the git switch command is a simple and powerful way to manage your codebase. By understanding how branches work and following best practices for branch switching, you can effectively work on different parts of your project and collaborate with other developers. Whether you're working on a new feature, fixing a bug, or experimenting with new ideas, Git branches and the git switch command make it easy to manage your code and stay organized.
Using git switch branch branch vs git checkout
When working with Git, you often need to switch between branches to work on different features or fixes. The git switch and git checkout commands are both used to switch branches in Git, but they have some differences in their behavior and usage. Let's explore the differences between git switch branch and git checkout and when to use each command.
git switch branch
The git switch command is a newer command introduced in Git 2.23 as a more intuitive and safer way to switch branches. It is specifically designed for switching branches and has a clearer syntax compared to git checkout.
To switch to a branch using git switch, you simply specify the name of the branch:
git switch branch-name
This command switches you to the specified branch, updating your working directory and index to match the state of the branch. It's a straightforward and easy-to-use command for switching branches.
git checkout
The git checkout command is an older command that has been used for various purposes in Git, including switching branches. While it is still widely used and supported, it has some nuances that can be confusing, especially for beginners.
To switch to a branch using git checkout, you also specify the name of the branch:
git checkout branch-name
This command switches you to the specified branch, similar to git switch. However, git checkout has additional capabilities, such as checking out individual files or commits, which can make its behavior more complex.
Differences and Recommendations
The main difference between git switch and git checkout is their intended use and behavior. git switch is designed specifically for switching branches and has a more straightforward syntax, making it easier to understand and use. On the other hand, git checkout is a more versatile command that can be used for various purposes, including switching branches, checking out files, and inspecting commits.
For most branch-switching operations, it is recommended to use git switch due to its clarity and simplicity. However, if you need to perform more advanced operations, such as checking out specific files or commits, git checkout may be more appropriate.
Best Practices for Branch Switching
When switching branches in Git, it's important to follow some best practices to ensure smooth workflow:
-
Commit or Stash Changes: Before switching branches, make sure to commit your changes or stash them to avoid losing any work.
-
Update Remote Branches: If you're switching to a branch that exists on a remote repository, make sure to fetch the latest changes from the remote repository before switching.
-
Merge or Rebase: After you're done working on a branch and want to incorporate your changes into another branch, use git merge or git rebase to merge or rebase your changes onto the target branch.
-
Delete Unused Branches: Once you're done with a feature branch and have merged its changes into the main branch, delete the feature branch to keep your repository clean.
By following these best practices and choosing the appropriate command for the task, you can effectively manage your branches and collaborate with other developers in Git.
Difference between git checkout and git reset
Switching branches is a fundamental operation in Git that allows developers to work on different parts of a project concurrently. The git switch command is a newer and more intuitive way to switch branches compared to the traditional git checkout command. It provides a clearer syntax and is specifically designed for branch switching tasks.
Syntax and Usage
The git switch command is used to switch branches in Git. Its syntax is straightforward:
git switch branch-name
This command switches your working directory to the specified branch, updating the files in your working directory to match the state of the branch. If there are uncommitted changes in your current branch, Git will prevent you from switching branches to avoid losing your changes. You can either commit your changes or stash them before switching branches.
Creating and Switching to a New Branch
One of the advantages of the git switch command is its ability to create a new branch and switch to it in a single command. To create a new branch and switch to it, you can use the -c or --create flag:
git switch -c new-branch-name
This command creates a new branch called new-branch-name based on the current branch and switches to it. This is a convenient way to start working on a new feature or bug fix without having to switch branches manually.
Switching to an Existing Branch
If you want to switch to an existing branch, you can simply specify the name of the branch:
git switch existing-branch-name
This command switches your working directory to the specified existing branch, allowing you to continue working on that branch.
Handling Remote Branches
When switching to a branch that exists on a remote repository, Git will automatically set up tracking so that you can push and pull changes to and from the remote branch. This allows you to collaborate with others effectively and keep your local and remote repositories in sync.
Undoing a Switch
If you switch to a branch and realize that you want to go back to the previous branch, you can use the - symbol as the branch name:
git switch -
This command is equivalent to git switch @{-1} and switches you back to the branch you were on before the current one.
The git switch command is a powerful and intuitive way to switch branches in Git. Its clear syntax and ability to create and switch to new branches make it a valuable tool for managing your Git workflow. Whether you're creating a new feature branch, fixing a bug, or simply exploring different versions of your code, git switch provides a simple and effective way to manage your branches and work more efficiently.
Difference between git checkout and git Clone
git checkout and git clone are both essential Git commands, but they serve different purposes in the Git workflow. Understanding the difference between these commands is crucial for effectively managing your Git repositories. Let's explore the key differences between git checkout and git clone.
git clone
The git clone command is used to create a copy of a remote repository on your local machine. It not only copies the repository but also sets up a connection between your local repository and the remote repository, allowing you to fetch and push changes to the remote repository.
Here's how you use git clone to clone a repository:
git clone <repository-url>
For example, to clone the repository located at https://github.com/user/repository, you would use:
git clone https://github.com/user/repository
git checkout
The git checkout command is used to switch branches or restore files in your working directory. It allows you to move between different branches in your repository, create new branches, and restore files to a previous state.
Here are some common uses of git checkout:
-
Switch to an existing branch: git checkout <branch-name>
-
Create and switch to a new branch: git checkout -b <new-branch-name>
-
Restore a file to a previous state: git checkout -- <file-name>
Key Differences
-
Purpose: The main difference between git clone and git checkout is their purpose. git clone is used to create a copy of a remote repository, while git checkout is used to switch branches or restore files in your working directory.
-
Effect on Working Directory: git clone creates a new directory containing the cloned repository, while git checkout only changes the state of the files in your current working directory.
-
Usage: git clone is used with the repository URL to clone a repository, while git checkout is used with different options and arguments to switch branches or restore files.
-
Remote vs. Local Operations: git clone is a remote operation that interacts with a remote repository, while git checkout is a local operation that affects only your local repository and working directory.
When to Use Each Command
-
Use git clone when you want to create a copy of a remote repository on your local machine, such as when you're starting a new project or working on someone else's project.
-
Use git checkout when you want to switch branches, create a new branch, or restore files in your working directory.
In summary, git clone is used to create a copy of a remote repository on your local machine, while git checkout is used to switch branches or restore files in your working directory. Understanding the differences between these commands is key to effectively managing your Git repositories and working with branches.
Git switch vs checkout
The git switch branch vs checkoutcommands in Git are both used for similar purposes, such as switching branches and checking out files. However, they differ in their syntax, behavior, and intended use cases.
git switch
The git switch command is specifically designed for switching branches in Git. Its syntax is straightforward:
git switch branch-name
This command switches your working directory to the specified branch, updating the files in your working directory to match the state of the branch. It is the preferred command for branch switching tasks in Git due to its clear and intuitive syntax.
git checkout
The git checkout command is a more versatile command that has been used for various purposes in Git, including switching branches, checking out individual files, and navigating through commits. While git checkout can still be used for branch switching, it has a more complex syntax compared to git switch:
git checkout branch-name
Both commands achieve the same result of switching branches, but git switch is preferred for branch switching tasks due to its simpler syntax and clearer focus on branch operations.
In summary, while both git switch and git checkout can be used for branch switching, git switch is the preferred command for this task due to its clearer syntax and specific focus on branch operations.
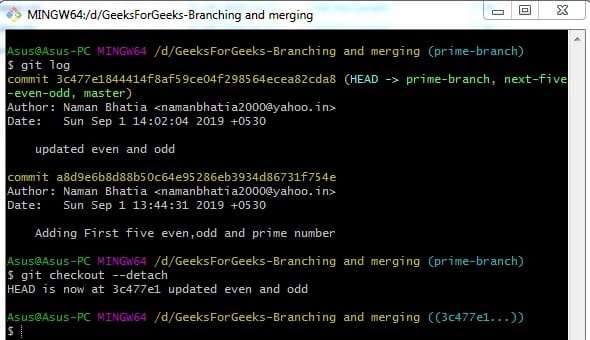
What is a detached HEAD state?
In Git, a "detached HEAD" state refers to a situation where the HEAD (which points to the current branch or commit) is pointing directly to a commit, rather than a branch. This can happen when you checkout a specific commit by its hash, rather than checking out a branch name. When you are in a detached HEAD state, any new commits you make will not be part of any branch and may be lost if you switch to another branch or checkout a different commit.
How Does a Detached HEAD State Occur?
A detached HEAD state can occur in several ways:
-
Checking out a specific commit by its hash:
git checkout <commit-hash>
-
Checking out a tag:
git checkout <tag-name>
-
Checking out a remote branch without creating a local tracking branch:
git checkout origin/main
-
Checking out a commit that is not part of any branch (e.g., a commit created during an interactive rebase or a commit that was reset):
git checkout HEAD@{1}
What Happens in a Detached HEAD State?
When you are in a detached HEAD state, Git warns you that you are in this state. You can use git status to see that you are not currently on any branch:
git status
Any commits you make while in a detached HEAD state will not be associated with any branch. If you want to keep these commits, you can create a new branch from the current commit to make them part of a branch:
git switch -c new-branch-name
If you switch to another branch or checkout a different commit while in a detached HEAD state, the commits you made in the detached HEAD state may become unreachable and eventually deleted by Git's garbage collection mechanism if they are not part of any branch.
How to Avoid a Detached HEAD State
To avoid unintentionally entering a detached HEAD state, make sure to always checkout branches by their names:
git checkout branch-name
If you want to work with a specific commit, create a new branch from that commit to ensure that any commits you make are part of a branch:
git switch -c new-branch-name <commit-hash>
A detached HEAD state in Git occurs when the HEAD points directly to a commit, rather than a branch. While in this state, any new commits you make will not be part of any branch and may be lost if you switch to another branch. It's important to understand how to avoid and recover from a detached HEAD state to ensure that your commits are properly tracked and part of a branch in your Git repository.
Conclusion
In conclusion, the git switch command is a powerful and intuitive tool for managing branches in Git. Its clear syntax and functionality make it a preferred choice for switching branches over the traditional git checkout command. By using git switch, you can easily create new branches, switch between existing branches, and manage your workflow more efficiently.
One of the key advantages of git switch is its ability to create and switch to a new branch in a single command, using the -c or --create flag. This makes it easy to start working on a new feature or bug fix without having to switch branches manually. Additionally, git switch provides a clearer and more consistent way to switch branches compared to git checkout, which can be confusing for beginners due to its multiple purposes and behaviors.
Another important aspect of git switch is its ability to handle remote branches effectively. When switching to a branch that exists on a remote repository, git switch automatically sets up tracking so that you can push and pull changes to and from the remote branch. This simplifies the process of collaborating with others and keeping your local and remote repositories in sync.
In addition to switching branches, git switch can also be used to perform other branch-related operations, such as creating a new branch from a specific commit, restoring files to a previous state, and undoing a switch. This versatility makes git switch a valuable tool for managing your Git repositories and working with branches.
Overall, the git switch command is a welcome addition to the Git toolkit, providing a more intuitive and efficient way to switch branches. Whether you're working on a new feature, fixing a bug, or simply exploring different versions of your code, git switch can help you manage your branches and work more effectively in Git.

Leave A Comment