
Want to launch a website, like a shopping site or a blog? Launching multiple websites on a single VPS is possible, but managing them will be difficult. With the help of control panels like Plesk, you can manage everything in one place, including emails, databases, and settings per website, simply by logging in to your dashboard. Let’s know more about the benefits of Plesk VPS servers and walk you through how you can set it up, as well as some security and optimization tips.
Introduction to Plesk VPS Server
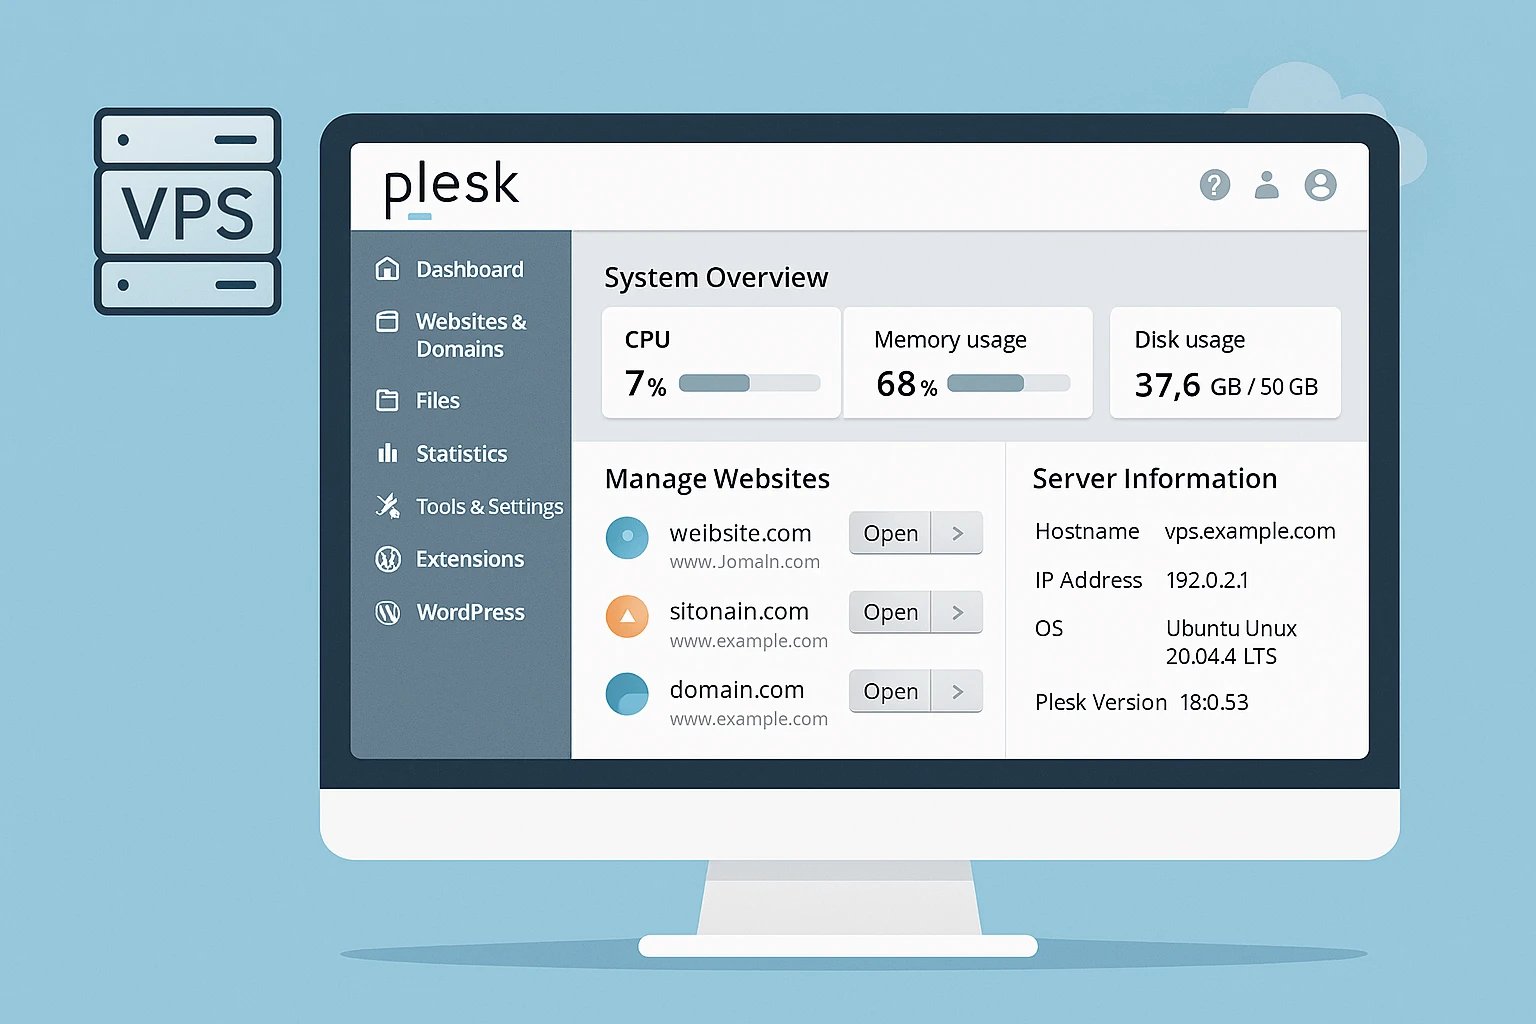
You can use a Virtual Private Server (VPS) to create a personal environment where you can run your website or web applications, keeping the resources like RAM, CPU, and storage all to yourself, and don't share them with hundreds of different websites. By using Plesk VPS for multiple websites, you will have a clean and user-friendly interface to manage all of them in one place. It provides you with a centralized dashboard, where you can tweak settings for each domain and run different CMS platforms (WordPress, Joomla, etc.).
Benefits of Using Plesk VPS for Multi-Site Management
We’ll explore some of the Plesk VPS dashboard features:
-
Centralized website control: Instead of multiple logins or configs, you can manage all your domains from one place. The user-friendly interface lets you create domains, assign hosting, and change settings with just a few clicks.
-
Improved performance and scalability: VPS hosting with Plesk helps you give each site its own dedicated resources, which results in better performance. Also, you can upgrade your VPS plans and easily scale without the need to move to another server.
-
Enhanced security features: Plesk VPS server management will give you SSL certificates for each domain, Fail2Ban, and firewall integration to block brute-force attacks. Members of your team can also access only what they need with role-based access.
-
Automated backups and updates: You can easily do regular backups and restore when needed, making your website recoverable when something goes wrong. It can also automate CMS updates to ensure you always have the new version.
-
Cross-platform compatibility: Using Plesk VPS for multiple websites allows you to use it seamlessly on both Linux and Windows servers, so there will be no need to change control panels when changing operating systems.
Want to dig deeper into Plesk VPS and explore its many different features and benefits?
Check Plesk VPS Hosting Features and Benefits
Step-by-Step Guide to Setting Up Multiple Websites on Plesk VPS
First of all, you need to buy Plesk VPS hosting. Keep an eye on a couple of things while choosing your VPS plan. It’s always better to go a bit higher than your estimated needs to have a buttery smooth experience with your websites.
|
Resources |
Minimum Requirement |
|
CPU, RAM, and Storage |
For 2-5 lightweight sites, 2 CPU cores, 2-4 GB of RAM, and 20-40 GB of SSD are enough. |
|
Bandwidth |
Go for at least 1-2 TB per month for sites that contain many images or videos |
|
Operating System |
Linux is preferred for CMS like WordPress or Joomla, but for ASP.NET or MSSQL, choose Windows. |
1- Installing Plesk on VPS
After you have chosen your VPS plan, it’s time to install Plesk:
-
Connect to your VPS: You can go with Remote Desktop for Windows. But if you’re on Linux, use SSH, and in the command line, type ssh username@your-server-ip. Username is usually root for the first access, and for your-server-ip, you can type the IP address of your VPS server.
-
Download Plesk: Find the installer on the official website and download it.
-
Run the installation script: It gives you the option to choose a full or minimal installation. You can also add extensions later on.
-
Access the Plesk Panel: When it’s installed, open a browser, go to https://your-server-ip:8443, and use the credentials you set.
-
Initial setup wizard: You will be guided through activating your license, setting up admin credentials, and recommended security settings.
Then, you can set up databases, install a CMS like WordPress, and use Plesk VPS for multiple websites.
2. Adding and Managing Multiple Domains
Log in to your Plesk panel, then go to “Websites & Domains” in the dashboard and click “Add Domain” for new websites, or “Add Subdomain” if it’s a section of an existing domain. After that, assign hosting settings such as document root and SSL, and click Ok or Save. Plesk will automatically create the domain environment for you.
For organizing your websites, use clear names for domains and subdomains. You can also group multiple domains under one subscription as needed, assign resources per domain, and install different CMS such as WordPress or Joomla for each domain.
3. Configuring Website Settings
-
Installing SSL Certificates: After you’ve selected the domain you want to secure in “ Websites & Domains”, click “SSL/TLS Certificates” or “Let’s Encrypt”, and follow the prompt until it’s installed. Your websites will use HTTPS after the installation, which protects user data and improves SEO.
-
Setting up email accounts: Go to the “Mail” section in the dashboard, click “Create Email Address”, set username and password, and assign mailbox limits. You can also configure mail clients like Outlook or Gmail.
-
Managing DNS settings: You can access DNS settings by going to “Websites & Domains” and then “DNS Settings” for each domain. Add or edit A records, CNAMEs, etc., then save changes and allow a couple of hours for propagation.
4. Automating Backups and Updates
Start by going to “Tools & Settings”, then “Backup Manager”. Choose the schedule and whether you want it to be daily, monthly, and so on. Go ahead and select what you want to back up (website files or the entire subscription), and where you want to store it (on the server or a remote storage).
For enabling automatic updates, go to “Tools & Settings” → “Update & Upgrades” in your dashboard, and you can find it there. Plesk will download and install patches in the background and notify you if you enable the notifications.
Plesk VPS security best practices
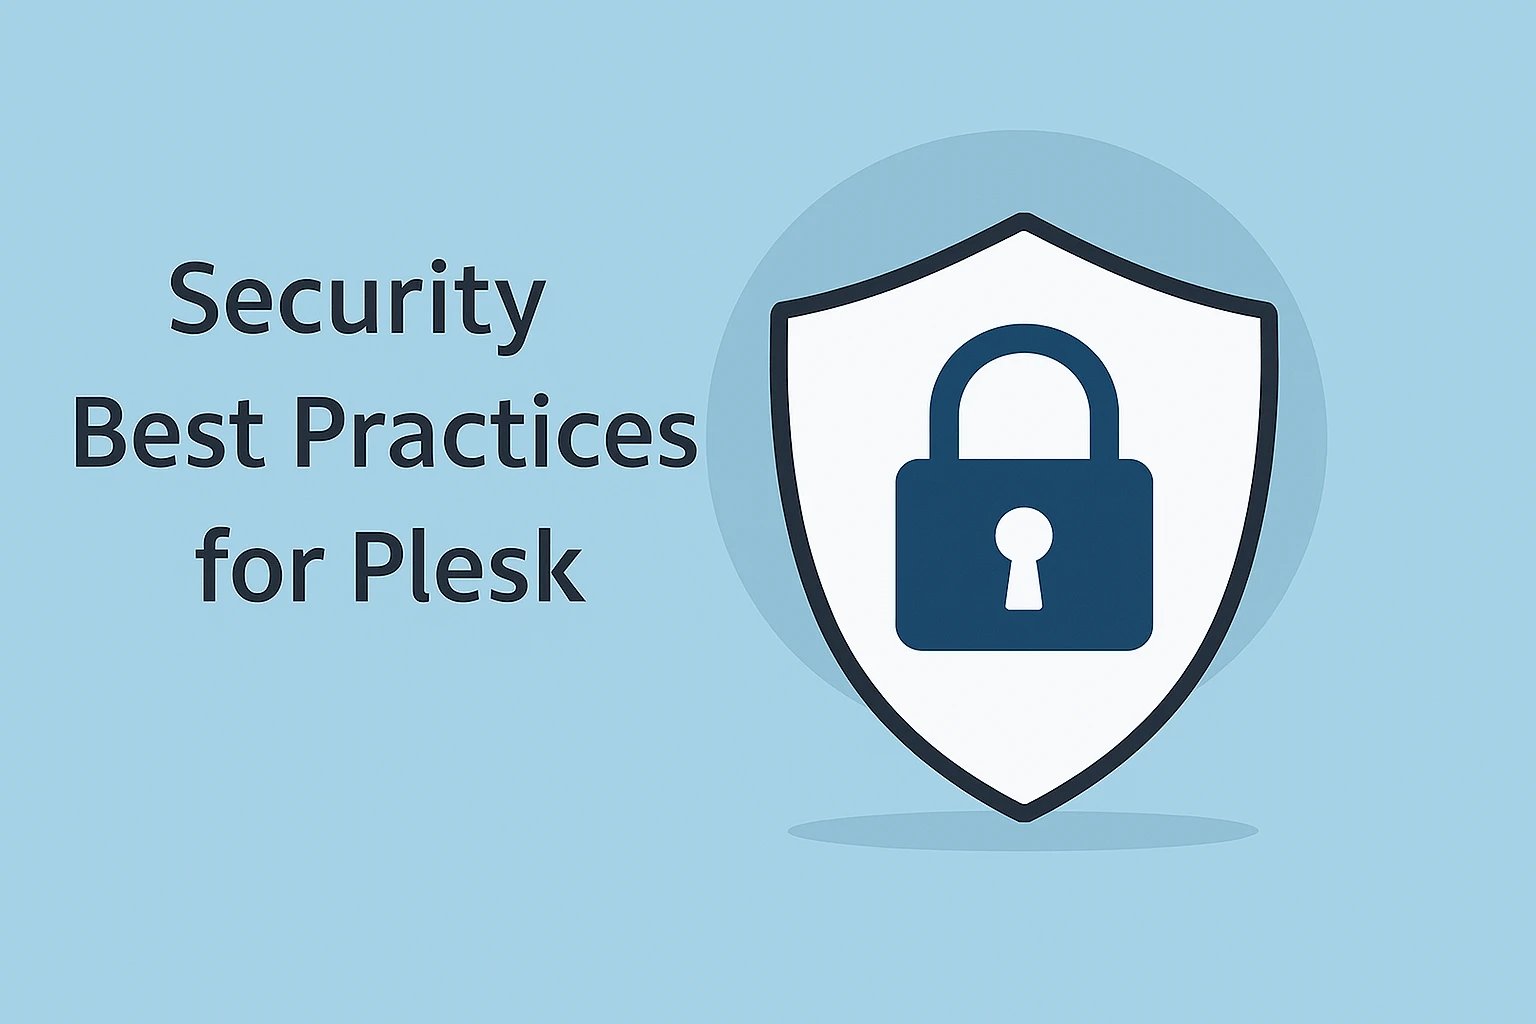
There are things you can do to further improve the security of your Plesk VPS:
-
Try enabling firewalls and adding Fail2Ban in “Tools & Settings” → “Firewall”. Firewall acts as your first line of defence, while Fail2Ban prevents brute-force attacks.
-
Remember to use Let’s Encrypt SSL for every single one of your websites to ensure trust and improve SEO.
-
When it comes to passwords, set strong, complex passwords and enable two-factor authentication for an extra layer of security.
-
You can monitor and manage your server logs by accessing them via “Tools & Settings” → “Log Browser”, and find out what is happening with your VPS (Unknown IPs, repeated failed login attempts, etc.) before they can compromise the security.
Performance Optimization Tips
When managing multiple sites on a Plesk VPS, optimization can become more important than ever. Here are some tips for you:
-
Caching strategies: In Plesk, you can enable NGINX caching that acts as a reverse proxy. Don’t forget to do opcode caching to avoid reprocessing scripts every time, and install additional caching solutions.
-
Resource allocation: It’s important to keep an eye on the resources so that resource-heavy websites will not slow down the other ones, and allocate resources like CPU, RAM, and storage per website.
-
Using CDN: A Content Delivery Network (CDN) improves load times by providing visitors with cached content from the servers near them. Some popular options are Cloudflare, BunnyCDN, and KeyCDN. It can also reduce bandwidth usage and improve security.
Troubleshooting Common Issues
Even if you configure everything correctly using our Plesk VPS setup guide, issues may still arise with your Plesk VPS. Here are some common ones and how to fix them:
If your domain doesn’t load or points to the wrong site, the problem is usually with DNS settings. Make sure the A record correctly points to your VPS IP.
If your website is down or slow, restart web services from Plesk under “Tools & Settings” → “Services Management.” Monitor server health to see resource usage, review logs under “Domains” → “Logs,” enable a CDN, and if needed, upgrade your VPS resources.
Comparison: Plesk VPS vs Other Control Panels for Multi-Site Hosting
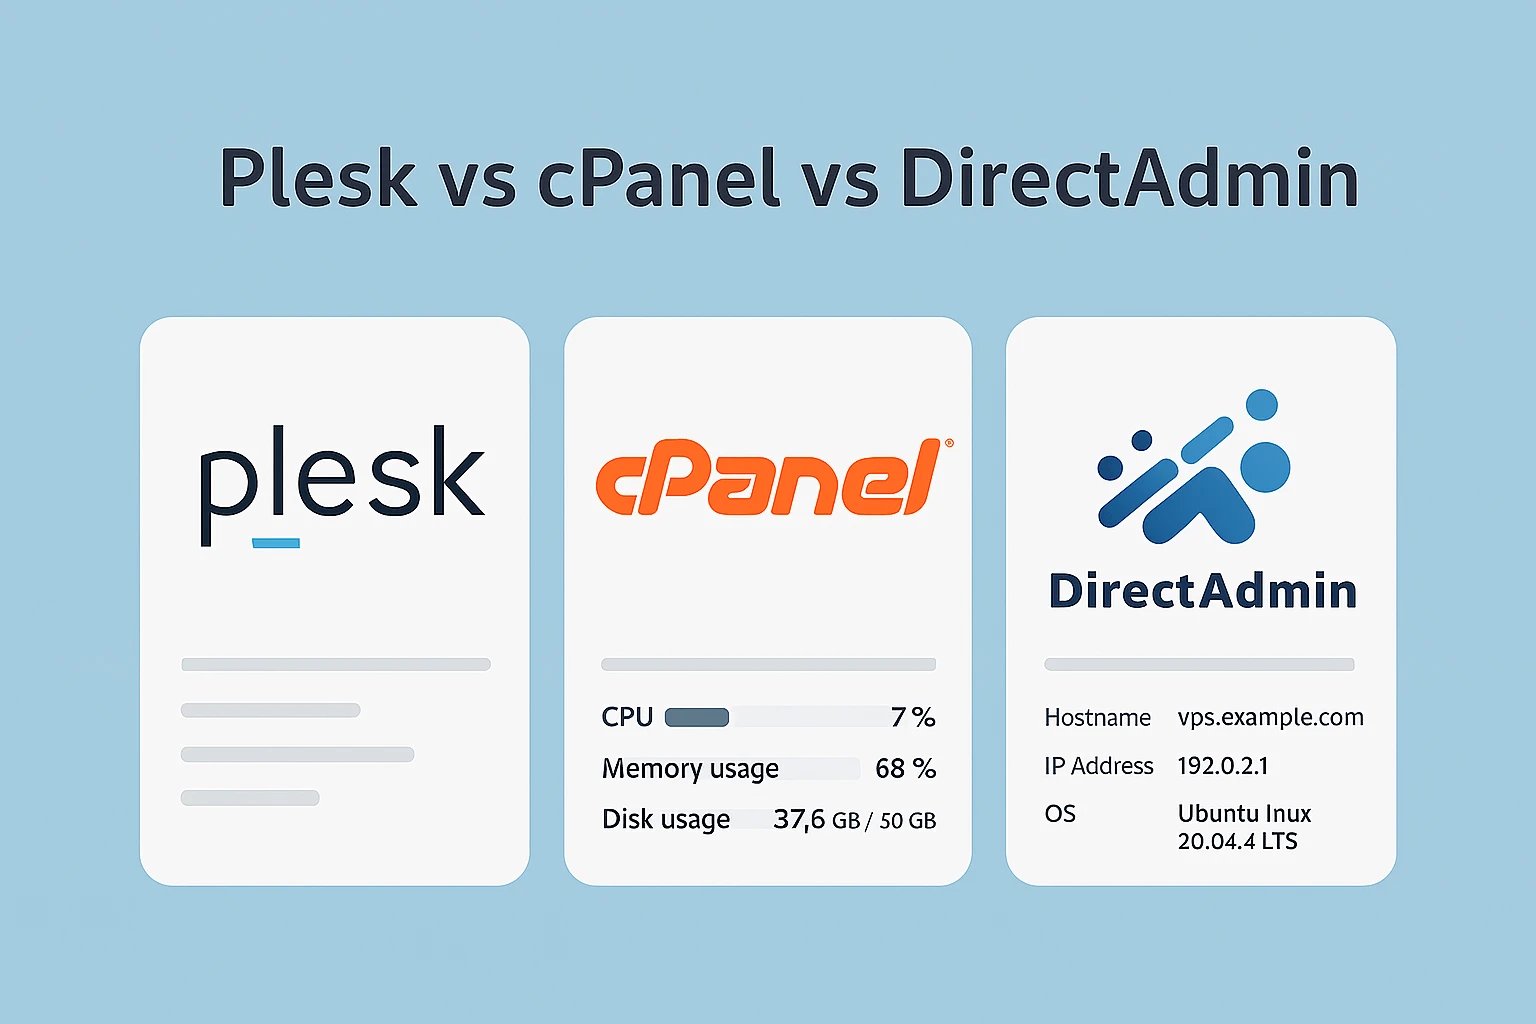
Why should I choose Plesk in the first place? Great question! Let’s compare Plesk vs cPanel VPS and other control panels, and decide when to choose it.
|
Feature |
Plesk VPS |
cPanel/WHM |
DirectAdmin |
|
Ease of Use |
Beginner-friendly, modern UI |
Familiar but slightly dated |
Lightweight, less polished |
|
Multi-Site Management |
Centralized, smooth handling of many domains |
Strong, geared more toward resellers |
Basic multi-domain support |
|
OS Support |
Works on Linux + Windows |
Linux only |
Linux only |
|
Built-in Security |
Firewall, Fail2Ban, Let’s Encrypt, 2FA |
Good, but some features require plugins |
Basic security tools |
|
Performance Tools |
Caching + resource allocation per site |
Limited or plugin-dependent |
Lightweight, fewer built-ins |
When should you choose Plesk? If you want easy management of multiple websites, cross-platform support, automation for backups, and performance optimization, Plesk can be a great choice.
Conclusion
Plesk can be a great choice when you want to manage multiple websites and need a beginner-friendly control panel. By using the Plesk VPS setup guide we provided, you now know how to use Plesk for multi-domain hosting and tweak its settings to ensure a smooth experience.
If you are looking for a Plesk VPS provider with great customer experience and powerful tools, 1Gbits can be a great choice! It simplifies multiple-site management and offers strong security features.
➡️ Don’t Wait! Buy a Plesk VPS Server and start now!


 🚀")

 🔐")
![What Is Cold Data Storage? ❄️ [2026 Guide]](https://1gbits.com/cdn-cgi/image//https://s3.1gbits.com/blog/2026/02/what-is-cold-data-storage-750xAuto.webp "What Is Cold Data Storage? ❄️ [2026 Guide]")
![How to Change VPS Password 🔑 [Windows & Linux]](https://1gbits.com/cdn-cgi/image//https://s3.1gbits.com/blog/2025/12/how-to-change-your-vps-password-750xAuto.webp "How to Change VPS Password 🔑 [Windows & Linux]")


