OpenSSL is a handy toolkit that helps keep online communication safe through protocols like TLS and SSL. It's a must-have for anyone serious about internet security. If you're a developer or IT pro working on Windows, you'll find this guide super helpful. We'll walk you through installing OpenSSL on your Windows system step by step. Let's dive in and get OpenSSL Windows set up!
Prerequisites for Installing OpenSSL on Windows
Preparing to install OpenSSL on Windows? Let's get everything set up first:
-
Check System Compatibility: Ensure your Windows version (like 10, 8, or 7) is compatible with OpenSSL for a smooth installation.
-
Administrator Access: You'll need admin rights to install OpenSSL Windows. Make sure you have the necessary permissions on your computer.
-
Install Visual C++ Redistributable for Visual Studio: OpenSSL relies on Visual C++ redistributable packages. If you don't have them, grab the latest version from Microsoft's website. If you need information on How To Configure SSL with Nginx, check our article on this topic.
-
Internet Connection: Stay connected to the internet throughout the download and installation to avoid any hiccups.
-
Familiarity with Command Prompt: Knowing your way around the Command Prompt will come in handy, as some steps require running commands.
How to Install OpenSSL on Windows
Ready to install OpenSSL on your Windows system? Let's get started with these easy steps:
1. Download OpenSSL Windows 64 or 32: Head over to the official OpenSSL website and grab the latest version tailored for Windows. Choose either the 32-bit or 64-bit version depending on your system's architecture.
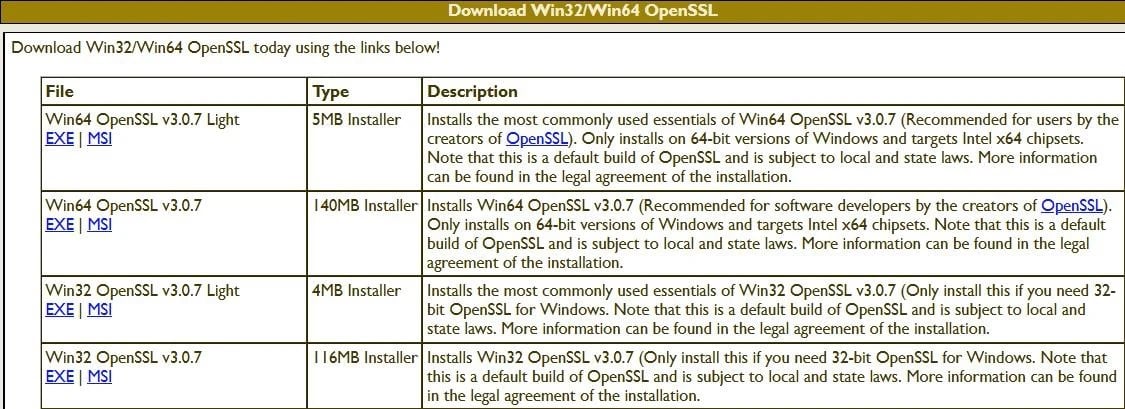
2. Run the Installer: Once the OpenSSL Windows download 64-bit finishes, locate the installer file, usually named something like “Win64OpenSSL_Light-x.x.x.exe” for 64-bit versions. Right-click on it and select "Run as administrator" to kick off the installation process.
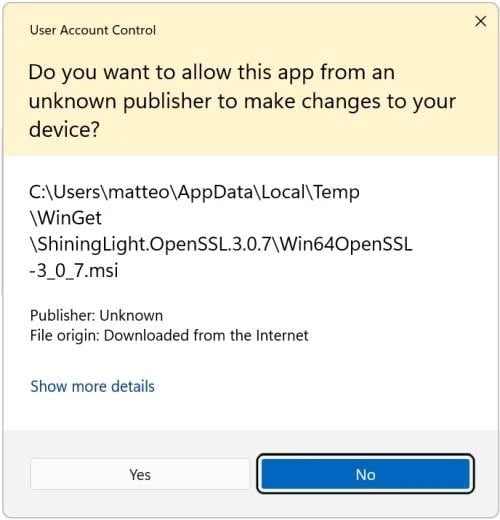
3. Follow the Wizard: An installation wizard will pop up, guiding you through the setup. Accept the license agreement and proceed. You can stick with the default destination folder, typically suitable for most users.
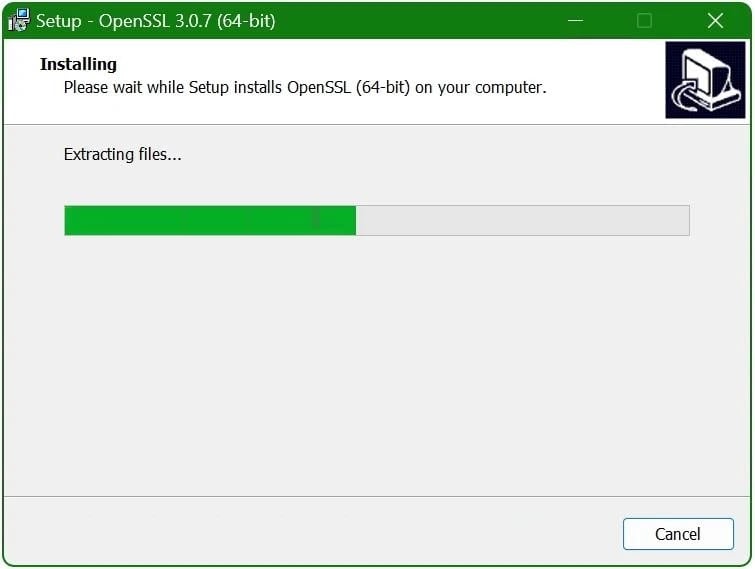
4. Copy DLLs: During OpenSSL Windows installation, you'll be prompted to choose where to place the DLL files. Opt for the Windows system directory to enable applications to access OpenSSL seamlessly.
5. Customize (Optional): You have the option to customize additional settings, like creating a Start Menu folder. Feel free to skip these if you prefer a standard installation.
6. Finish Installation: Click through the installation process by hitting "Next." The installer will handle file copying and configuration. Once done, click "Finish" to wrap things up.
7. Set Environment Variables: To ensure OpenSSL Windows arm64 works smoothly from the command line, you'll need to add it to your system's PATH environment variable. Head to Control Panel > System and Security > System > Advanced system settings > Environment Variables. Under System Variables, locate and edit the Path variable to include the path to your OpenSSL bin directory (e.g., C:\Program Files\OpenSSL-Win64\bin).
OpenSSL Windows Installer: Simplifying Installation
Deploying OpenSSL on both Windows 10 and Windows 11 has become more accessible, and this guide outlines a straightforward method for installation. Whether you're setting up a local development environment or configuring a Windows dedicated server leveraging the Windows Package Manager can streamline the installation process with ease. This approach ensures that OpenSSL is installed quickly and correctly, providing a solid foundation for secure communications and other cryptographic needs.
To initiate the install OpenSSL Windows 10 process, press the Windows-logo+R keys simultaneously to open the ‘Run’ dialog box, then type ‘cmd’ and select OK. Alternatively, you can press the Windows key, search for ‘cmd’, and select the command prompt icon from the search results.
Once the command prompt window is open, enter the following command to install OpenSSL:
winget install openssl
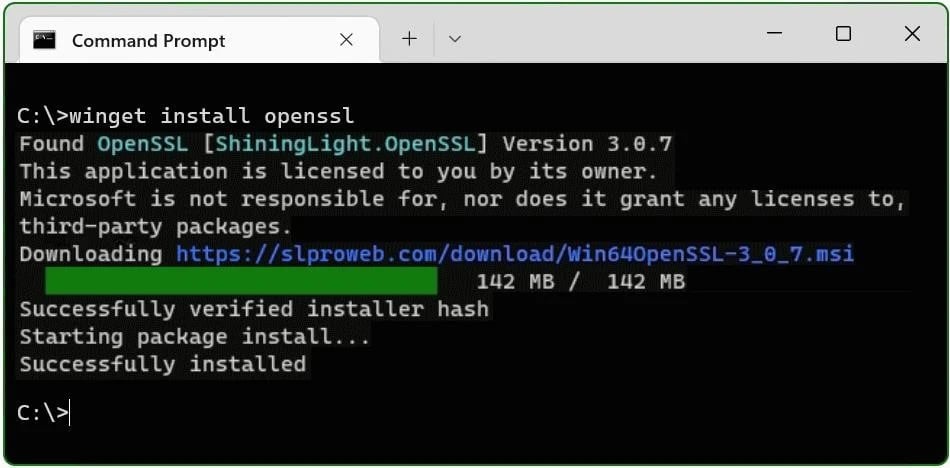
If your current user account doesn’t have administrative privileges, ensure to right-click on the command prompt and choose “Run as administrator” for elevated access.
The command line tool ‘winget’ serves as a versatile package manager for Windows, simplifying the installation of software applications and packages directly from the command line interface. When you run 'winget‘ for the first time, it may ask you to accept the terms of the source agreement. You can do this by pressing the ‘Y’ key when prompted.
This install OpenSSL Windows 11 method showcases the simplicity and efficiency of using 'winget' for software installations on Windows platforms, streamlining the process of getting OpenSSL up and running on your system without the need for intricate steps or manual downloads.
OpenSSL Windows Binaries
For those seeking pre-compiled OpenSSL binaries for Windows, two popular sources are SLProweb and the Indy Project. Here's how to obtain and install OpenSSL binaries from each:
1. SLProweb:
-
Navigate to SLProweb's OpenSSL downloads page.
-
Choose the appropriate version (Win32 or Win64) based on your system's architecture.
-
Download the OpenSSL installer from the provided link.
-
Run the downloaded installer and follow the installation wizard. Ensure to select the option to add OpenSSL to your system PATH for convenient command-line access.
2. Indy Project:
-
Visit the Indy Project's OpenSSL page to access pre-compiled OpenSSL DLLs.
-
Download the OpenSSL DLLs suitable for your system.
-
Extract the downloaded ZIP file and place the DLLs either in your application's directory or in a system-wide directory like C:\Windows\System32.
Additionally, users can install OpenSSL Windows Apache using OpenSSL Windows portables and package managers like Chocolatey and Scoop:
-
Chocolatey:
-
If not already installed, follow the instructions on the Chocolatey website to install Chocolatey.
-
Open an elevated Command Prompt by right-clicking on it and selecting "Run as administrator".
-
Enter the command choco install openssl and press Enter. Chocolatey will handle the download and installation process automatically.
-
Scoop:
-
Follow the installation instructions for Scoop provided on its website.
-
Access PowerShell through the Start menu.
-
Type scoop install openssl in PowerShell and press Enter. Scoop will manage the download and installation process seamlessly.
How to use OpenSSL on Windows: A Step-by-Step Guide
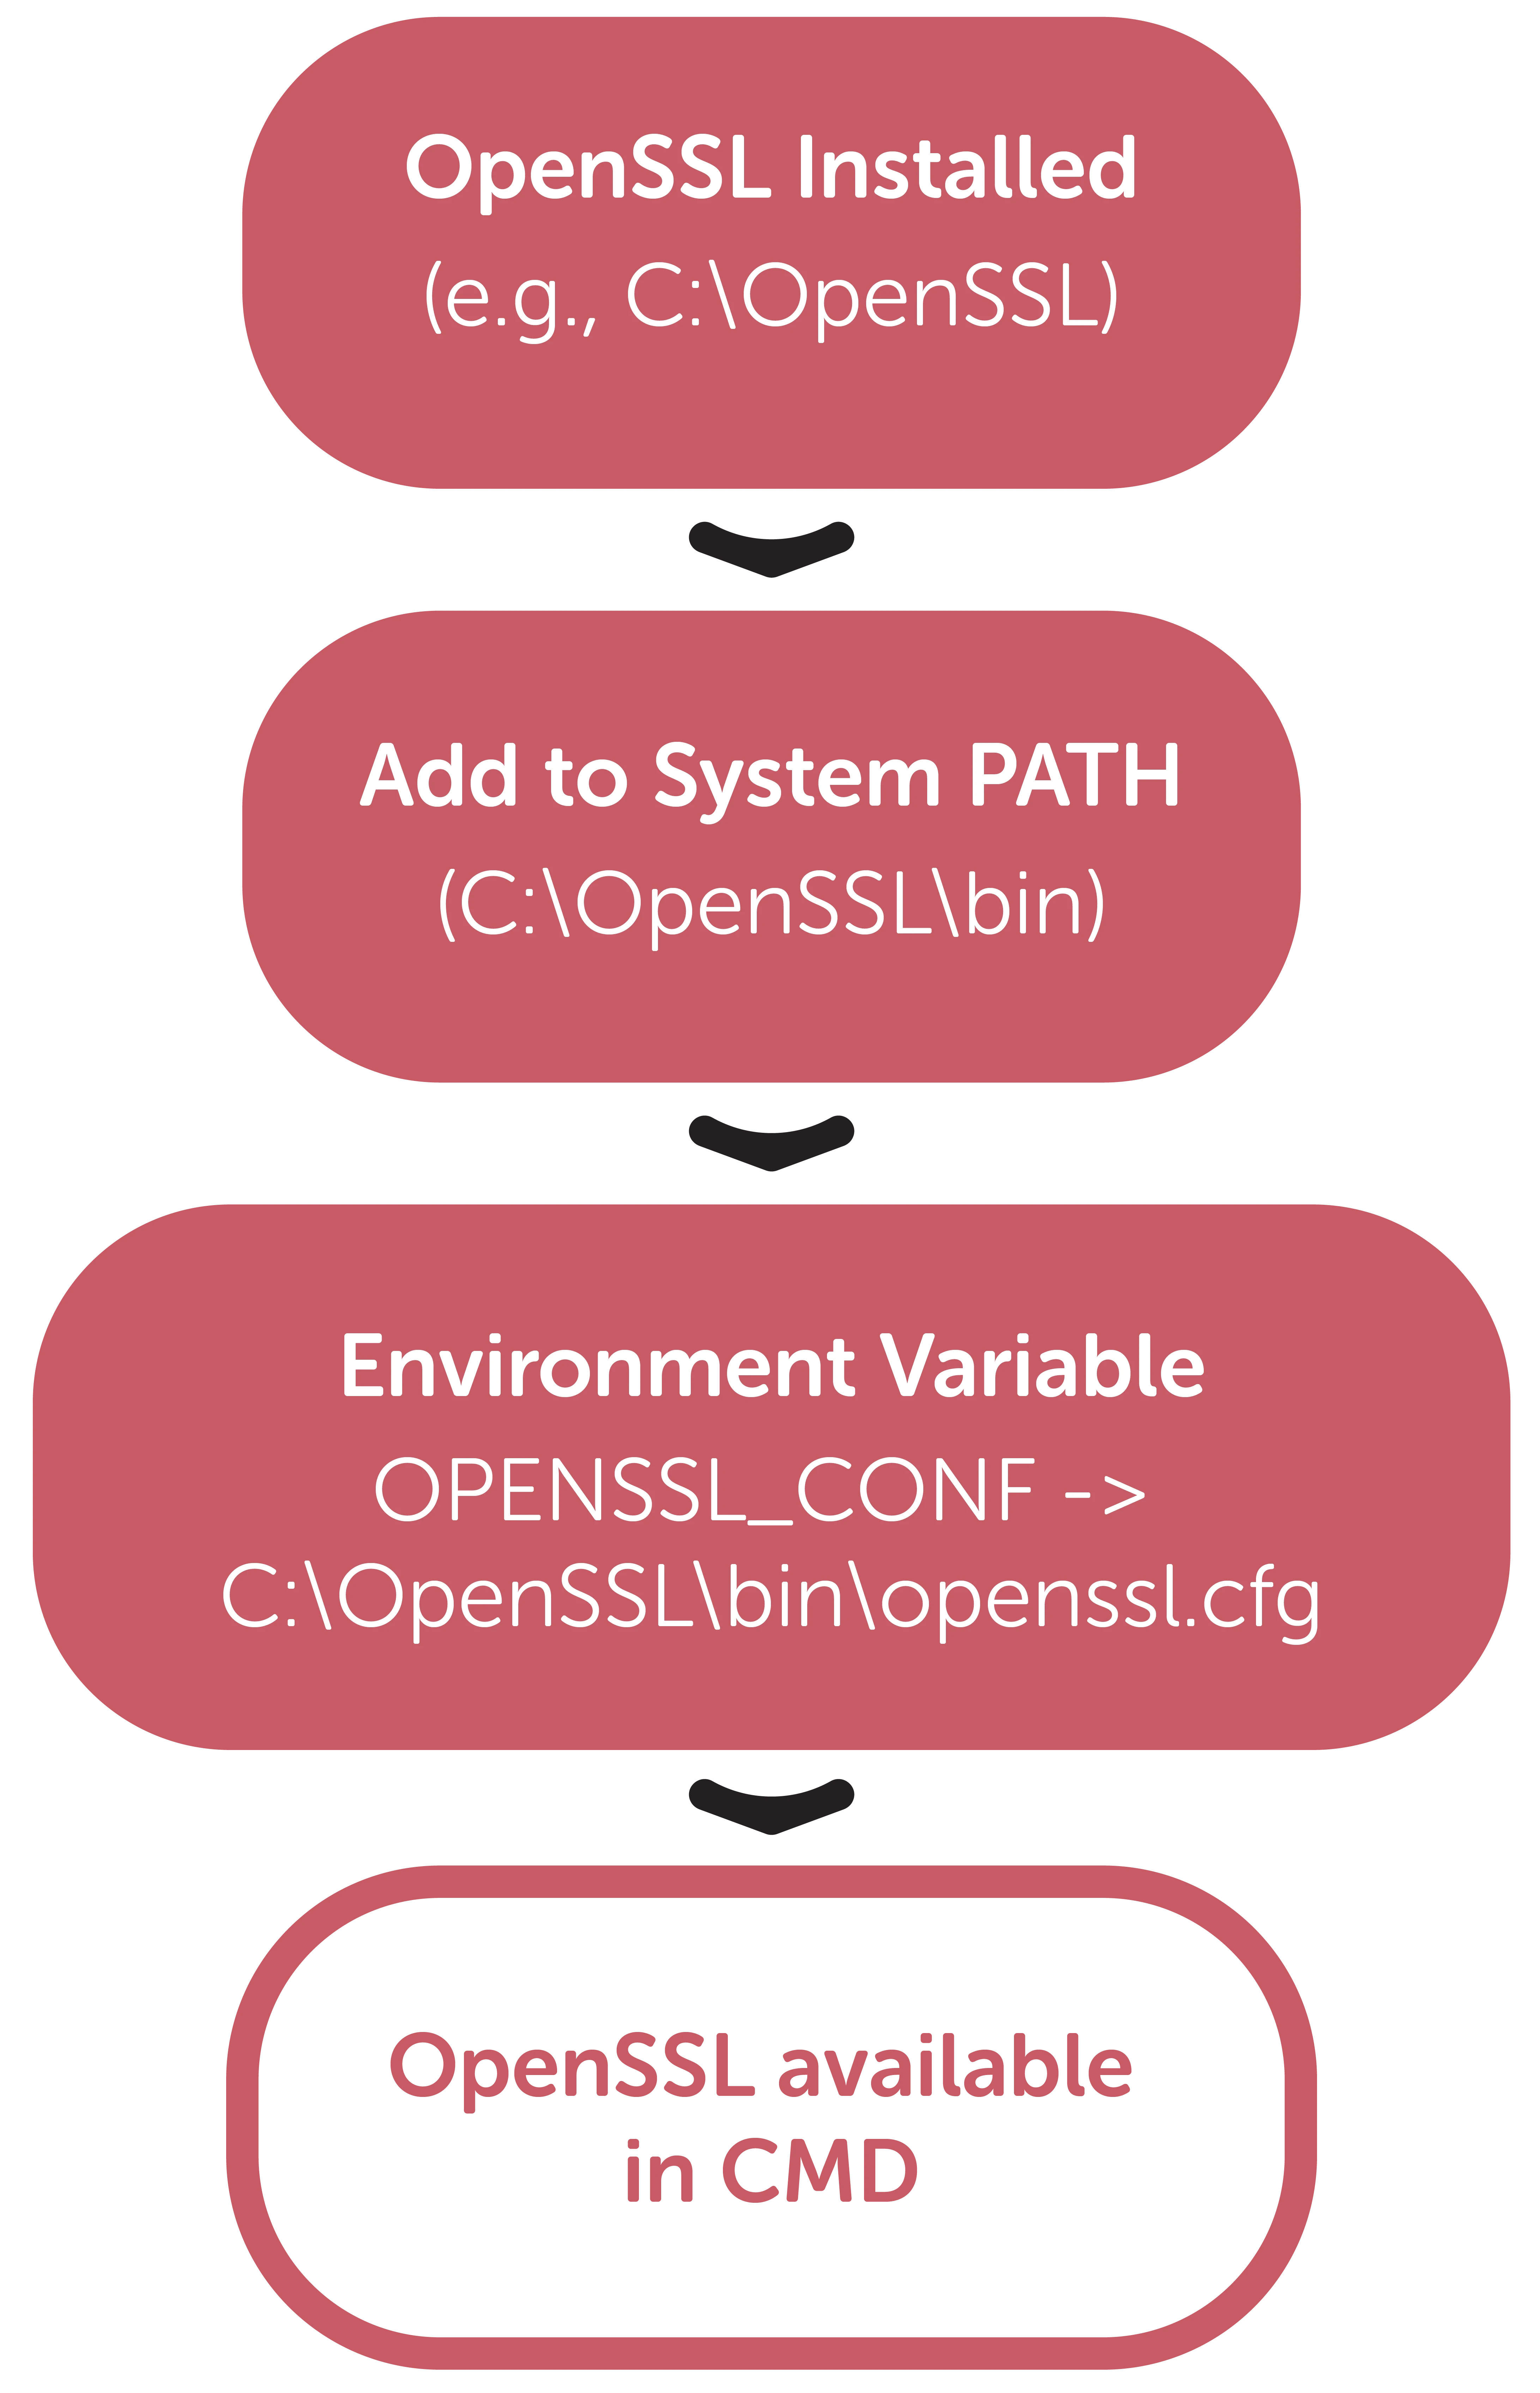
Integrating OpenSSL into the Windows Environment
-
Access System Properties:
-
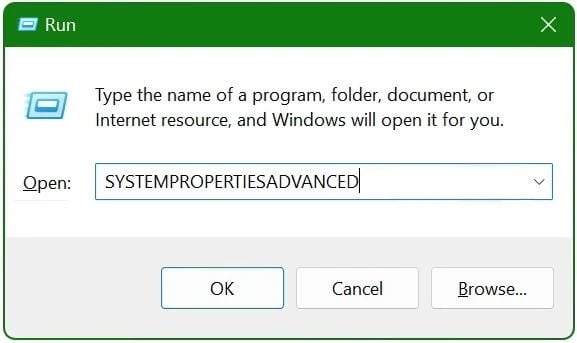
Open the Run dialog box using the Windows + R shortcut.
-
Type SYSTEM PROPERTIES ADVANCED and click OK to proceed.
-
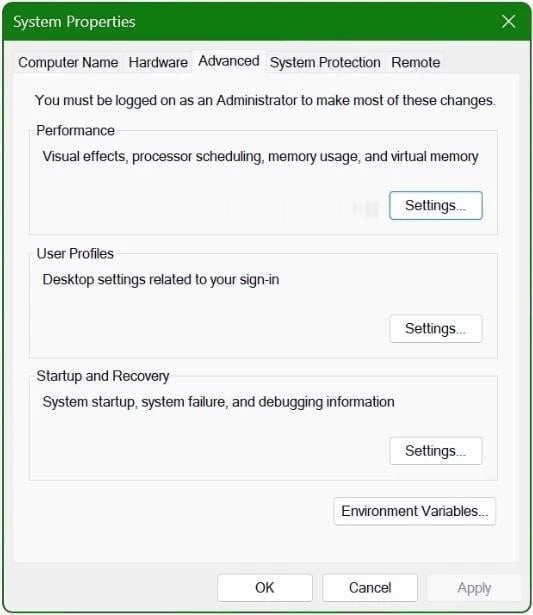
Navigate to Environment Variables:
-
In the System Properties window, locate and click on the ‘Environment Variables’ button situated at the lower section.
-
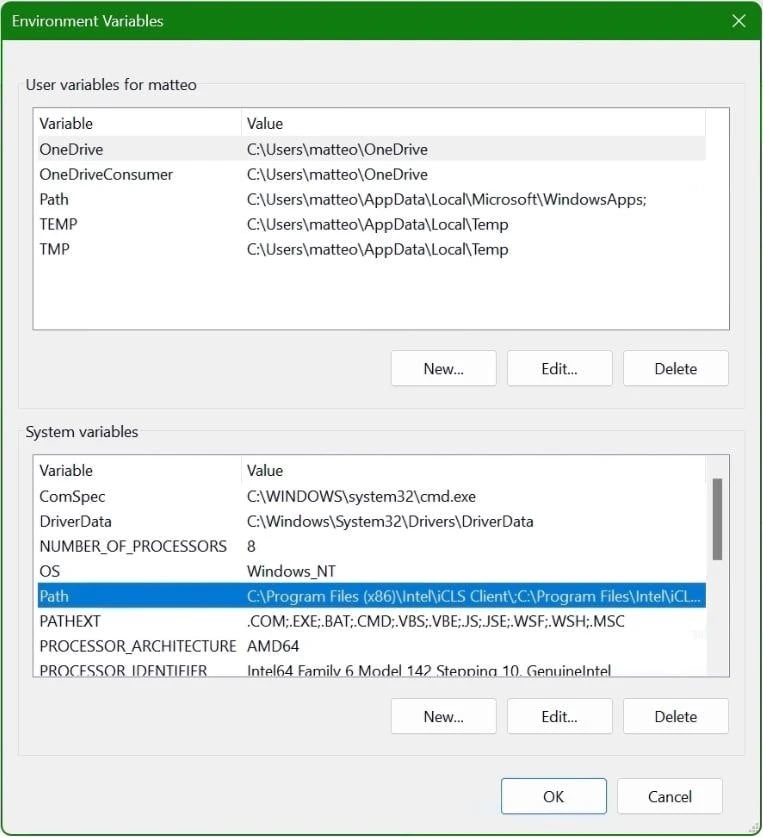
Modify the System Path:
-
Within the Environment Variables window, find the ‘Path’ variable under the ‘System Variables’ section. Select it and click the ‘Edit’ button.
-
In the ‘Edit Environment Variable’ window, add OpenSSL Windows path.
-
This path is typically located within the Program Files directory at OpenSSL-Win64\bin. It contains the openssl.exe executable.
-
You can either use the Browse button or directly paste the path. Click OK to confirm.
-
Add OPENSSL_CONF Variable:
-
For OpenSSL Windows to function correctly, it needs to know where to find its configuration file.
-
Add a new system variable by clicking ‘New’ within the System Variables section.
-
Enter OPENSSL_CONF as the variable name.
-
In the variable value field, input the path to your openssl.cnf file, usually located at C:\Program Files\OpenSSL-Win64\bin\cnf\openssl.cnf.
-
Confirm all actions by clicking OK.

Following these steps ensures that OpenSSL is properly integrated into the Windows environment, allowing for seamless usage and configuration.
Verifying the OpenSSL Windows Installation
To ensure that OpenSSL Windows has been properly installed and is functioning correctly, follow these steps:
1. Open a command prompt window.
2. Enter the following command to check the version and build information of your OpenSSL installation:
openssl version -a
This command will display details such as the version number and build date.
3. To determine the directory where OpenSSL searches for its configuration files, use the following command:
openssl version -d
This command will return the OPENSSLDIR path, indicating where the OpenSSL configuration files are located.
Final Words
In today's digital age, security is paramount, and OpenSSL stands as a crucial toolkit safeguarding online communication through robust protocols like TLS and SSL. For Windows users, this guide offers invaluable assistance in installing and utilizing OpenSSL Windows seamlessly.
From prerequisites ensuring a smooth installation and generate CSR OpenSSL Windows to step-by-step instructions on acquiring OpenSSL binaries, you'll find clear guidance tailored to your needs. Whether you opt for traditional installers, package managers like Chocolatey or Scoop, or pre-compiled binaries from sources like SLProweb or the Indy Project, we've got you covered.


